
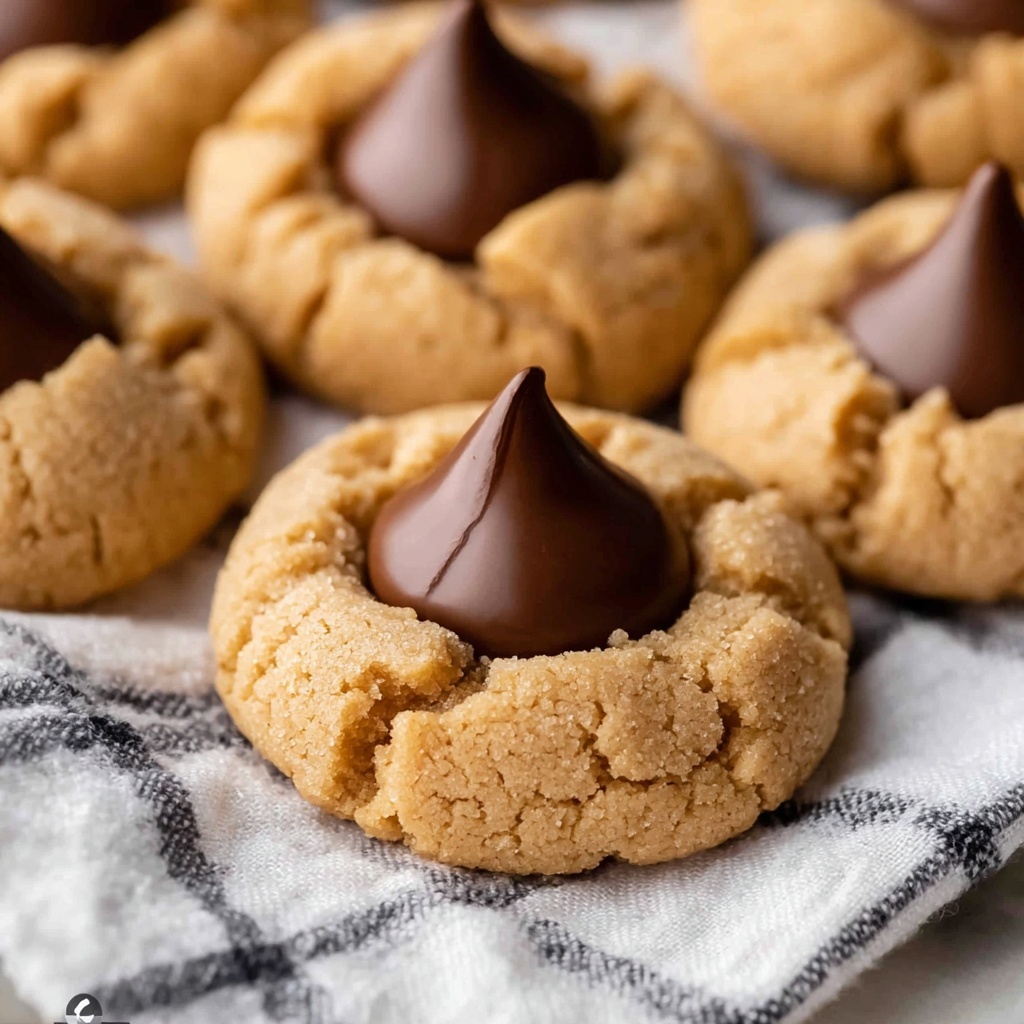
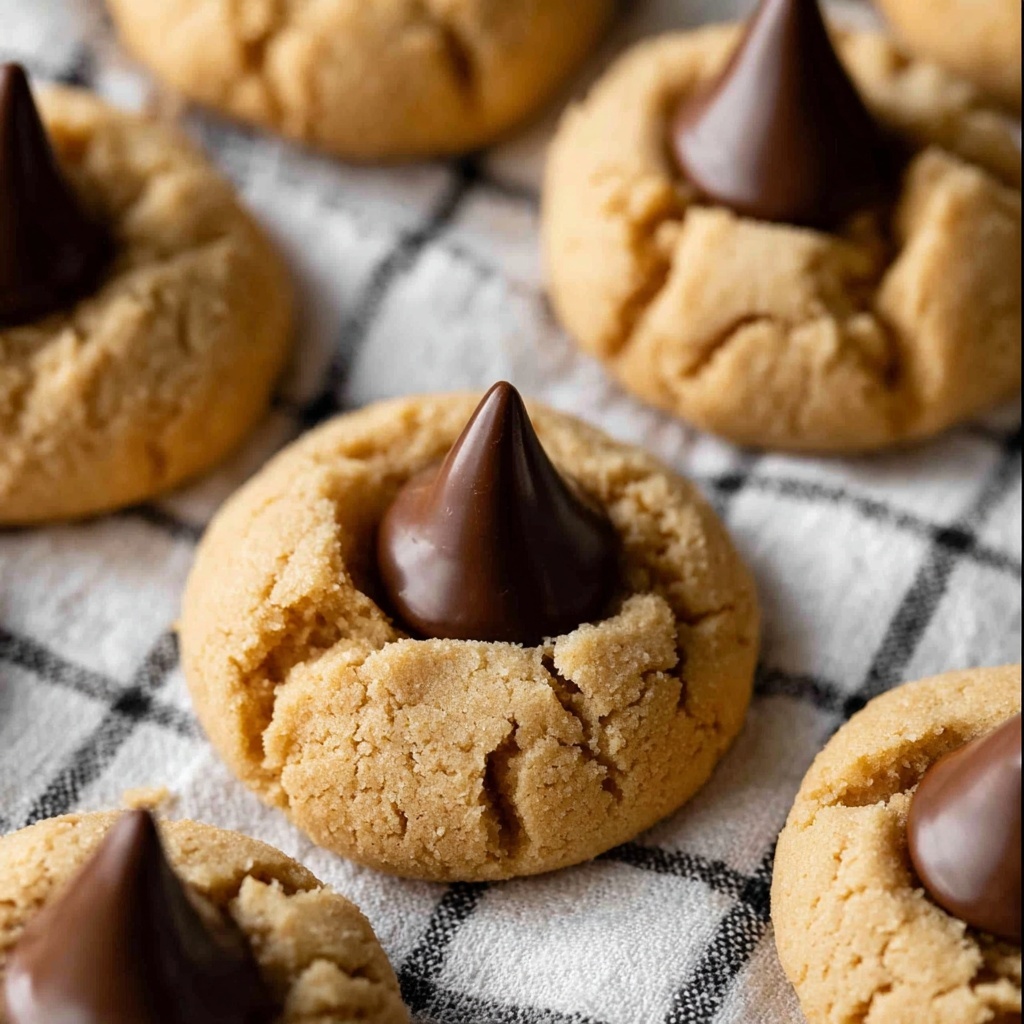
If you are craving a delightful combination of rich peanut butter and melt-in-your-mouth chocolate, the Hershey Kiss Cookies Recipe is the answer to your sweet tooth dreams. This classic treat features perfectly soft, golden cookies topped with a signature Hershey’s Kiss, delivering a nostalgic burst of flavor and a tender texture that’s truly irresistible. Whether you’re baking for a holiday, a party, or just because, these cookies bring warmth and joy to every bite with simplicity and a delicious, homemade touch.
Ingredients You’ll Need
The beauty of this Hershey Kiss Cookies Recipe is in its straightforward, pantry-friendly ingredients. Each component contributes to the cookie’s tender crumb, rich flavor, and perfect chewiness, creating a cookie you’ll want to make again and again.
- 3 cups all-purpose flour: Provides structure for a soft yet sturdy cookie base.
- ½ teaspoon baking soda: Helps give the cookies a light, tender rise.
- ½ teaspoon baking powder: Adds extra leavening for just the right amount of fluff.
- 1 teaspoon kosher salt: Enhances the sweetness and balances the peanut butter flavor.
- 1 cup unsalted butter (room temperature): Creates a rich, creamy texture that’s key to great cookies.
- 1 cup creamy peanut butter: Brings that quintessential nutty flavor and moisture.
- ⅔ cup dark brown sugar: Adds depth and a hint of molasses sweetness.
- ⅔ cup granulated sugar: For sweetness and a slight crisp edge on the cookie exterior.
- 2 large eggs (room temperature): Helps bind ingredients and adds richness.
- 2 teaspoons pure vanilla extract: Enhances all the flavors with a warm vanilla essence.
- 1 tablespoon milk (optional): Use only if the dough feels too stiff for shaping.
- 2 pounds Hershey’s Kisses (wrappers removed): The iconic chocolate topping that makes this recipe unforgettable.
How to Make Hershey Kiss Cookies Recipe
Step 1: Prep Your Baking Sheets
Start by lining two baking sheets with parchment paper. This simple step prevents sticking and ensures your cookies bake evenly without spreading too much.
Step 2: Combine Your Dry Ingredients
In a medium bowl, whisk together the flour, baking soda, baking powder, and kosher salt. This blend creates the perfect base for the cookies, ensuring they rise nicely without becoming cakey.
Step 3: Cream the Butter and Peanut Butter
Using a stand mixer fitted with a paddle attachment, beat together the softened butter and creamy peanut butter until smooth and homogeneous. This creamy mixture forms the heart of your cookie dough, delivering richness and that delightful peanut flavor.
Step 4: Add the Sugars
Mix in both the dark brown and granulated sugars, beating until the mixture lightens in color and becomes fluffy. These sugars balance texture and sweetness, with the brown sugar adding moisture and a hint of molasses.
Step 5: Incorporate Eggs and Vanilla
Beat in the eggs and vanilla extract until everything is fully combined and smooth. This step brings the dough together, enhancing flavor depth while improving texture.
Step 6: Add Dry Ingredients
With the mixer on low, gradually add the flour mixture to the wet ingredients. Stir just until combined to avoid overworking the dough and keeping your cookies tender.
Step 7: Adjust Dough Consistency
If your dough feels too stiff to roll, gently mix in a tablespoon of milk. This ensures your dough is pliable enough to shape perfectly rounded cookie balls.
Step 8: Chill the Dough
Cover the dough and place it in the refrigerator for 30 minutes. This chilling step firms the dough, making it easier to handle, and helps the cookies maintain their shape while baking.
Step 9: Shape and Bake
Preheat the oven to 375°F (190°C). Roll the chilled dough into ¾-inch balls and space them about 1½ inches apart on the prepared baking sheets. Bake for 8 minutes to allow the cookies to set and begin baking through.
Step 10: Add the Hershey’s Kisses
Remove the cookies from the oven and gently press an unwrapped Hershey’s Kiss into the center of each cookie. Don’t press too hard to avoid the kiss melting into the sheet; just enough to nestle it into the warm cookie.
Step 11: Finish Baking
Return the cookies to the oven for an additional 2 minutes. This short baking time sets the chocolate perfectly without overbaking the cookie.
Step 12: Cool Completely
Transfer the cookies to a wire rack after two minutes on the baking sheet to cool completely. This step ensures your cookies retain their chewiness and chocolate stays intact.
How to Serve Hershey Kiss Cookies Recipe
Garnishes
You can keep these cookies simple with the classic Hershey’s Kiss topping, but consider sprinkling a tiny pinch of flaky sea salt on top for a gourmet touch that amplifies the peanut butter and chocolate flavors beautifully.
Side Dishes
These cookies pair wonderfully with a cold glass of milk for a classic combo, or elevate your presentation with a scoop of vanilla ice cream for a delightful dessert plate.
Creative Ways to Present
Arrange your Hershey Kiss Cookies Recipe on a festive platter, alternating with clusters of fresh berries or nuts for added color and texture. You can also wrap them in decorative cellophane bags as heartfelt gifts that everyone will adore.
Make Ahead and Storage
Storing Leftovers
Keep your baked cookies in an airtight container at room temperature for up to five days. This storage method keeps them fresh and maintains their tender texture.
Freezing
If you want to save some for later, freeze unbaked cookie dough balls on a baking sheet until solid, then transfer to a freezer bag. When ready, bake from frozen with an extra minute or two added to the baking time for fresh-baked goodness anytime.
Reheating
Warm your cookies in a low-temperature oven for a few minutes or microwave them for just 10-15 seconds to revive that soft, freshly baked feel and to gently melt the Hershey’s Kiss once more.
FAQs
Can I use crunchy peanut butter instead of creamy?
Absolutely! You can use all crunchy or a mix of creamy and crunchy peanut butter to add texture variety; it won’t affect the overall delicious outcome.
Do I have to refrigerate the dough before baking?
Yes, chilling the dough helps prevent spreading and improves the cookie’s texture. It also makes rolling easier, which is especially helpful with this peanut butter-rich dough.
What can I substitute for Hershey’s Kisses?
If you don’t have Hershey’s Kisses, try using mini chocolate chips or other bite-sized chocolates, though the classic Kiss shape and size is part of the cookie’s charm.
Can I make these cookies gluten-free?
To make a gluten-free version, substitute the all-purpose flour with a 1-to-1 gluten-free baking flour blend and ensure all other ingredients are gluten-free. The texture might vary slightly, but the flavor remains fantastic.
How do I prevent the cookies from spreading too much?
Make sure your butter is softened but not melted, chill the dough before baking, and space the cookies well apart on the baking sheet. These tips keep the shape just right.
Final Thoughts
This Hershey Kiss Cookies Recipe is truly one of those timeless favorites that brings a smile with every bite. Whether you’re new to baking or a seasoned pro, these cookies offer a wonderful blend of flavors and textures that feel both comforting and celebratory. Trust me, once you try this recipe, Hershey Kiss Cookies will become a staple in your kitchen rotation, perfect for sharing love, warmth, and something sweet with the people you care about most.
Print
Hershey Kiss Cookies Recipe
- Prep Time: 10 minutes
- Cook Time: 10 minutes
- Total Time: 50 minutes
- Yield: 96 cookies
- Category: Dessert
- Method: Baking
- Cuisine: American
Description
These classic Hershey Kiss Cookies combine the rich flavors of peanut butter and chocolate in a soft, chewy cookie topped with a perfect Hershey’s Kiss. Ideal for holiday treats or any sweet craving, this recipe yields a large batch of 96 cookies that are easy to prepare and irresistible to share.
Ingredients
Dry Ingredients
- 3 cups all-purpose flour (360 grams)
- ½ teaspoon baking soda (3 grams)
- ½ teaspoon baking powder (2 grams)
- 1 teaspoon kosher salt (3 grams)
Wet Ingredients
- 1 cup unsalted butter (226 grams, room temperature, 2 sticks)
- 1 cup creamy peanut butter (270 grams, or ½ cup creamy & ½ cup crunchy)
- ⅔ cup dark brown sugar (142 grams)
- ⅔ cup granulated sugar (133 grams)
- 2 large eggs (100 grams, room temperature)
- 2 teaspoons pure vanilla extract (8 grams)
- 1 tablespoon milk (14 grams, add only if batter is too stiff)
Topping
- 2 pounds Hershey’s Kisses (907 grams, wrappers removed)
Instructions
- Prepare Bakeware: Line 2 baking sheets with parchment paper and set aside to ensure cookies do not stick and for easy cleanup.
- Mix Dry Ingredients: In a medium bowl, whisk together flour, baking soda, baking powder, and kosher salt until fully combined. Set this mixture aside as it will be added later.
- Cream Butter and Peanut Butter: Using a stand mixer equipped with the paddle attachment, beat the unsalted butter and peanut butter together at medium speed until smooth and creamy, approximately 2 minutes.
- Add Sugars: Incorporate the dark brown sugar and granulated sugar into the creamed butter mixture. Continue beating until the mixture lightens in color and is smooth, about 2 to 3 minutes.
- Add Eggs and Vanilla: Beat in the eggs one at a time along with the vanilla extract until all ingredients are fully incorporated and the batter is smooth, around 1 minute.
- Incorporate Flour Mixture: Turn off the mixer, add the dry ingredient mixture, then mix on the lowest speed just until flour is incorporated, avoiding overmixing to maintain cookie tenderness.
- Adjust Consistency: If the dough feels too stiff or dry, add up to 1 tablespoon of milk and mix just until combined to reach the right consistency.
- Chill Dough: Cover the dough and refrigerate for 30 minutes to firm up, which helps the cookies hold shape during baking. Meanwhile, preheat the oven to 375°F (190°C).
- Shape Cookies: Roll the chilled dough into ¾-inch balls and arrange them on the prepared baking sheets, spacing approximately 1½ inches apart to allow spreading. Each half-sheet pan fits about 20 dough balls.
- First Bake: Bake the cookies in the preheated oven for 8 minutes until they just start to set but are not fully baked.
- Add Hershey’s Kisses: Remove the cookies from the oven and immediately press one Hershey’s Kiss gently into the center of each cookie, being careful not to push the candy through the bottom of the cookie.
- Final Bake: Return the baking sheets to the oven and bake the cookies for an additional 2 minutes, allowing the kisses to slightly melt and set into the cookie tops.
- Cool Cookies: Remove from the oven and let the cookies cool on the baking sheets for 2 minutes before transferring them to a wire cooling rack to cool completely.
Notes
- Using room temperature ingredients helps the dough mix properly and results in better texture.
- Chilling the dough is essential to prevent excessive spreading and to develop flavor.
- If you prefer a crunchier texture, substitute half the creamy peanut butter with crunchy peanut butter.
- Ensure Hershey’s Kisses are unwrapped before placing on cookies to avoid melting wrappers onto the bakeware.
- Store cooled cookies in an airtight container at room temperature for up to 5 days, or freeze for longer storage.


