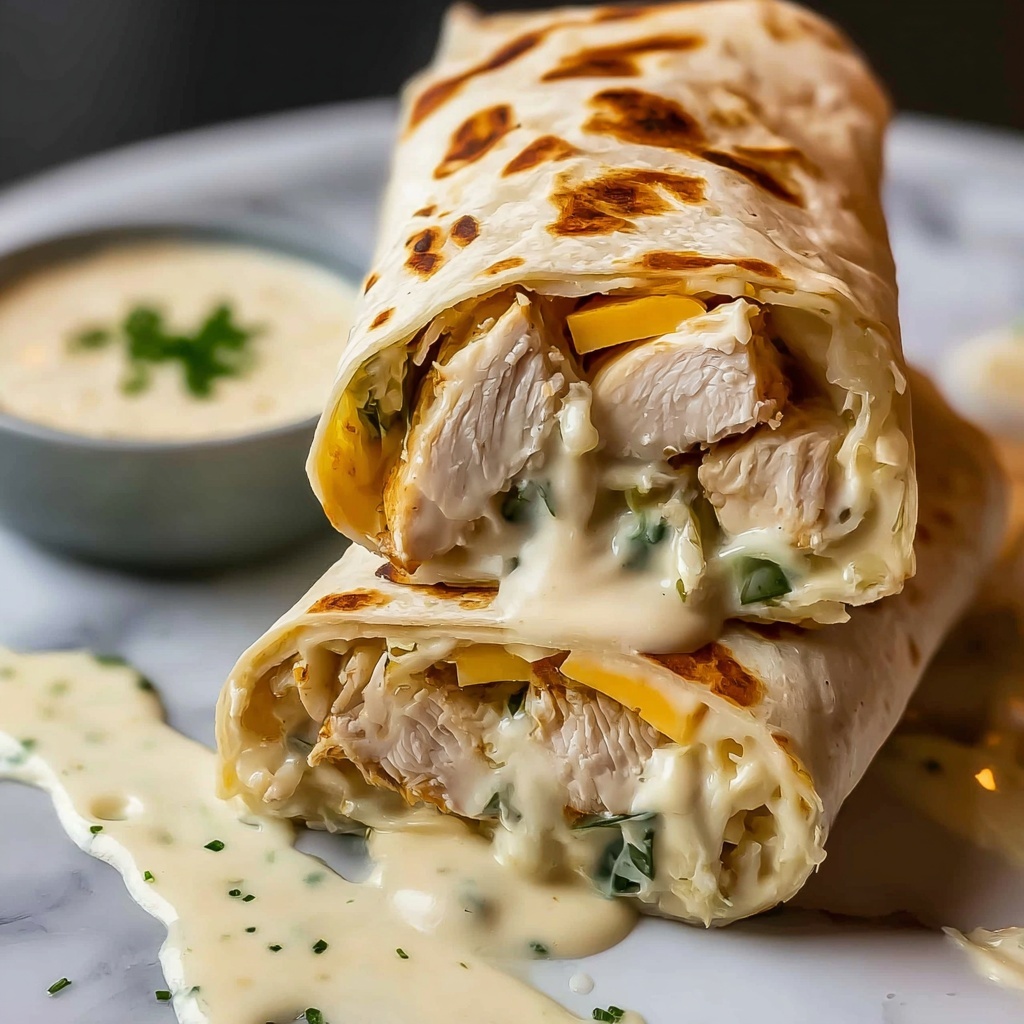
If you’re craving something that wraps up comfort, flavor, and a cheesy, garlicky kick all in one bite, you’re in for a treat with this Cheesy Garlic Chicken Wraps Recipe. Imagine tender, shredded chicken smothered in creamy garlic aioli, melted cheddar binding it all together, and all snugly folded inside a warm tortilla. It’s an easy-to-make dish that never fails to satisfy, perfect for busy weeknights or casual get-togethers. Let’s dive into how simple ingredients come together to create this irresistibly good meal!
Ingredients You’ll Need
These ingredients are straightforward but indispensable, each bringing its own magic to the table. The shredded chicken adds hearty protein, garlic aioli brings creamy, pungent flavor, cheddar cheese offers gooey richness, and the tortillas wrap it all up perfectly for the ideal handheld delight.
- 2 cups cooked chicken (shredded): Use rotisserie chicken or leftovers to save time and guarantee tenderness.
- ½ cup garlic aioli: This flavorful spread is the star that delivers irresistible garlic creaminess throughout.
- 1 cup cheddar cheese (shredded): Sharp cheddar melts beautifully, adding a vibrant cheesy punch to the wrap.
- 4 large tortillas: Flour tortillas work best for rolling and hold everything together without breaking.
- Salt and pepper to taste: Simple seasoning to enhance every flavor note perfectly.
How to Make Cheesy Garlic Chicken Wraps Recipe
Step 1: Prepare the Chicken Filling
Start with shredded, cooked chicken—the foundation of the wrap. In a bowl, mix the chicken with the garlic aioli, ensuring each shred gets coated in that luscious creamy garlic goodness. Season well with salt and pepper to balance the flavors and bring out the best in each ingredient.
Step 2: Add the Cheese
Stir in the shredded cheddar cheese gently, so it distributes evenly but doesn’t clump. This step is key for pockets of gooey, melted cheese throughout the wrap, adding both texture and flavor that will melt in your mouth.
Step 3: Assemble the Wraps
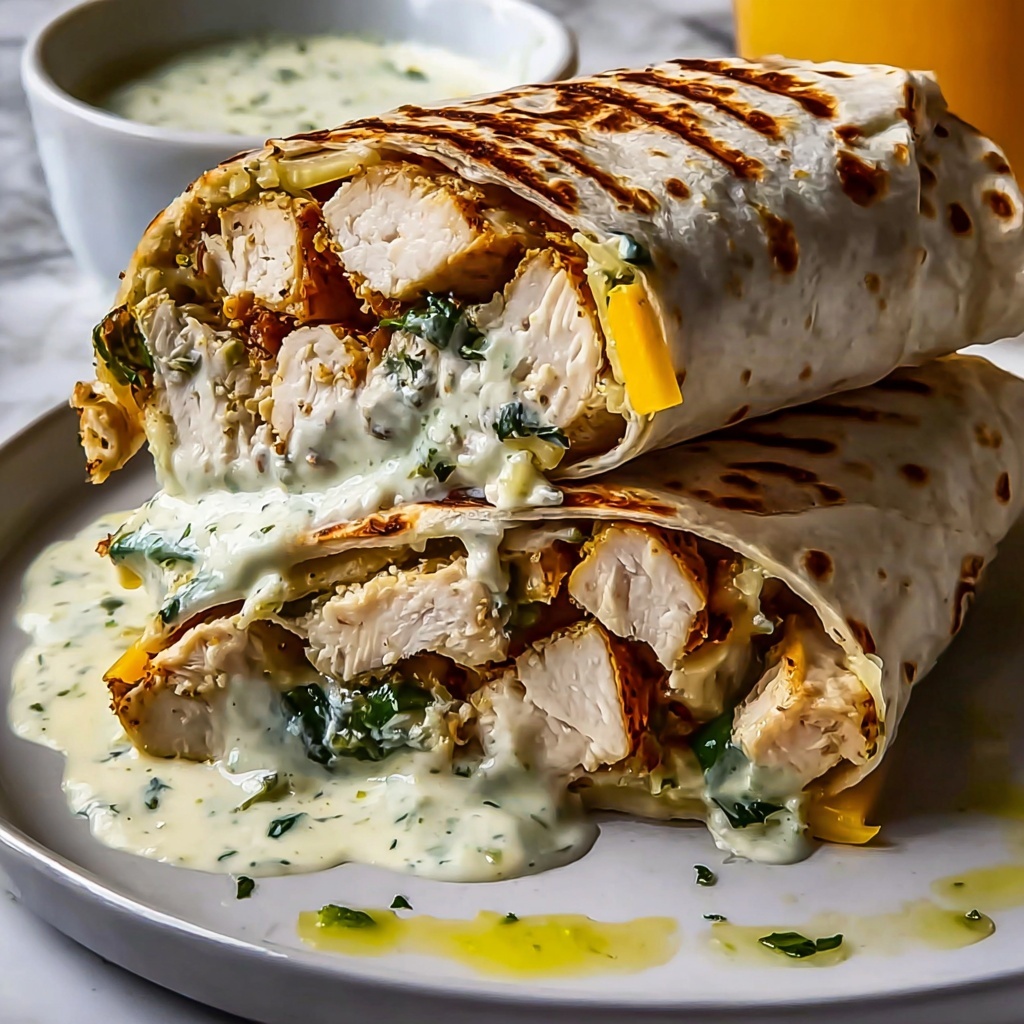
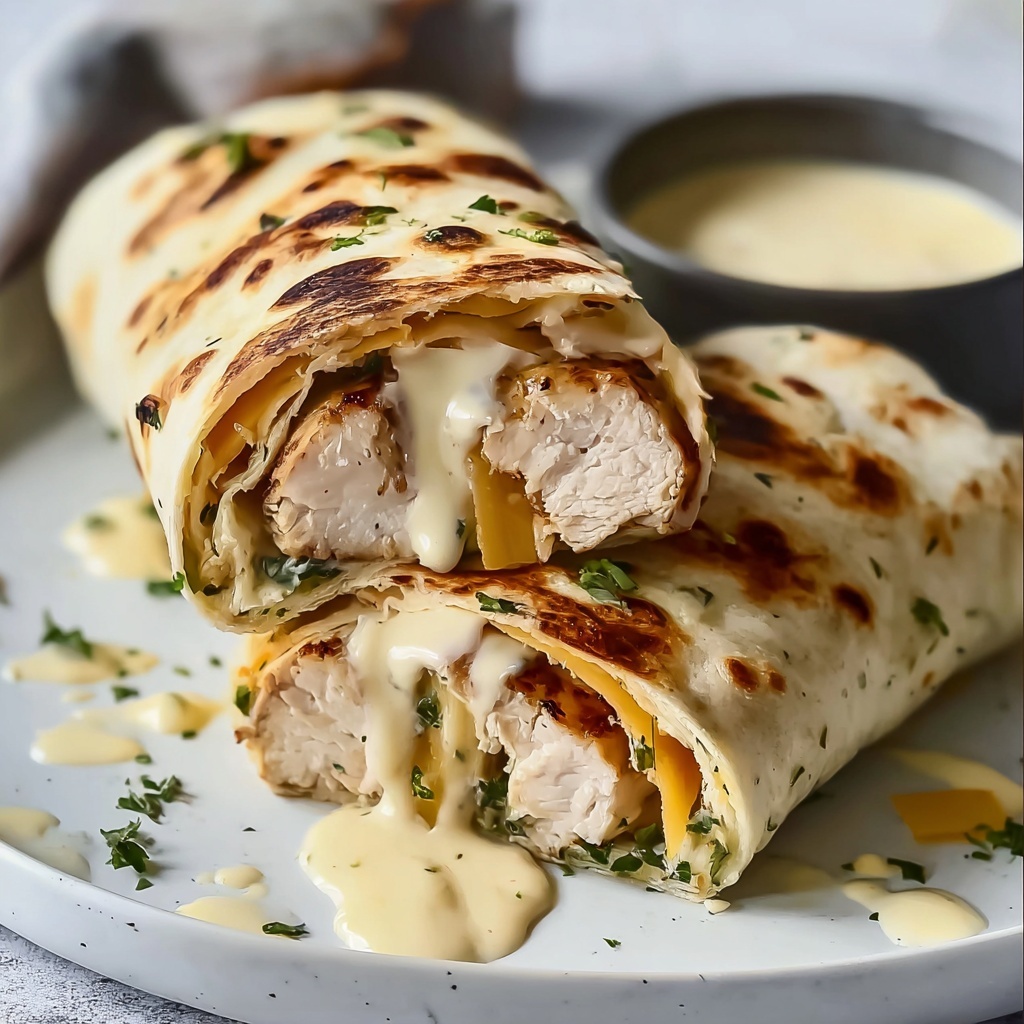
Lay out each tortilla flat and spoon an even amount of the chicken and cheese mixture onto the center. Fold the sides in and then roll tightly from one edge to the other, creating a neat wrap that’s packed with filling but easy to handle.
Step 4: Warm and Melt
For the perfect melt and warm-up, place the wraps seam-side down in a hot skillet. Cook each side for about 2-3 minutes until the tortillas turn golden brown and the cheese inside has melted spectacularly. This adds a delightful crispness and seals everything inside.
Step 5: Serve and Enjoy
Once golden and melty, remove the wraps from heat and let them rest for a minute. This brief pause keeps the filling from spilling out and makes them easier to slice and savor.
How to Serve Cheesy Garlic Chicken Wraps Recipe
Garnishes
Fresh garnishes like chopped parsley or green onions bring a pop of color and a hint of freshness that complements the richness. A drizzle of extra garlic aioli or a sprinkle of red pepper flakes can elevate the flavor with a little zing or spice.
Side Dishes
These wraps pair beautifully with light and crisp sides such as a tangy coleslaw or a vibrant garden salad to balance the richness. Sweet potato fries or classic kettle chips add a satisfying crunch alongside your wrap for a well-rounded meal.
Creative Ways to Present
Try slicing the wraps diagonally for a chic presentation on a platter, ideal for sharing at parties. Serving with a small bowl of ranch or salsa on the side invites dipping and adds extra flavor options. Wrapping in parchment paper or foil can make these wraps perfect for picnics or lunches on the go.
Make Ahead and Storage
Storing Leftovers
Place any leftover wraps in an airtight container and refrigerate. They will stay fresh for up to 3 days when properly stored. The flavors meld even more after resting, making leftovers just as delicious.
Freezing
To freeze, wrap each assembled but unheated wrap tightly in plastic wrap and then aluminum foil to prevent freezer burn. They’re best used within 1-2 months. Thaw in the refrigerator overnight before reheating to keep the texture intact.
Reheating
Reheat in a skillet over medium heat to regain that crispy exterior, flipping gently until warmed through and the cheese melts again. Avoid microwaving if possible, as it can make the tortilla soggy and less enjoyable.
FAQs
Can I use other types of cheese in this Cheesy Garlic Chicken Wraps Recipe?
Absolutely! While cheddar offers great meltability and flavor, mozzarella or Monterey Jack can be delicious alternatives if you want a milder or creamier cheese.
Is it okay to substitute chicken with another protein?
Yes, turkey or shredded rotisserie pork can work wonderfully. You could also try a plant-based chicken substitute to make this recipe vegetarian-friendly.
How spicy is the wrap? Can I add heat?
This recipe is mild by default, focusing on garlic and cheese flavors. If you love spice, add some crushed red pepper flakes to the chicken mixture or serve with a spicy dipping sauce.
Can I make this recipe vegan?
With some swaps—vegan cheese, a garlic-flavored vegan mayo instead of aioli, and a plant-based chicken alternative—you can definitely enjoy a vegan version that’s just as tasty and satisfying.
What’s the best way to keep the tortillas from tearing?
Warm the tortillas slightly before assembling to make them more pliable. Also, avoid overfilling the wraps to prevent tearing and ensure easier rolling.
Final Thoughts
There’s something truly comforting about a homemade wrap that’s packed with cheesy, garlicky chicken goodness, and this Cheesy Garlic Chicken Wraps Recipe hits that sweet spot perfectly. It’s quick to prepare, easy to customize, and incredibly satisfying. So go ahead, roll one up, take a big bite, and enjoy the cozy, delicious flavors that this recipe brings to your table. Trust me, it might just become one of your new favorites!
Print
Cheesy Garlic Chicken Wraps Recipe
- Prep Time: 10 minutes
- Cook Time: 10 minutes
- Total Time: 20 minutes
- Yield: 4 servings
- Category: Lunch
- Method: Stovetop
- Cuisine: American
Description
These Cheesy Garlic Chicken Wraps combine tender shredded chicken with creamy garlic aioli and melted cheddar cheese, all wrapped in a warm tortilla. Perfect for a quick and satisfying lunch or dinner, these wraps deliver a flavorful blend of garlic and cheese with every bite.
Ingredients
Chicken Filling
- 2 cups cooked chicken, shredded
- ½ cup garlic aioli
- 1 cup cheddar cheese, shredded
- Salt and pepper, to taste
Wraps
- 4 large tortillas
Instructions
- Prepare the chicken mixture: In a mixing bowl, combine the shredded cooked chicken with the garlic aioli. Stir until the chicken is well coated. Season with salt and pepper to taste.
- Assemble the wraps: Lay out each tortilla on a flat surface. Evenly distribute the chicken mixture onto the center of each tortilla. Sprinkle the shredded cheddar cheese over the chicken.
- Fold and warm the wraps: Fold the sides of the tortilla over the filling, then roll tightly to form a wrap. Warm each wrap in a skillet over medium heat for about 2-3 minutes per side, or until the cheese melts and the wrap is golden and slightly crispy.
- Serve: Remove from heat, slice each wrap if desired, and serve immediately while warm.
Notes
- You can use rotisserie chicken for convenience.
- For extra flavor, add some chopped fresh herbs like parsley or cilantro to the chicken mixture.
- To make this recipe spicier, add a few dashes of hot sauce or some sliced jalapeños.
- Wraps can be kept warm in a low oven if preparing multiple servings.
- If preferred, use whole wheat tortillas for added fiber.
