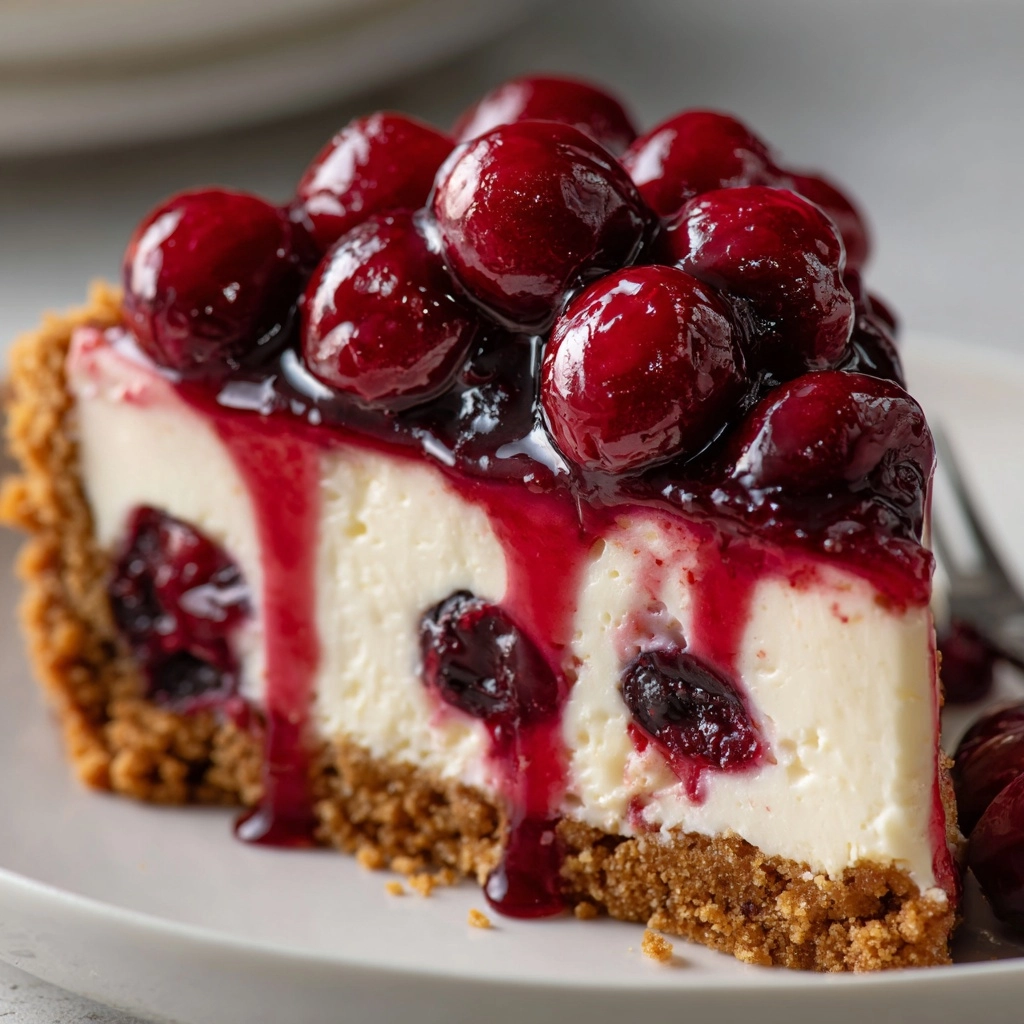
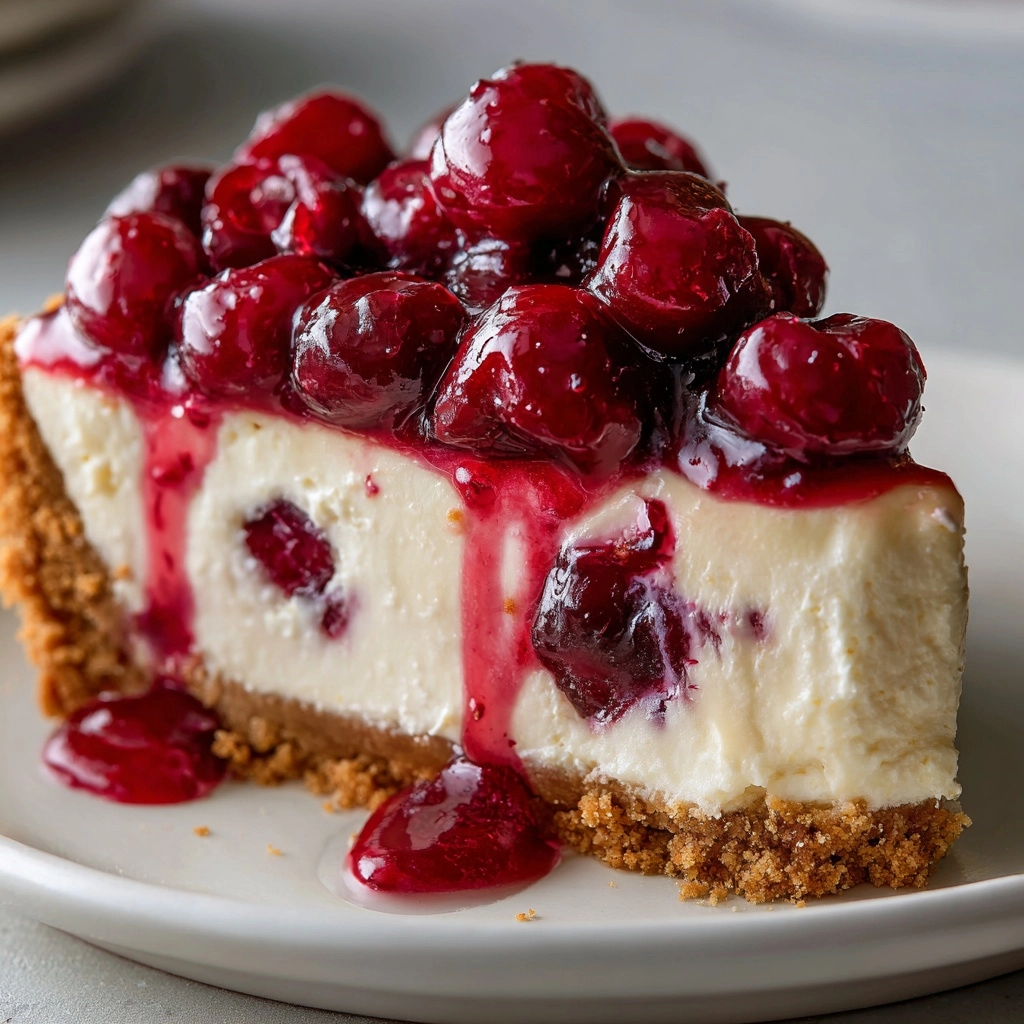
If you’re looking for a dazzling dessert that tastes like a summer picnic and comes together with zero oven time, look no further than these No-Bake Cherry Cheesecake Bars. Each bite is a delicious marriage of buttery graham cracker crust, lush and creamy cheesecake filling, and that irresistible glossy cherry topping. What I love most is that everything happens in a single pan—the results look beautiful, slice seamlessly, and wow both family and guests with very little effort. Whether you’re a cheesecake beginner or a dessert pro in need of a crowd-pleaser, these bars are about to become your new go-to treat.
Ingredients You’ll Need
With just a handful of ingredients, these bars come together magically. Each item plays a vital role in building flavor and texture, making the No-Bake Cherry Cheesecake Bars a vibrant and welcoming dessert you’ll want to make again and again.
- Graham cracker crumbs: The classic crunchy, buttery base that holds everything together and gives the dessert its signature texture.
- Granulated sugar: Adds a touch of sweetness to the crust, balancing out the savory depth of the crackers.
- Unsalted butter (melted): Binds the crust and infuses every bite with rich flavor.
- Cream cheese (softened): The creamy, tangy heart of our cheesecake layer—make sure it’s at room temperature for easy mixing!
- Powdered sugar: Dissolves smoothly into the cream cheese for that perfectly sweet, velvety filling.
- Vanilla extract: Rounds out the flavors and gives a warm, fragrant note to the cheesecake layer.
- Whipped topping or whipped cream: Lightens the cheesecake mixture, making every bar airy and dreamy.
- Cherry pie filling: A vibrant, glossy topping that delivers the sweet-tart punch and gorgeous color these bars are known for.
How to Make No-Bake Cherry Cheesecake Bars
Step 1: Make the crust
Start off by stirring together the graham cracker crumbs, granulated sugar, and melted butter in a medium bowl. You want the texture to look like wet sand, fully moistened but not greasy. Once it’s ready, firmly press the crust into the bottom of a 9×9-inch baking dish, smoothing it out to create an even layer. This base is what’s going to hold up all that luscious cheesecake goodness.
Step 2: Chill the crust
To help the crust firm up, pop the baking dish into the refrigerator for at least 20 minutes. Chilling allows the butter to set, which ensures your No-Bake Cherry Cheesecake Bars won’t break apart when sliced. If you prefer a firmer, slightly toasted base, you can bake the crust for 8 minutes at 350°F and let it cool completely.
Step 3: Prepare the cheesecake filling
In a large bowl, combine softened cream cheese, powdered sugar, and vanilla extract. Use a hand mixer or sturdy spatula to beat until the mixture is ultra-smooth and creamy with no lumps. This is the moment to taste for sweetness and vanilla punch, adjusting slightly if needed.
Step 4: Fold in the whipped topping
Take your whipped topping or whipped cream and gently fold it into the cream cheese mixture. Be careful not to overmix—fold just until everything is combined and the filling is silky and airy. This will give your bars that classic, cloud-like cheesecake layer.
Step 5: Assemble and chill the bars
Spoon the cheesecake mixture onto your chilled crust, spreading it out to the edges using an offset spatula or the back of a spoon. Top everything with the cherry pie filling, swirling it into an even glossy layer. Cover the dish and refrigerate for at least 4 hours, or until the bars are set and easy to slice. Chilling is the secret to neat, perfect squares!
How to Serve No-Bake Cherry Cheesecake Bars

Garnishes
For an extra pop, scatter a few fresh cherries or a handful of shaved chocolate over the top just before serving. Some folks love a little sprinkle of lemon zest, which makes the cherry flavor sing. Dollops of whipped cream can transform your No-Bake Cherry Cheesecake Bars into something almost bakery-worthy.
Side Dishes
Pairing these bars with a cup of hot coffee or a scoop of vanilla ice cream is always a hit. For picnics or backyard parties, serve them alongside bowls of fresh summer berries or a light fruit salad—the creamy cheesecake and the brightness of fruit is a match made in heaven.
Creative Ways to Present
If you want to impress, cut your No-Bake Cherry Cheesecake Bars into bite-sized squares and arrange them on a decorative platter. Use cupcake liners for easy grab-and-go servings, or layer individual bars into small mason jars for playful parfaits. Drizzle with a touch of chocolate or extra cherry sauce for dramatic flair.
Make Ahead and Storage
Storing Leftovers
Once sliced, pop any extra bars into an airtight container and store them in the refrigerator. They’ll keep beautifully for about 4 to 5 days, staying fresh and creamy. Separate layers with parchment paper to keep the cherry topping from sticking together.
Freezing
Need to make your No-Bake Cherry Cheesecake Bars even further ahead? You can freeze them before adding the cherry topping: wrap individual bars tightly in plastic wrap, then foil, and freeze for up to one month. When ready to serve, thaw in the fridge overnight and add the topping just before enjoying for best texture.
Reheating
No reheating needed! These bars are meant to be enjoyed cold straight from the fridge. If they’ve been frozen, simply allow them to defrost in the refrigerator. Trying to warm them will melt the creamy filling, so keep them chilled for all that dreamy texture.
FAQs
Can I use a different fruit topping besides cherry?
Absolutely! Blueberry, strawberry, or even peach pie fillings make fantastic variations. With a simple swap, you can customize your No-Bake Cherry Cheesecake Bars to the fruit flavors you love best.
Do I have to use whipped topping, or can I use homemade whipped cream?
Either works beautifully! Homemade whipped cream gives a fresher flavor and softer texture, while store-bought whipped topping is a bit more stable for make-ahead preparation. Choose what fits your style and taste.
How do I get clean slices when cutting these bars?
For sharp, bakery-style slices, use a large knife dipped in hot water and wiped dry between each cut. Chilled bars and a clean blade make all the difference, giving your No-Bake Cherry Cheesecake Bars those picture-perfect edges.
Can I make these bars gluten-free?
Yes, just substitute gluten-free graham crackers for the base. Double-check that your other ingredients are gluten-free, and you’ll be able to enjoy these dreamy bars worry-free!
What’s the best way to soften cream cheese quickly?
If you forgot to bring the cream cheese to room temperature, cut it into cubes and microwave it in 10-second intervals until just soft—no melting! Properly softened cream cheese will blend seamlessly, ensuring your cheesecake filling is smooth and luscious.
Final Thoughts
If you’ve never tried making No-Bake Cherry Cheesecake Bars at home, now’s the perfect time to dive in. They offer all the classic flavors you crave in an easy, fuss-free format that’s sure to win over anyone with a sweet tooth. Whip up a batch for your next get-together or simply treat yourself—you’ll be amazed at how quickly these irresistible bars disappear!
Print
No-Bake Cherry Cheesecake Bars Recipe
- Prep Time: 20 minutes
- Cook Time: 0 minutes
- Total Time: 4 hours 20 minutes
- Yield: 9 bars
- Category: Dessert
- Method: No-Bake
- Cuisine: American
- Diet: Non-Vegetarian
Description
Indulge in the creamy, fruity goodness of these No-Bake Cherry Cheesecake Bars. A luscious cream cheese layer atop a graham cracker crust, topped with sweet cherry filling – the perfect treat for any occasion!
Ingredients
Graham Cracker Crust:
- 1 1/2 cups graham cracker crumbs
- 1/3 cup granulated sugar
- 1/2 cup unsalted butter, melted
Cheesecake Filling:
- 16 oz cream cheese, softened
- 1 cup powdered sugar
- 1 teaspoon vanilla extract
- 2 cups whipped topping or whipped cream
Topping:
- 1 can (21 oz) cherry pie filling
Instructions
- Prepare the Crust: Mix graham cracker crumbs, sugar, and melted butter. Press into a 9×9-inch dish. Chill.
- Make the Filling: Beat cream cheese, sugar, and vanilla until smooth. Fold in whipped topping.
- Assemble: Spread cream cheese mixture over crust. Top with cherry pie filling.
- Chill and Serve: Refrigerate for at least 4 hours, then cut into bars and enjoy!
Notes
- For a firmer crust, bake at 350°F for 8 minutes before adding the filling.
- Try blueberry or strawberry pie filling for a delicious twist.
Nutrition
- Serving Size: 1 bar
- Calories: 325
- Sugar: 22g
- Sodium: 210mg
- Fat: 20g
- Saturated Fat: 12g
- Unsaturated Fat: 6g
- Trans Fat: 0g
- Carbohydrates: 32g
- Fiber: 1g
- Protein: 3g
- Cholesterol: 45mg
