
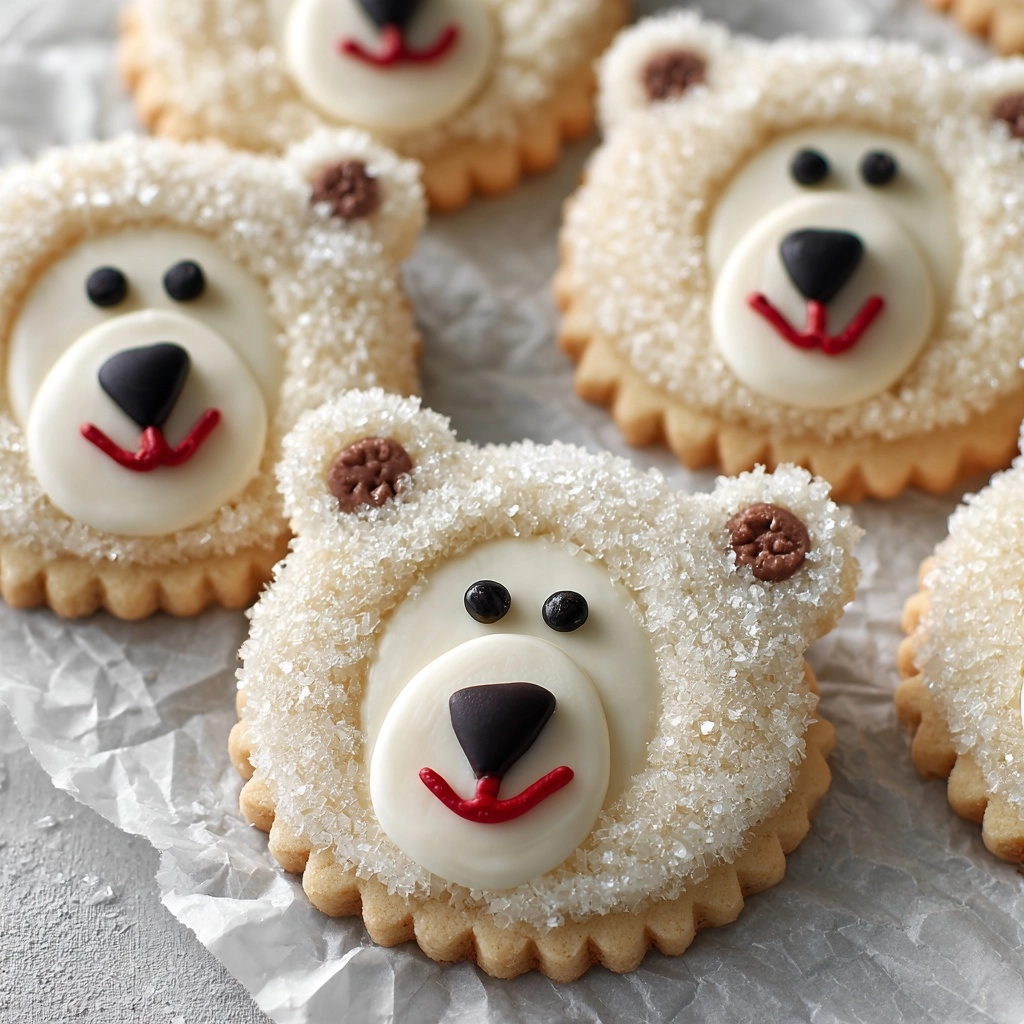
Polar Bear Cookies are everything you love about winter baking rolled into one adorable, irresistible treat that’s perfect for sharing. Imagine a buttery vanilla cookie covered in dreamy white chocolate, with a fluffy marshmallow “snout” and chocolate chip features so cute you’ll want to smile right back at them. Not only do these cookies look as magical as a snow day, but they taste like a snowy wonderland too, making them a must-bake for holiday gatherings, snow-day fun, or just whenever you’re craving a sweet and whimsical kitchen adventure.
Ingredients You’ll Need
The beauty of Polar Bear Cookies is that they use everyday ingredients you probably already have in your pantry, yet each one plays a key role in ensuring your cookies are as delicious as they are delightful. Every element, from the butter to the coconut, comes together to guarantee that every bite is soft, sweet, and full of character.
- Unsalted butter (1 cup, softened): Gives the cookies their melt-in-your-mouth texture and buttery richness. Make sure it’s at room temperature for easy creaming.
- Powdered sugar (1 cup): Dissolves smoothly into the dough, creating a tender crumb and light sweetness.
- Vanilla extract (1 teaspoon): Adds that comforting, classic cookie flavor everyone loves.
- All-purpose flour (2 cups): Holds everything together and provides structure to your Polar Bear Cookies.
- Salt (1/4 teaspoon): Just enough to balance the sweet and deepen the flavors.
- White chocolate chips, melted (1/2 cup): Creates a delicious base for the decorations and adds creamy sweetness.
- Large marshmallows (24): These playful snouts transform ordinary cookies into charming polar bear faces.
- Mini chocolate chips (for eyes and nose): Simple but adorable details for those memorable polar bear features.
- Black decorating gel or melted dark chocolate: Perfect for precise mouths and finishing facial expressions.
- Shredded coconut (optional): Sprinkle around the edges for a snowy, wintry effect and a little extra texture.
How to Make Polar Bear Cookies
Step 1: Prepare Your Oven and Baking Sheet
Start by preheating your oven to 350°F (175°C). Line a baking sheet with parchment paper so your cookies lift off easily and stay beautifully intact—no sticking or crumbling means picture-perfect polar bears!
Step 2: Cream the Butter and Sugar
In a large mixing bowl, beat your softened butter with the powdered sugar until the mixture is light, fluffy, and just begging to be tasted off the spoon. This step creates the soft, meltaway cookie base that sets Polar Bear Cookies apart.
Step 3: Add Vanilla, Flour, and Salt
Mix in the vanilla extract for that lovely aroma, then gradually add the flour and salt. Stir until a soft dough forms. The dough should be pliable but not sticky, making it easy to shape your cookies with your hands.
Step 4: Shape and Bake the Cookies
Roll tablespoons of dough into 1-inch balls and space them about 2 inches apart on your prepared baking sheet. Gently flatten each ball with your palm or the bottom of a glass—just enough to give your bears a plump shape. Pop the tray into the oven and bake for 10 to 12 minutes until the edges show just a hint of golden color. Let them cool completely on a wire rack.
Step 5: Decorate Your Polar Bear Cookies
Once the cookies are cool, spread the surface with a layer of melted white chocolate—this becomes your “canvas.” Quickly press a marshmallow into the center of each cookie to create the polar bear’s snout. Now, use mini chocolate chips for the eyes and nose, and add a mouth or any extra details with black decorating gel or melted dark chocolate. For the ultimate winter magic, sprinkle shredded coconut around the edges for snowy flair. Let everything set until the chocolate firms up.
How to Serve Polar Bear Cookies

Garnishes
Dress up your Polar Bear Cookies by sprinkling a halo of shredded coconut around their edges for a gentle snowy effect, or add a dash of edible glitter for festive sparkle. If you’re feeling extra creative, try swapping mini chocolate chips for edible candy eyes to make each bear truly unique!
Side Dishes
Serve these cookies alongside mugs of hot cocoa laden with whipped cream, vanilla milkshakes for a frosty pairing, or even a plate of fresh fruit to balance the sweetness. They also play well with other holiday cookies if you’re building a winter dessert platter.
Creative Ways to Present
Arrange the Polar Bear Cookies in a snowy “den” on a platter topped with coconut flakes, cluster them on a cake stand with mini marshmallows scattered around, or wrap them individually in clear cellophane bags with a festive ribbon for the cutest edible gifts ever.
Make Ahead and Storage
Storing Leftovers
Keep your Polar Bear Cookies fresh by storing them in an airtight container at room temperature for up to five days. If you used coconut, you’ll notice it keeps its texture nicely and prevents the cookies from sticking together.
Freezing
You can freeze decorated or undecorated cookies for up to two months. Place wax paper between layers to preserve their faces, and thaw at room temperature before serving—perfect for prepping ahead of holiday madness!
Reheating
Polar Bear Cookies are best enjoyed at room temperature, but if you’d like a just-baked aroma, briefly warm them in a 300°F oven for 2-3 minutes. Avoid the microwave to keep the decorations looking sharp.
FAQs
Can I use candy eyes instead of mini chocolate chips for the polar bear face?
Absolutely! Candy eyes make each Polar Bear Cookie even more charming, adding an extra layer of personality. If you have them on hand, swap them in for the eyes and keep the chocolate chip for the nose.
Is it possible to make these cookies gluten-free?
Yes, just substitute a cup-for-cup gluten-free flour blend for the all-purpose flour to create gluten-free Polar Bear Cookies. Check the labels on your other ingredients to make sure they’re gluten-safe too.
Can I add different flavors to the cookie dough?
Certainly! Try replacing vanilla extract with peppermint for a holiday twist, or almond extract for something nuttier. Just keep the amount to one teaspoon so the flavor doesn’t overpower the delicate cookie base.
How do I prevent the melted white chocolate from hardening before I finish decorating?
Work on decorating one Polar Bear Cookie at a time: spread the chocolate, press on the marshmallow and chocolate chips, then move to the next. If your chocolate starts to set, gently rewarm it over a double boiler or in short bursts in the microwave.
Can kids help make these cookies?
Kids will love rolling dough, pressing marshmallows, and adding faces! Supervise when handling hot chocolate and the oven, but assembling the decorations is a wonderful family activity.
Final Thoughts
If you’re looking for a cookie that’s as cute as it is delicious, Polar Bear Cookies are definitely calling your name. Whether you make them for a winter celebration, as heartfelt gifts, or just for some cozy kitchen fun, these cookies are sure to warm hearts and bring big smiles. Go on, give them a try—your inner child (and your taste buds) will thank you!
Print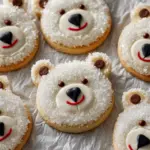
Polar Bear Cookies Recipe
- Prep Time: 20 minutes
- Cook Time: 12 minutes
- Total Time: 32 minutes
- Yield: 24 cookies
- Category: Dessert
- Method: Baking
- Cuisine: American
- Diet: Vegetarian
Description
These adorable Polar Bear Cookies are a fun and festive treat perfect for the holiday season. Soft, buttery cookies topped with marshmallows and white chocolate create cute polar bear faces that are almost too sweet to eat!
Ingredients
Cookies:
- 1 cup unsalted butter, softened
- 1 cup powdered sugar
- 1 teaspoon vanilla extract
- 2 cups all-purpose flour
- 1/4 teaspoon salt
Decorations:
- 1/2 cup white chocolate chips, melted
- 24 large marshmallows
- Mini chocolate chips (for eyes and nose)
- Black decorating gel or melted dark chocolate (for facial features)
- Shredded coconut (optional, for texture or snow effect)
Instructions
- Preheat the oven: Preheat the oven to 350°F (175°C) and line a baking sheet with parchment paper.
- Mix the dough: Cream together butter and powdered sugar, add vanilla, then mix in flour and salt to form a dough.
- Shape and bake: Roll dough into balls, flatten, and bake for 10–12 minutes until slightly golden.
- Decorate: Spread melted white chocolate on each cookie, place a marshmallow in the center, add mini chocolate chips for eyes and nose, then use decorating gel or chocolate for facial features. Optionally, sprinkle shredded coconut for a snowy effect.
- Final touches: Let the cookies cool and the chocolate set before serving.
Notes
- You can use candy eyes for a different look.
- Try adding peppermint extract for a flavor variation.
- Store cookies in an airtight container for up to 5 days.
Nutrition
- Serving Size: 1 cookie
- Calories: 160
- Sugar: 10g
- Sodium: 40mg
- Fat: 9g
- Saturated Fat: 5g
- Unsaturated Fat: 3g
- Trans Fat: 0g
- Carbohydrates: 18g
- Fiber: 0g
- Protein: 1g
- Cholesterol: 20mg

