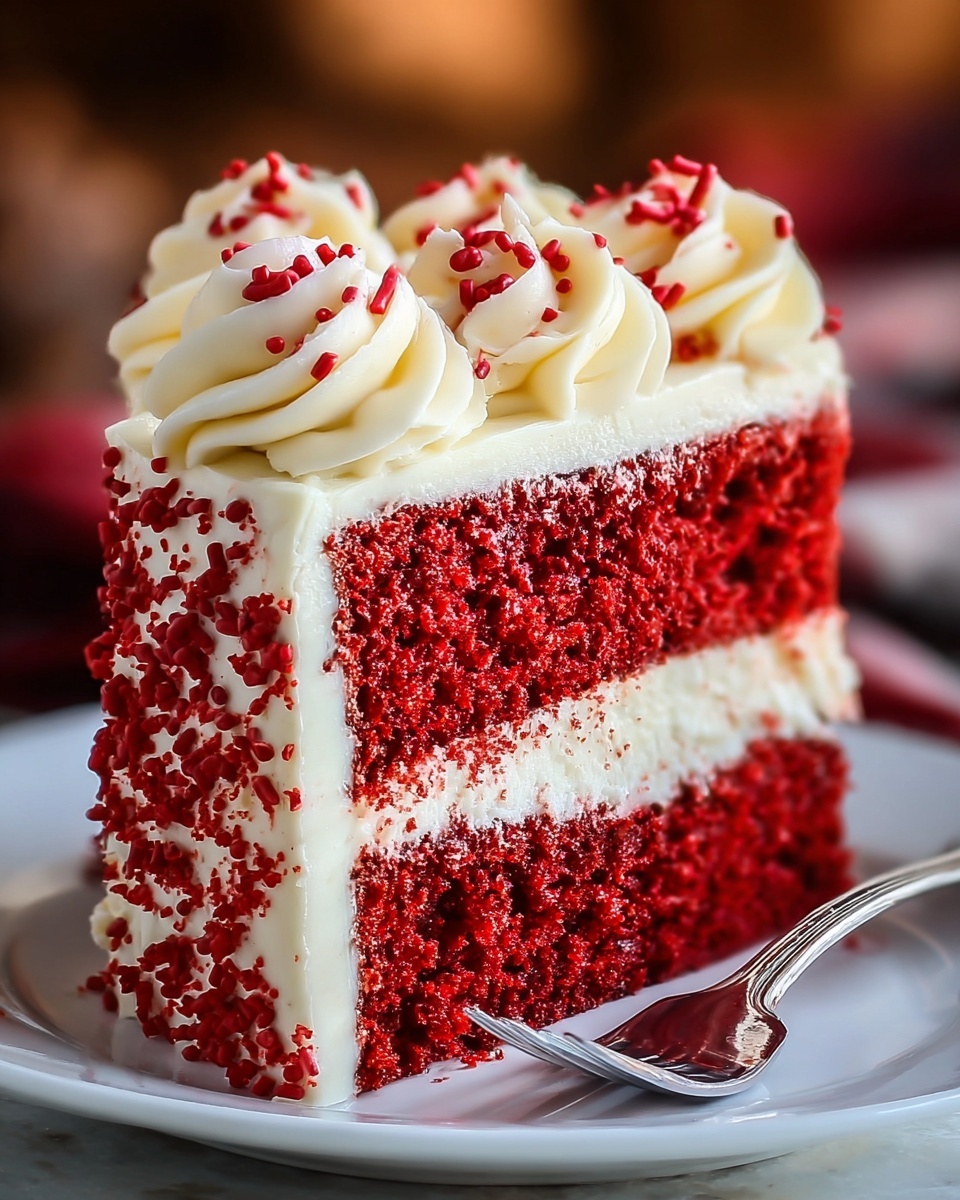
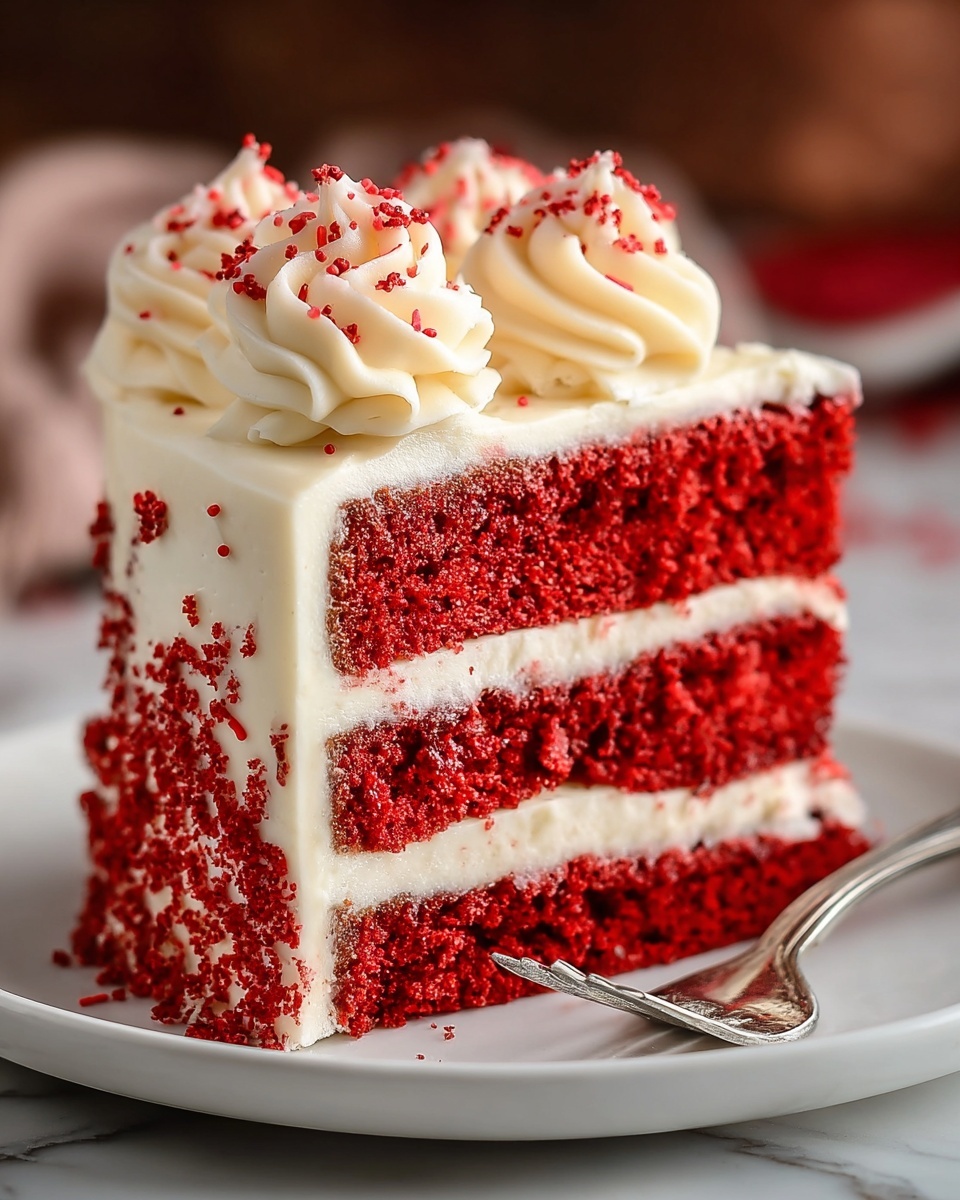
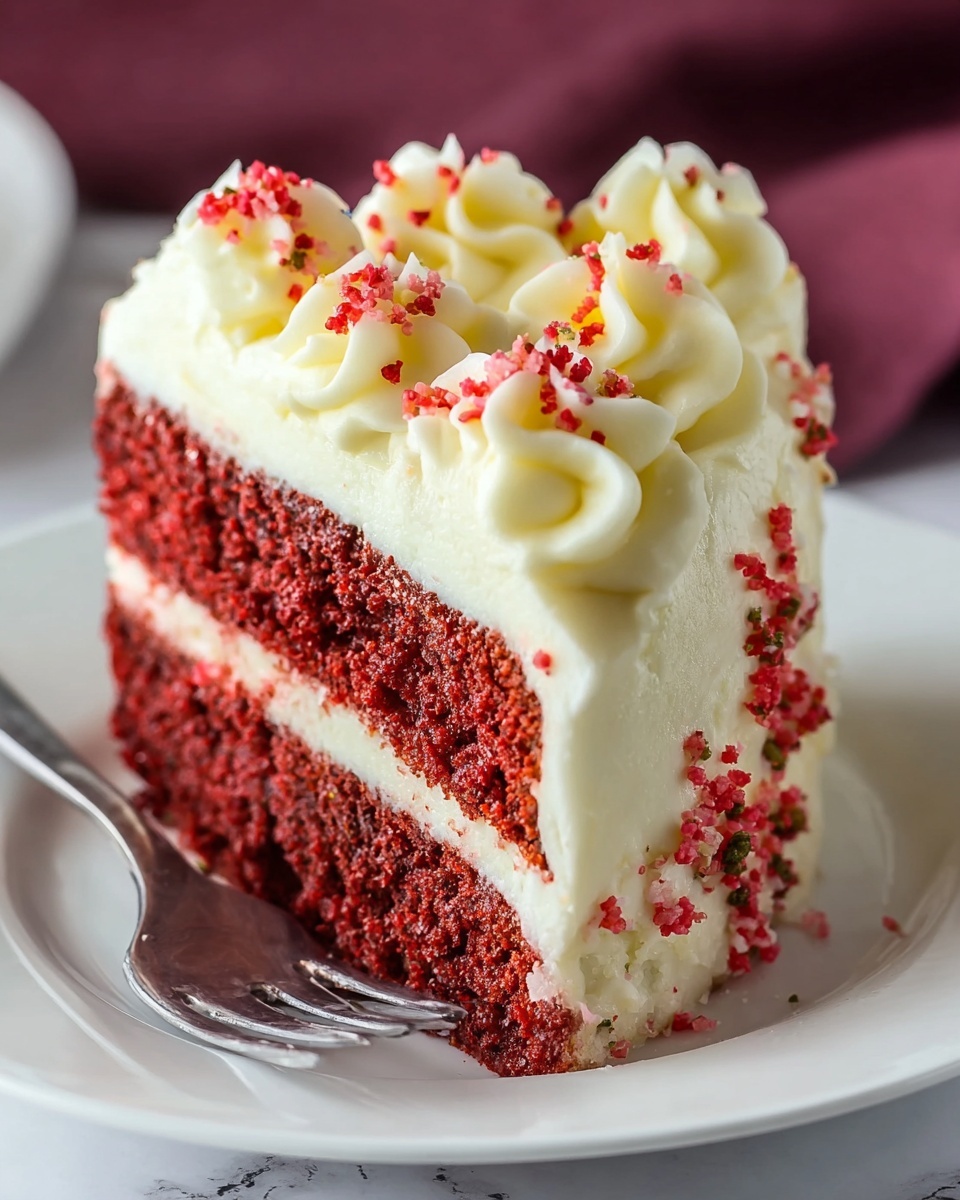
If you’ve ever dreamed of slicing into a cake that’s as visually stunning as it is irresistibly delicious, then this Classic Red Velvet Cake Recipe is about to become your new best friend. With its moist, tender crumb, that signature deep red hue, and a luscious cream cheese frosting, every bite feels like a celebration. This recipe strikes the perfect balance of subtle cocoa flavor and velvety texture, making it an all-time favorite that’s as beautiful as it is tasty. Trust me, from the very first slice, you’ll understand why this Classic Red Velvet Cake Recipe holds a special place in so many hearts.
Ingredients You’ll Need
Gathering your ingredients for this Classic Red Velvet Cake Recipe is simple, yet each item plays a crucial role in delivering the cake’s perfect flavor and texture. From the fluffiness imparted by the buttermilk to the striking color from the red food coloring, these essentials come together harmoniously.
- 2.5 cups All-purpose flour: The foundation of your cake’s structure, ensuring a tender crumb.
- 2 tablespoons Cocoa powder: Offers a subtle chocolate note that complements the red velvet’s signature flavor.
- 1.5 cups Granulated sugar: Sweetens the cake and helps keep it moist and soft.
- 1 teaspoon Baking soda: A leavening agent that helps the cake rise perfectly.
- 0.5 teaspoon Salt: Enhances all the flavors for a well-rounded taste.
- 1 cup Vegetable oil: Contributes to the cake’s moist and tender texture.
- 1 cup Buttermilk: Adds moisture and a slight tang that brightens the flavor.
- 2 large Eggs: Helps bind the ingredients and build structure.
- 2 tablespoons Red food coloring: Gives the cake its iconic, vibrant color.
- 1 teaspoon Vanilla extract: Provides aromatic depth and rounds out the flavor.
- 8 ounces Cream cheese: The rich, tangy base of the luscious frosting.
- 0.5 cup Unsalted butter: Adds creaminess and smoothness to the frosting.
- 4 cups Powdered sugar: Sweetens and thickens the frosting to a perfect consistency.
- 2 tablespoons Milk: Adjusts the frosting’s texture for easy spreading.
How to Make Classic Red Velvet Cake Recipe
Step 1: Preheat and Prepare Pans
Start by preheating your oven to 350°F (175°C). Grease two 9-inch round cake pans with butter and dust them lightly with flour to prevent sticking and ensure easy cake release.
Step 2: Combine Dry Ingredients
In a large mixing bowl, sift together the all-purpose flour, cocoa powder, granulated sugar, baking soda, and salt. This step ensures even distribution and a smooth batter without lumps.
Step 3: Mix Wet Ingredients
In another bowl, whisk the vegetable oil, buttermilk, eggs, and red food coloring until everything is fully incorporated. This vibrant mixture is key to achieving that classic red velvet appearance and texture.
Step 4: Bring Wet and Dry Ingredients Together
Gradually pour the wet ingredients into the dry, stirring gently with a spatula until just combined. Overmixing can make your cake dense, so be careful to stop when the batter looks smooth and homogenous.
Step 5: Add Vanilla Extract
Stir in the vanilla extract to add a touch of aromatic sweetness, elevating the overall flavor profile of your cake.
Step 6: Divide Batter into Pans
Evenly pour and spread the batter between your prepared cake pans. Smooth out the tops with a spatula to ensure even baking.
Step 7: Bake the Cake
Bake the layers for 25 to 30 minutes until a toothpick inserted in the center comes out clean. This indicates that your cake is perfectly baked and ready to cool.
Step 8: Cool the Cake Layers
Let the cakes rest in the pans for about 10 minutes before carefully inverting them onto wire racks to cool completely. Proper cooling is essential before frosting.
Step 9: Prepare Cream Cheese Frosting
Beat together cream cheese and unsalted butter until smooth and creamy. Gradually add powdered sugar, mixing until fluffy, then adjust the consistency with milk as necessary for easy spreading.
Step 10: Layer and Frost Your Cake
Place one cake layer on your serving plate and generously spread the cream cheese frosting over the top. Add the second layer and apply a thin crumb coat over the whole cake.
Step 11: Chill and Finish Frosting
Pop the cake in the fridge for about 30 minutes to firm up the crumb coat. Then, apply a final thick layer of frosting and smooth it beautifully for that classic, elegant look.
Step 12: Slice and Enjoy
Allow the cake to come to room temperature before slicing. This is the moment to savor the fruits of your labor with friends and family, enjoying every decadent bite of your Classic Red Velvet Cake Recipe.
How to Serve Classic Red Velvet Cake Recipe
Garnishes
Add a personal touch by topping your cake with fresh berries like raspberries or strawberries for a pop of color and tang. Alternatively, sprinkle some white chocolate shavings or crushed pecans for extra texture and flavor contrast.
Side Dishes
Pair your slice with freshly brewed coffee or a creamy vanilla chai latte to complement the cake’s rich flavors. For a refreshing option, serve with a side of whipped cream or a light fruit salad that lets the cake shine.
Creative Ways to Present
For a stunning presentation, consider serving this Classic Red Velvet Cake Recipe as mini cupcakes with swirls of cream cheese frosting on top. You can also layer it into parfait glasses with cream cheese frosting and crushed cake crumbs for an elegant dessert twist.
Make Ahead and Storage
Storing Leftovers
Keep your leftover Classic Red Velvet Cake Recipe covered tightly in the refrigerator to preserve freshness. It will stay moist and delicious for up to 4 days, making it perfect for enjoying later or sharing with loved ones.
Freezing
This cake freezes beautifully. Wrap individual layers tightly in plastic wrap and then foil before placing them in the freezer. When you’re ready, thaw overnight in the fridge, then frost and assemble for a freshly baked flavor anytime.
Reheating
Reheating cake is usually unnecessary because it’s best enjoyed at room temperature, but if you prefer it slightly warm, leave slices out for 30 minutes or gently warm for 5-10 seconds in the microwave. Avoid overheating to retain the perfect texture and flavor.
FAQs
Can I substitute buttermilk with regular milk?
You can substitute buttermilk with regular milk mixed with a tablespoon of lemon juice or vinegar per cup to mimic the acidity and help achieve that tender crumb and tangy flavor classic to this cake.
Why does red velvet cake have cocoa powder?
The cocoa powder adds a mild chocolate flavor that deepens the taste of the cake without overpowering it, giving red velvet its trademark subtle richness and depth.
How do I prevent the red color from fading?
Use a good-quality red food coloring and avoid overmixing your batter. The acidity from the buttermilk also helps preserve the color, ensuring your cake stays vibrantly red after baking.
Can I make this cake gluten-free?
Absolutely! Substitute the all-purpose flour with a gluten-free flour blend designed for baking, but be sure to choose one that includes xanthan gum or a similar binder for best results.
What’s the best way to get smooth cream cheese frosting?
Ensure the cream cheese and butter are softened to room temperature before mixing, and beat them together until completely smooth before gradually adding powdered sugar. This will yield a creamy, lump-free frosting perfect for your cake.
Final Thoughts
This Classic Red Velvet Cake Recipe brings joy and elegance to any occasion, blending a perfect balance of flavors and textures that will wow your family and friends. Once you try this recipe, I promise it will hold a cherished spot in your baking repertoire, ready to be pulled out whenever you want to impress or simply treat yourself to something special.
Print
Classic Red Velvet Cake Recipe
- Prep Time: 30 minutes
- Cook Time: 30 minutes
- Total Time: 1 hour
- Yield: 8 to 8 servings
- Category: Dessert
- Method: Baking
- Cuisine: American
Description
This Classic Red Velvet Cake recipe features a moist and tender cake with a subtle chocolate flavor and an iconic vibrant red color. Paired with a rich and creamy cream cheese frosting, this dessert is perfect for celebrations or an indulgent treat. The recipe includes detailed steps to bake two layers of soft cake and create a smooth, tangy frosting that complements the delicate crumb of the cake.
Ingredients
Cake Ingredients
- 2.5 cups All-purpose flour
- 2 tablespoons Cocoa powder
- 1.5 cups Granulated sugar
- 1 teaspoon Baking soda
- 0.5 teaspoon Salt
- 1 cup Vegetable oil
- 1 cup Buttermilk
- 2 large Eggs
- 2 tablespoons Red food coloring
- 1 teaspoon Vanilla extract
Frosting Ingredients
- 8 ounces Cream cheese
- 0.5 cup Unsalted butter
- 4 cups Powdered sugar
- 2 tablespoons Milk
Instructions
- Preheat Oven and Prepare Pans: Preheat your oven to 350°F (175°C). Grease two 9-inch round cake pans with butter and dust them lightly with flour to prevent the cake from sticking.
- Mix Dry Ingredients: In a large mixing bowl, sift together the all-purpose flour, cocoa powder, granulated sugar, baking soda, and salt to ensure a smooth, lump-free base.
- Combine Wet Ingredients: In a separate bowl, whisk together the vegetable oil, buttermilk, eggs, and red food coloring until fully incorporated and smooth.
- Combine Wet and Dry Mixtures: Gradually pour the wet ingredients into the dry ingredients, stirring gently with a spatula or spoon until just combined to avoid overmixing.
- Add Flavoring: Stir in the vanilla extract evenly throughout the batter.
- Divide Batter and Smooth: Pour the batter evenly into the prepared cake pans, smoothing the tops with a spatula for even baking.
- Bake the Cakes: Bake in the preheated oven for 25 to 30 minutes or until a toothpick inserted into the center comes out clean, indicating the cakes are done.
- Cool Cakes: Allow the cakes to cool in the pans for about 10 minutes, then carefully invert them onto a wire rack to cool completely before frosting.
- Make Cream Cheese Frosting: Beat cream cheese and unsalted butter together until smooth and creamy. Gradually add powdered sugar and continue beating until fluffy. Add milk as needed to adjust the consistency.
- Assemble Cake Layers: Place one cooled cake layer on a serving plate. Spread a generous amount of frosting over the top layer.
- Apply Crumb Coat: Add the second cake layer on top, then apply a thin crumb coat of frosting over the entire cake. Chill in the refrigerator for about 30 minutes to set.
- Frost and Serve: After chilling, apply a final smooth layer of frosting over the cake. Slice and serve at room temperature.
Notes
- Ensure all ingredients are at room temperature for best results.
- Do not overmix the batter to keep the cake tender.
- Red food coloring intensity can be adjusted based on preference.
- Chilling the cake after crumb coating helps to achieve a clean frosting finish.
- Store leftovers covered in the refrigerator to keep the cake fresh.


