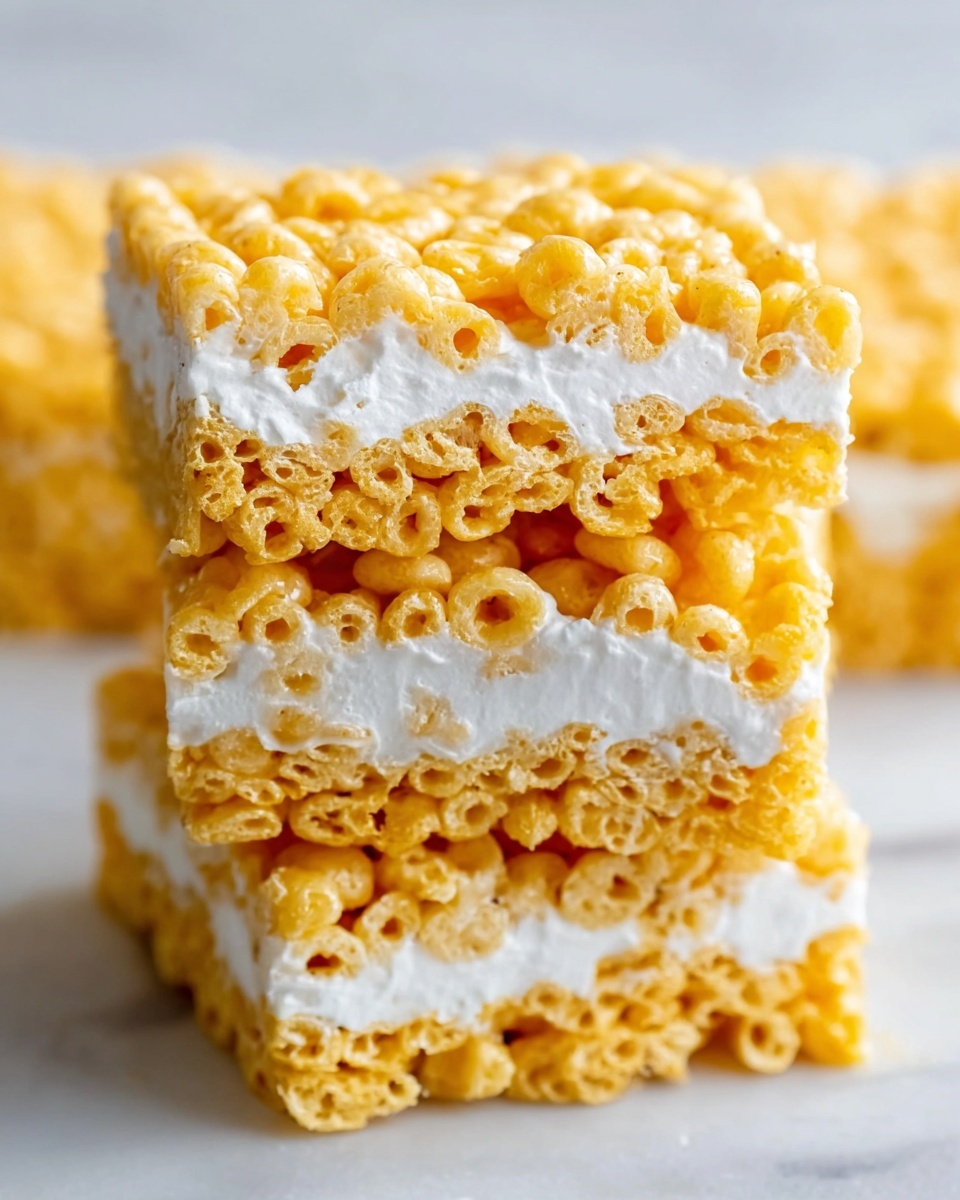
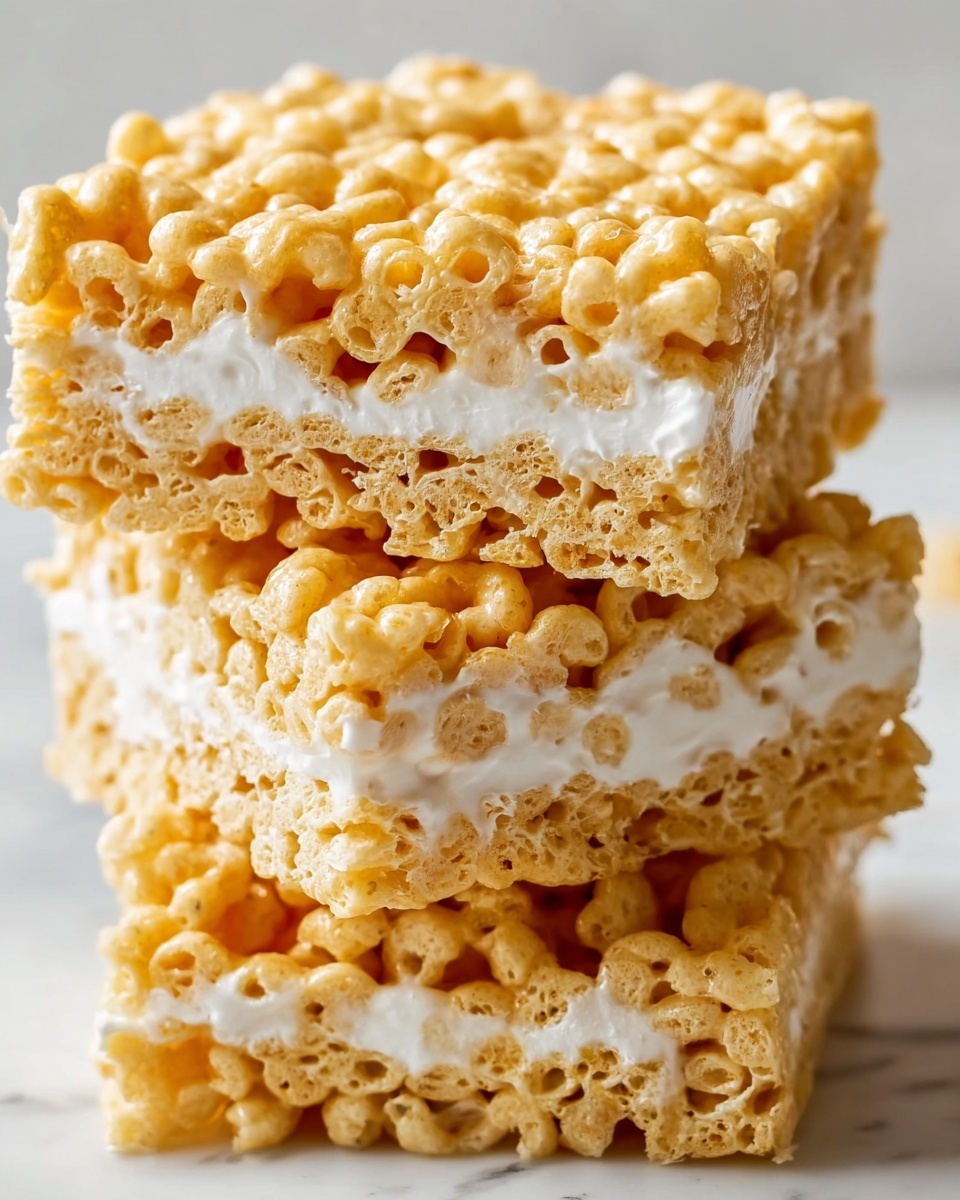
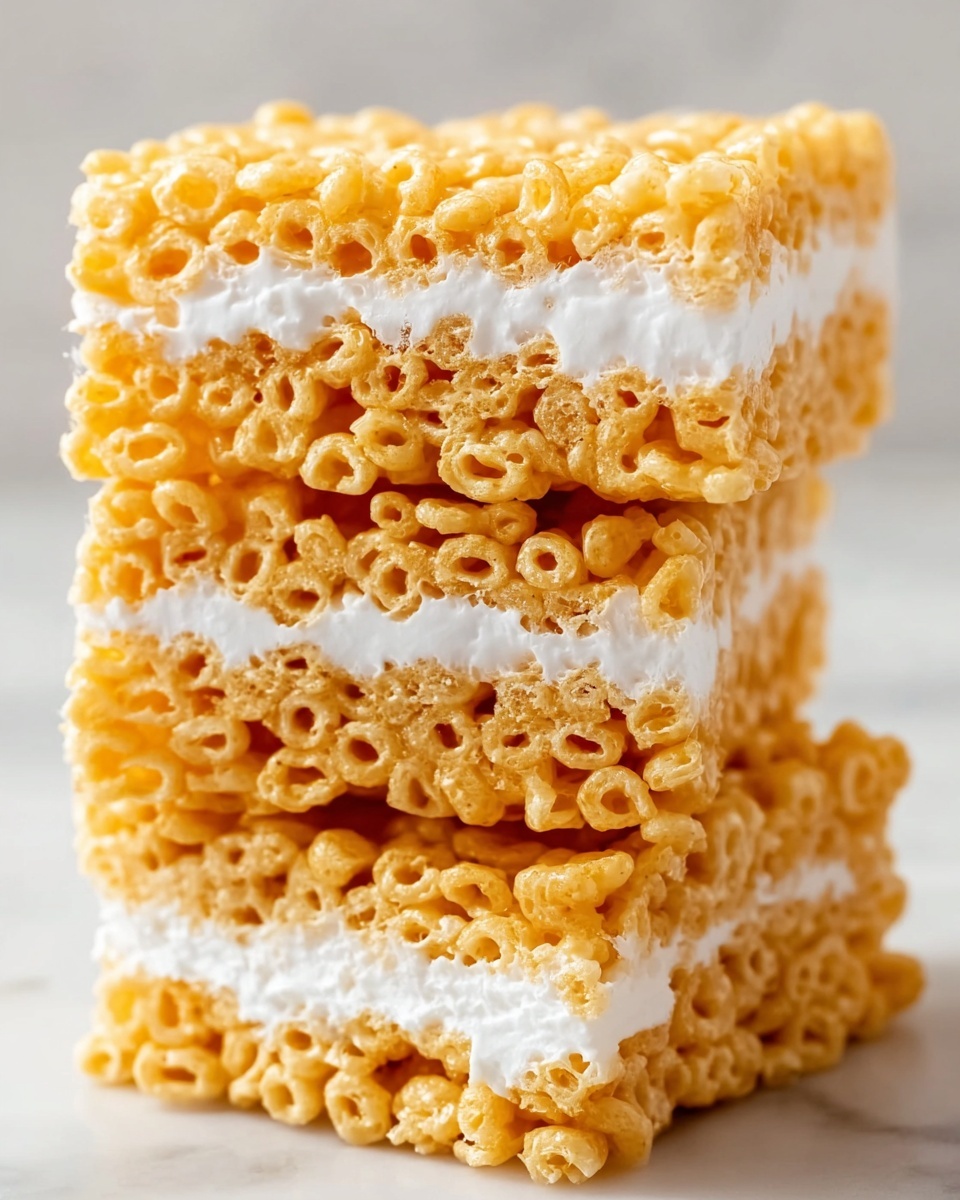
There is something truly magical about the Classic Homemade Rice Krispie Treats Recipe that instantly brings back childhood memories while delivering a perfect combination of crispy crunch and gooey sweetness. This timeless treat is not only incredibly simple to make but also irresistible in taste and texture. Whether you want a quick snack or a fun dessert to share, this recipe delivers that nostalgic, melt-in-your-mouth experience that everyone loves. The key lies in the simple harmony of butter, marshmallows, and Rice Krispies coming together to create a treat that’s light, chewy, and utterly delightful.
Ingredients You’ll Need
Every ingredient in this Classic Homemade Rice Krispie Treats Recipe plays a vital role in creating those perfect squares of joy. They are simple, easy to find, and highlight the beauty of classic flavors made from scratch.
- 6 cups Rice Krispies: The foundation of your treats, providing crunch and texture.
- 3 tablespoons Unsalted Butter: Adds richness and flavor to the treats while helping the marshmallows melt evenly.
- 10 ounces Mini Marshmallows: Provides sweetness and texture, melting down to hold the cereal together beautifully.
- 1 pinch Salt: Enhances the overall flavor and balances the sweetness perfectly.
How to Make Classic Homemade Rice Krispie Treats Recipe
Step 1: Prepare Your Workspace
Start by gathering all your ingredients and tools. You’ll need a large mixing bowl, a spatula, and a greased 9×13-inch baking pan. Setting up beforehand ensures a smooth process and lets you focus on creating those perfect treats.
Step 2: Melt the Butter
Place the unsalted butter in a large saucepan over low heat. Stir constantly to help it melt evenly and avoid any browning that could alter the delicate flavor. This gentle process sets the stage for the creamy marshmallow mixture that follows.
Step 3: Add the Mini Marshmallows
Once your butter is melted, add the mini marshmallows to the saucepan. Stir consistently until they are completely melted and smooth, creating that luscious, sticky base that will hug every Rice Krispie piece.
Step 4: Season with a Pinch of Salt
Remove the pan from the heat and stir in a pinch of salt. This small addition is the secret weapon that elevates the sweetness and rounds out the flavor profile to perfection.
Step 5: Fold in the Rice Krispies
Gradually add the Rice Krispies cereal to your marshmallow mixture. Gently fold them together with your spatula, making sure each crispy piece is coated but not crushed. This technique keeps your treats light and crunchy while perfectly bound by the marshmallow.
Step 6: Press into the Pan
Transfer the sticky mixture into the greased 9×13 baking pan. Press firmly and evenly with the spatula or your hands to compact the treats without squishing the cereal too much. This helps them hold their shape once cooled.
Step 7: Cool at Room Temperature
Let the treats rest for about 30 minutes at room temperature. This step allows them to set fully, making cutting and serving a breeze.
Step 8: Cut and Serve
Once cooled, slice your classic treats into squares or rectangles. Enjoy immediately or store in an airtight container to maintain their fresh, chewy-crisp texture.
How to Serve Classic Homemade Rice Krispie Treats Recipe
Garnishes
Although these treats are perfect all on their own, a sprinkle of rainbow nonpareils, a drizzle of melted chocolate, or a few mini marshmallows pressed on top can add a playful flair. These little touches make the treats look festive and inviting, perfect for parties or cozy evenings.
Side Dishes
Pair your Classic Homemade Rice Krispie Treats Recipe with a cold glass of milk or a steaming cup of hot cocoa for the ultimate nostalgic snack combo. For a fun twist, serve alongside fresh fruit to balance the sweetness with some juicy freshness.
Creative Ways to Present
Try using cookie cutters to shape the treats into stars, hearts, or other fun shapes for themed occasions. Wrapping individual squares in colorful parchment or cellophane tied with a ribbon turns these treats into charming homemade gifts that everyone will adore.
Make Ahead and Storage
Storing Leftovers
If you have any leftovers from your Classic Homemade Rice Krispie Treats Recipe, keep them fresh by storing in an airtight container at room temperature. Properly stored, they stay soft and chewy for up to 3 days—though if you ask me, they rarely last that long!
Freezing
You can freeze these treats by wrapping each piece tightly in plastic wrap and placing them in a freezer-safe bag or container. They can be kept frozen for up to 6 weeks. Thaw them at room temperature before serving for that freshly made texture.
Reheating
If you prefer your treats a little warm, microwave a piece for about 10-15 seconds. The marshmallows soften deliciously, enhancing that gooey, freshly-made feel without sacrificing the crispness of the cereal.
FAQs
Can I use a different type of cereal?
Absolutely! While Rice Krispies are classic and ideal for this recipe, you can experiment with similar puffed rice cereals or even cornflakes for a different texture and flavor. Just keep in mind that the melt and bind capability may vary slightly.
How do I prevent my treats from being sticky?
To avoid overly sticky treats, be sure to press the mixture firmly into the pan and allow it to cool completely. Using unsalted butter and the right amount of marshmallows ensures the perfect chewy but not wet consistency.
Can I add mix-ins like chocolate chips or nuts?
Yes! Stir in chocolate chips, chopped nuts, or even dried fruit after the marshmallows have melted for extra texture and flavor. Just fold gently so you don’t crush the cereal.
What’s the best way to cut the treats without them sticking to the knife?
Use a buttered or slightly oiled knife to slice your treats. This helps the blade glide through cleanly, preventing sticking and tearing.
Are Rice Krispie treats gluten-free?
Traditional Rice Krispies contain malt flavoring derived from barley, which is not gluten-free. However, there are gluten-free puffed rice cereals available that work wonderfully if you need a gluten-free version of this classic recipe.
Final Thoughts
Making the Classic Homemade Rice Krispie Treats Recipe is a delightful way to enjoy a quick, nostalgic treat that never fails to impress. Easy ingredients, simple steps, and endless serving possibilities make this recipe a must-have in your dessert repertoire. So grab your marshmallows and cereal, and get ready to create some sweet memories!
Print
Classic Homemade Rice Krispie Treats Recipe
- Prep Time: 15 minutes
- Cook Time: 10 minutes
- Total Time: 55 minutes
- Yield: 12 servings
- Category: Dessert
- Method: Stovetop
- Cuisine: American
Description
Classic Homemade Rice Krispie Treats are a simple, nostalgic dessert made by combining crispy Rice Krispies cereal with melted marshmallows and butter. These sweet, gooey treats are easy to prepare, require minimal ingredients, and are perfect for parties, snacks, or anytime you crave a delightful crunchy and chewy bite.
Ingredients
Ingredients
- 6 cups Rice Krispies cereal
- 3 tablespoons unsalted butter
- 10 ounces mini marshmallows
- 1 pinch salt
Instructions
- Prepare Workspace: Gather all ingredients and essential tools such as a large mixing bowl, spatula, and grease a 9×13-inch baking pan to prevent sticking.
- Melt Butter: In a large saucepan over low heat, melt the unsalted butter while stirring constantly to ensure it does not brown.
- Add Marshmallows: Once the butter is fully melted, add the mini marshmallows and continue stirring until they are completely melted and the mixture is smooth.
- Add Salt: Remove the saucepan from heat and stir in a pinch of salt to enhance the flavor balance.
- Mix Cereal: Gradually add the Rice Krispies cereal into the marshmallow mixture. Fold gently with a spatula to thoroughly coat the cereal without crushing it.
- Press into Pan: Transfer the cereal mixture into the prepared baking pan and press it down firmly and evenly to create an even layer.
- Cool: Let the treats cool at room temperature for approximately 30 minutes until they are set.
- Slice and Serve: Cut into squares or rectangles and serve immediately, or store in an airtight container to maintain freshness.
Notes
- For easier handling, lightly grease your spatula or hands before pressing the mixture into the pan.
- You can add a teaspoon of vanilla extract for a flavor boost.
- Store leftovers in an airtight container at room temperature for up to 3 days to keep treats soft.
- To make larger or smaller portions, adjust the pan size and ingredient quantities accordingly.


