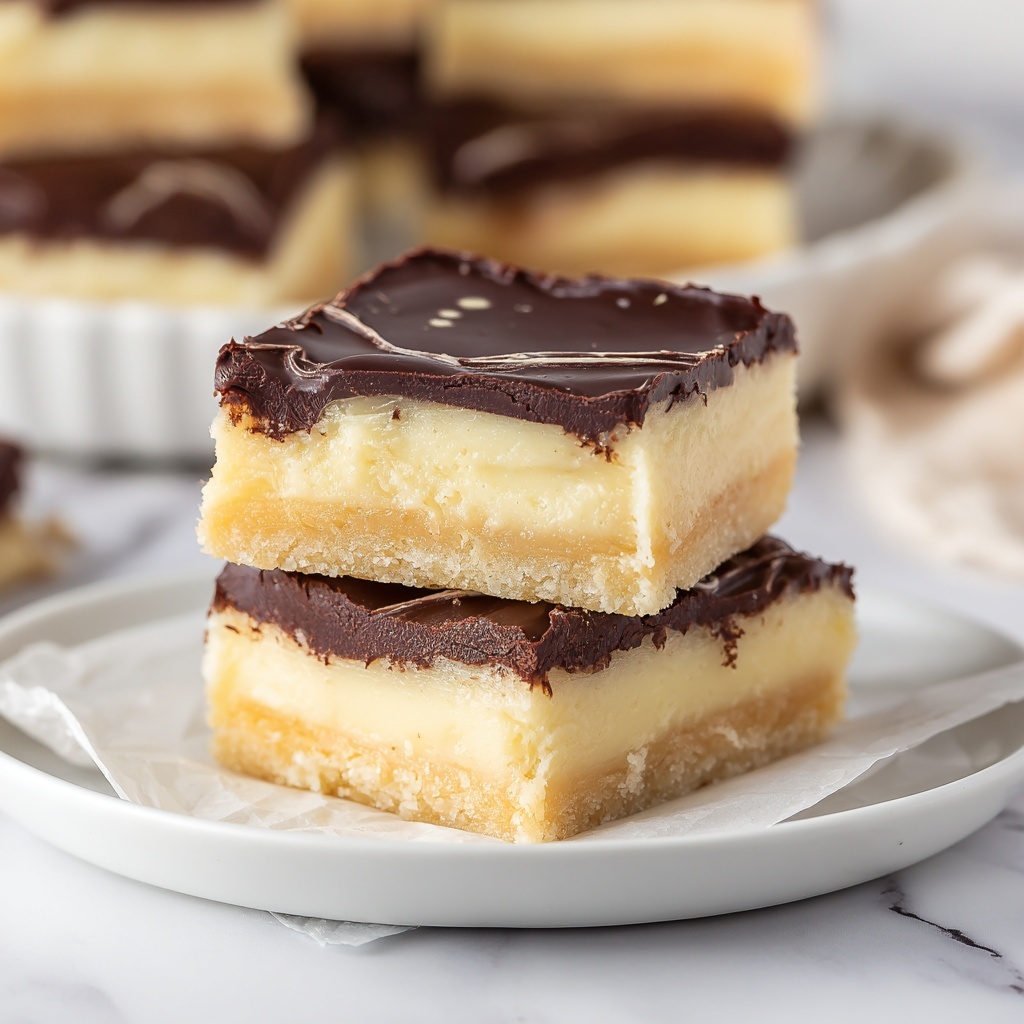
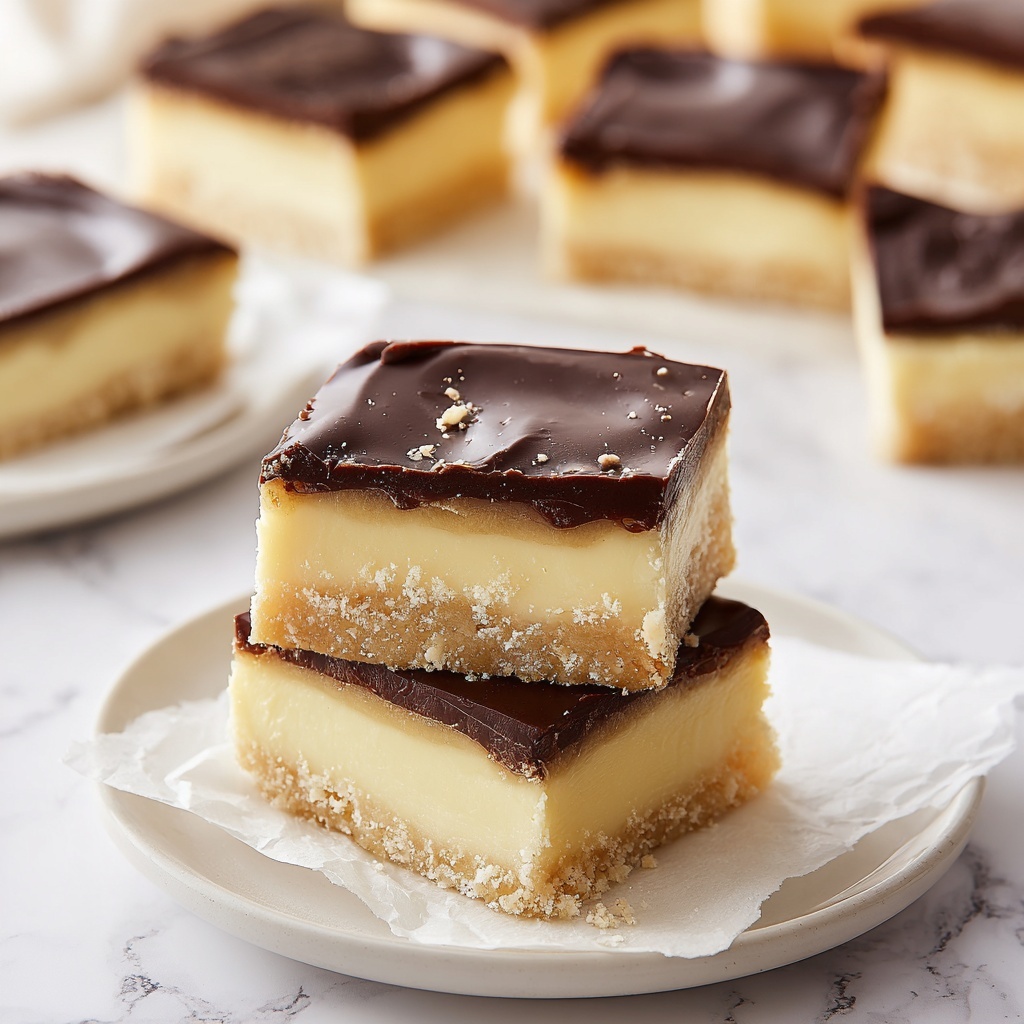
If you adore the classic flavors of a Boston cream pie but want something quicker, easier, and just as indulgent, then you’re in for a treat with this Boston Cream Pie Fudge Recipe. This luscious fudge captures everything you love about the original dessert—silky white chocolate vanilla, rich semi-sweet chocolate, and a hint of creamy sweetness packed into every bite. It’s an irresistible twist that combines the best elements of cake and pie into a bite-sized confection that’s perfect for gifting, snacking, or impressing friends without breaking a sweat.
Ingredients You’ll Need
This Boston Cream Pie Fudge Recipe is delightfully straightforward, relying on a handful of simple but essential ingredients. Each one brings something special to the party, from the smooth texture of sweetened condensed milk to the deep layers of vanilla and chocolate flavor.
- White chocolate chips: Provide the sweet, creamy vanilla fudge base that mimics the cake’s filling perfectly.
- Semi-sweet chocolate chips: Bring rich cocoa intensity, balancing the sweetness with a classic chocolate fudge layer.
- Sweetened condensed milk: A key ingredient that ensures the fudge stays silky smooth and melts in your mouth.
- Vanilla extract: Adds aromatic warmth that enhances the vanilla cream notes typical of Boston cream pie.
- Parchment paper: For easy removal of the fudge from the pan without messy clean-up.
How to Make Boston Cream Pie Fudge Recipe
Step 1: Prepare Your Pan
Start by lining an 8×8-inch square baking pan with parchment paper. Let the paper overhang the edges so you can lift out the fudge easily when it’s set. This simple prep step saves so much time later and guarantees clean, neat pieces.
Step 2: Make the Vanilla Fudge Layer
In a microwave-safe bowl, combine the white chocolate chips and 1/2 cup of sweetened condensed milk. Heat the mixture in 20-second intervals, stirring each time to ensure it melts evenly and becomes a smooth vanilla fudge base. Once glossy and lump-free, stir in the vanilla extract for that dreamy Boston cream pie flavor.
Step 3: Chill the Vanilla Layer
Pour the vanilla fudge into the prepared pan and smooth it into an even layer. Pop the pan in the refrigerator for about 20 minutes to let it firm up but not become rock hard; you want a stable base for the chocolate layer.
Step 4: Make the Chocolate Fudge Layer
While the vanilla layer chills, repeat the melting process with the semi-sweet chocolate chips and the remaining 1/2 cup of sweetened condensed milk in a separate microwave-safe bowl. Again, heat in 20-second bursts and stir until silky smooth. Stir in the vanilla extract to add that subtle richness that perfectly complements the white chocolate vanilla layer.
Step 5: Add the Chocolate Layer and Chill
Pour the chocolate fudge on top of the slightly set vanilla base and spread it evenly. Return the pan to the refrigerator and let the fudge chill for at least 2 hours, until both layers firm up completely and are ready to cut.
Step 6: Slice and Serve
Use the parchment paper overhang to lift the fudge out of the pan easily. Cut into 16 decadent squares, and get ready to delight yourself and everyone around you with these rich, creamy, and luxurious bites.
How to Serve Boston Cream Pie Fudge Recipe

Garnishes
For an extra pop of flavor and presentation, sprinkle a few crushed graham crackers or cookie crumbs over the top before chilling the chocolate layer. A light dusting of cocoa powder or a drizzle of caramel sauce also pairs beautifully with this fudge, mimicking that final touch on a Boston cream pie.
Side Dishes
This fudge shines as a sweet ending to a potluck, afternoon tea, or holiday dessert spread. Pair it with coffee, chai tea, or even a glass of dessert wine to complement its rich flavors. Fresh berries on the side add a refreshing contrast to the fudge’s creamy texture.
Creative Ways to Present
Elevate your Boston Cream Pie Fudge Recipe by serving each square in mini cupcake liners or arranging them on a tiered dessert stand for festive gatherings. Wrapping individual pieces in cellophane tied with twine makes lovely, thoughtful treats for friends and neighbors. You can even create a fudge ‘platter’ by mixing pieces with complementary candies or nuts.
Make Ahead and Storage
Storing Leftovers
Leftover fudge keeps wonderfully in an airtight container in the refrigerator for up to 2 weeks. Properly stored, it maintains its creamy texture and rich flavor, so you can enjoy it over time without any loss in quality.
Freezing
If you want to keep your Boston Cream Pie Fudge Recipe fresh for longer, freeze it! Wrap individual squares tightly in plastic wrap and place them in a freezer-safe container or bag. Frozen fudge can last up to 3 months. Thaw in the refrigerator before serving to preserve the texture.
Reheating
This fudge is typically served cold or at room temperature, so reheating isn’t required. However, if you do want a softer texture, leave the squares out at room temperature for about 15 minutes before serving. Avoid microwaving, as it may cause unwanted melting or graininess.
FAQs
Can I use dark chocolate instead of semi-sweet chocolate chips?
Absolutely! Dark chocolate will give your Boston Cream Pie Fudge Recipe a deeper, more intense cocoa flavor. Just be mindful that it’s less sweet, so you might want to adjust the amount of sweetened condensed milk slightly to keep the right balance.
Is this fudge recipe suitable for beginners?
Yes, it’s one of the easiest fudge recipes you’ll find. The microwave melting method simplifies the process, and the minimal ingredients keep things straightforward. Plus, the two-layer effect looks impressive without complicated steps.
Can I substitute the sweetened condensed milk?
Sweetened condensed milk is crucial for that creamy, fudgy texture. Substituting it might significantly change the consistency. If you want a dairy-free version, look for condensed coconut milk, but results can vary.
How long does the fudge take to set properly?
The vanilla layer needs about 20 minutes to firm up enough for the chocolate layer to go on top. Then, letting the entire fudge chill for at least 2 hours ensures it sets fully and slices cleanly.
Can I add other flavors or mix-ins?
Yes! Some fun additions include a teaspoon of coffee extract in the chocolate layer for a mocha twist or a handful of crushed nuts within the vanilla layer for added crunch. Just fold them in gently after melting and before pouring.
Final Thoughts
This Boston Cream Pie Fudge Recipe is a beautiful and delicious homage to a classic dessert, made easy and shareable through fudge. Whether you’re indulging yourself or looking for a show-stopping treat to impress your loved ones, this recipe is sure to become a beloved favorite. Give it a try—you’ll be amazed how such simple ingredients can create such unforgettable flavor and joy.
Print
Boston Cream Pie Fudge Recipe
- Prep Time: 15 minutes
- Cook Time: 10 minutes
- Total Time: 2 hours 25 minutes
- Yield: 16 servings
- Category: Dessert
- Method: No-Cook
- Cuisine: American
Description
Indulge in the rich, creamy decadence of Boston Cream Pie Fudge, a delightful twist on the classic dessert. This layered fudge combines a smooth vanilla white chocolate base with a luscious semi-sweet chocolate topping, offering a perfect balance of flavors. Easy to prepare and no-bake, it’s the perfect treat for gatherings or a sweet snack anytime.
Ingredients
Vanilla Fudge Layer
- 2 cups white chocolate chips
- 1/2 cup sweetened condensed milk
- 1 teaspoon vanilla extract
Chocolate Fudge Layer
- 1 1/2 cups semi-sweet chocolate chips
- 1/2 cup sweetened condensed milk
- 1/2 teaspoon vanilla extract
Instructions
- Prepare the pan: Line an 8×8-inch square baking pan with parchment paper, leaving extra overhang on the sides to easily lift out the fudge once set.
- Make the vanilla fudge layer: In a microwave-safe bowl, combine the white chocolate chips and 1/2 cup of sweetened condensed milk. Microwave at 20-second intervals, stirring thoroughly between each, until the mixture is smooth and fully melted.
- Add vanilla to vanilla fudge: Stir in 1 teaspoon of vanilla extract, mixing well to incorporate the flavor evenly.
- Set the vanilla layer: Pour the smooth vanilla fudge mixture evenly into the prepared pan and refrigerate for 20 minutes to start setting.
- Make the chocolate fudge layer: While the vanilla layer chills, combine the semi-sweet chocolate chips with 1/2 cup sweetened condensed milk in a microwave-safe bowl. Heat in 20-second increments, stirring after each, until smooth and melted.
- Add vanilla to chocolate fudge: Stir in 1/2 teaspoon vanilla extract, blending well to enhance flavor.
- Layer chocolate fudge: Pour the chocolate fudge evenly over the chilled vanilla fudge layer, spreading gently to cover the surface.
- Chill to set: Refrigerate the layered fudge for at least 2 hours or until completely firm and set.
- Serve: Use the parchment overhang to lift the fudge out of the pan. Cut into 16 equal squares and serve chilled for the perfect creamy and chocolatey bite.
Notes
- Ensure stirring between microwave intervals to prevent burning and achieve a smooth texture.
- Use fresh vanilla extract for the best flavor.
- The fudge can be stored in an airtight container in the refrigerator for up to one week.
- Allow fudge to come to room temperature briefly before serving for softer texture if desired.
- Adjust sweetness by selecting your preferred chocolate chips brands or types.


