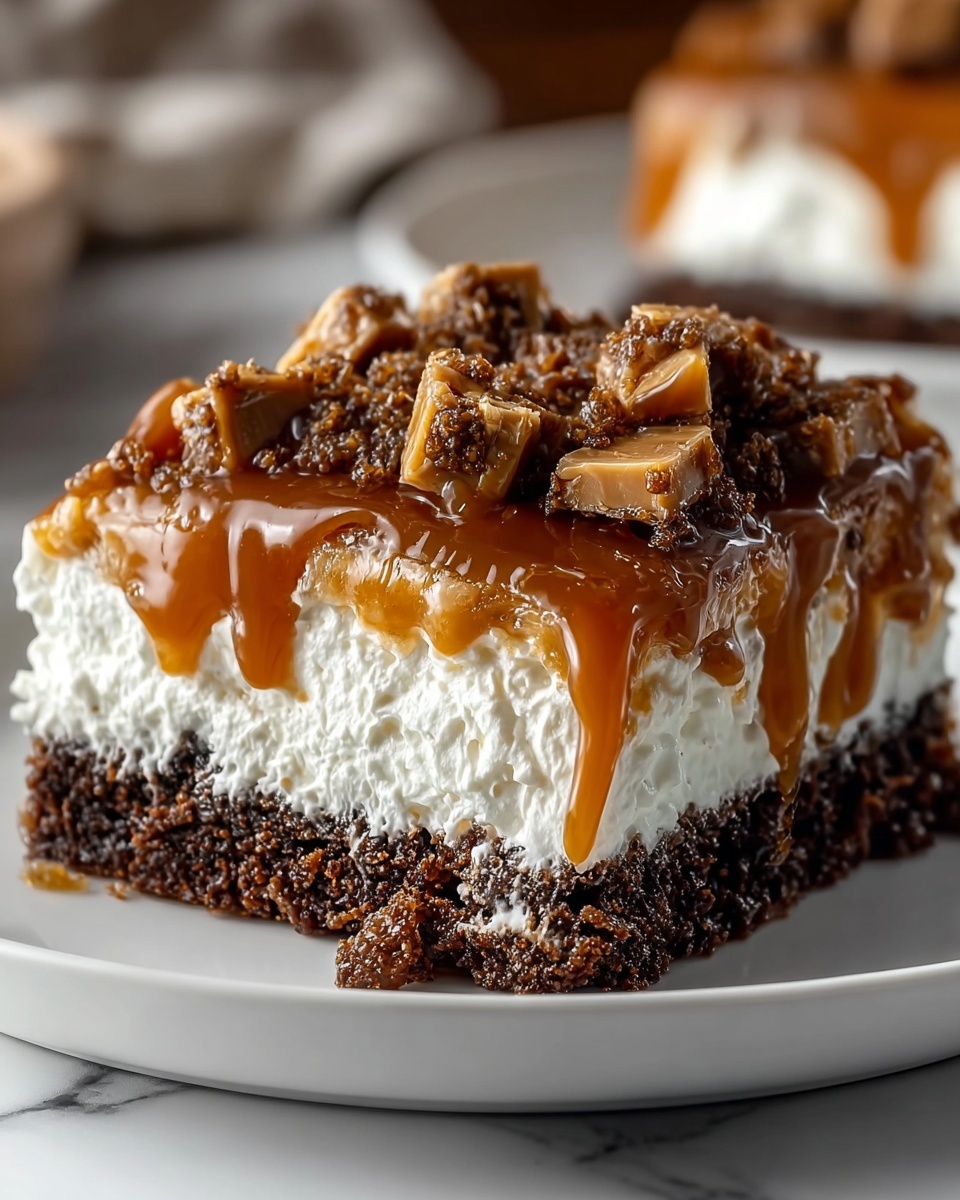
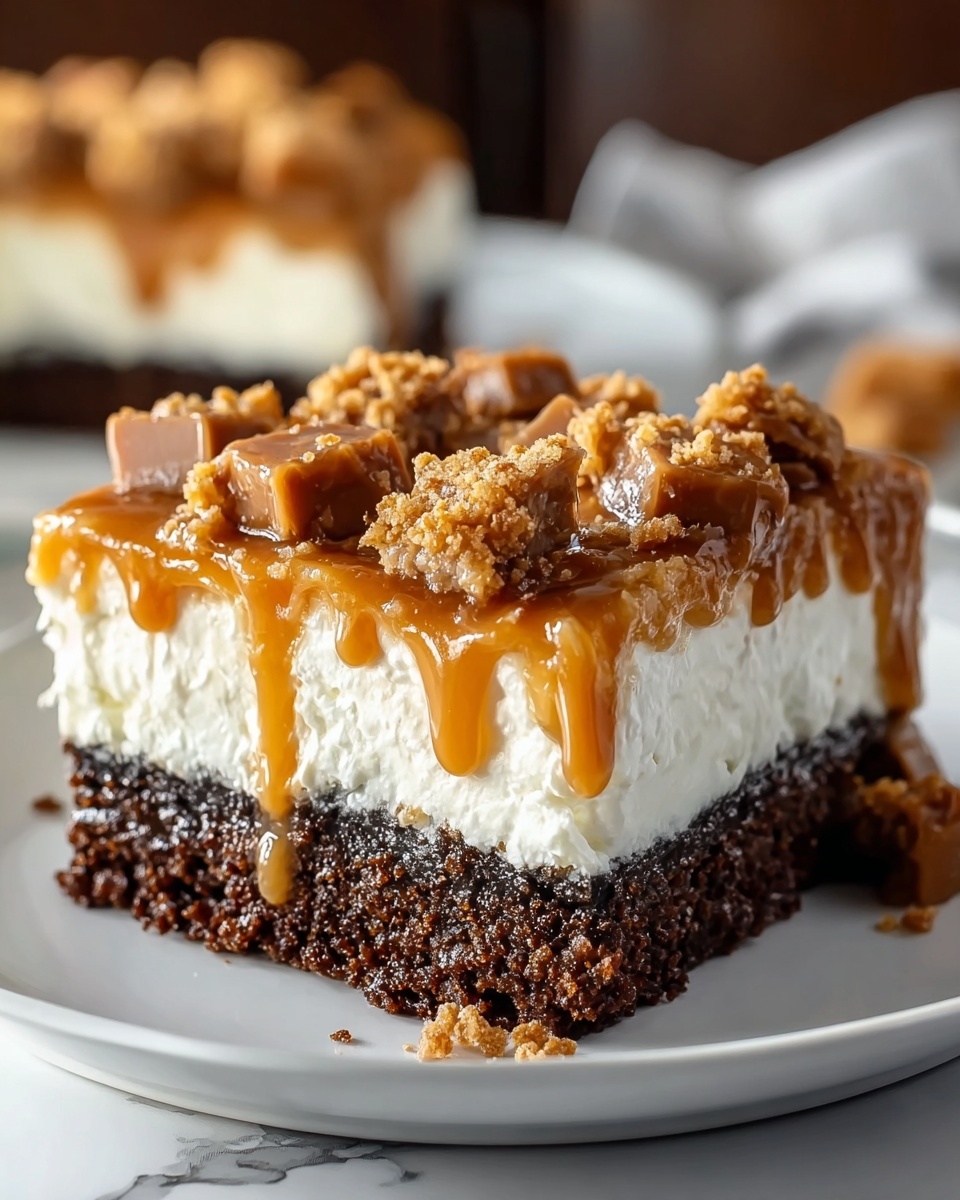
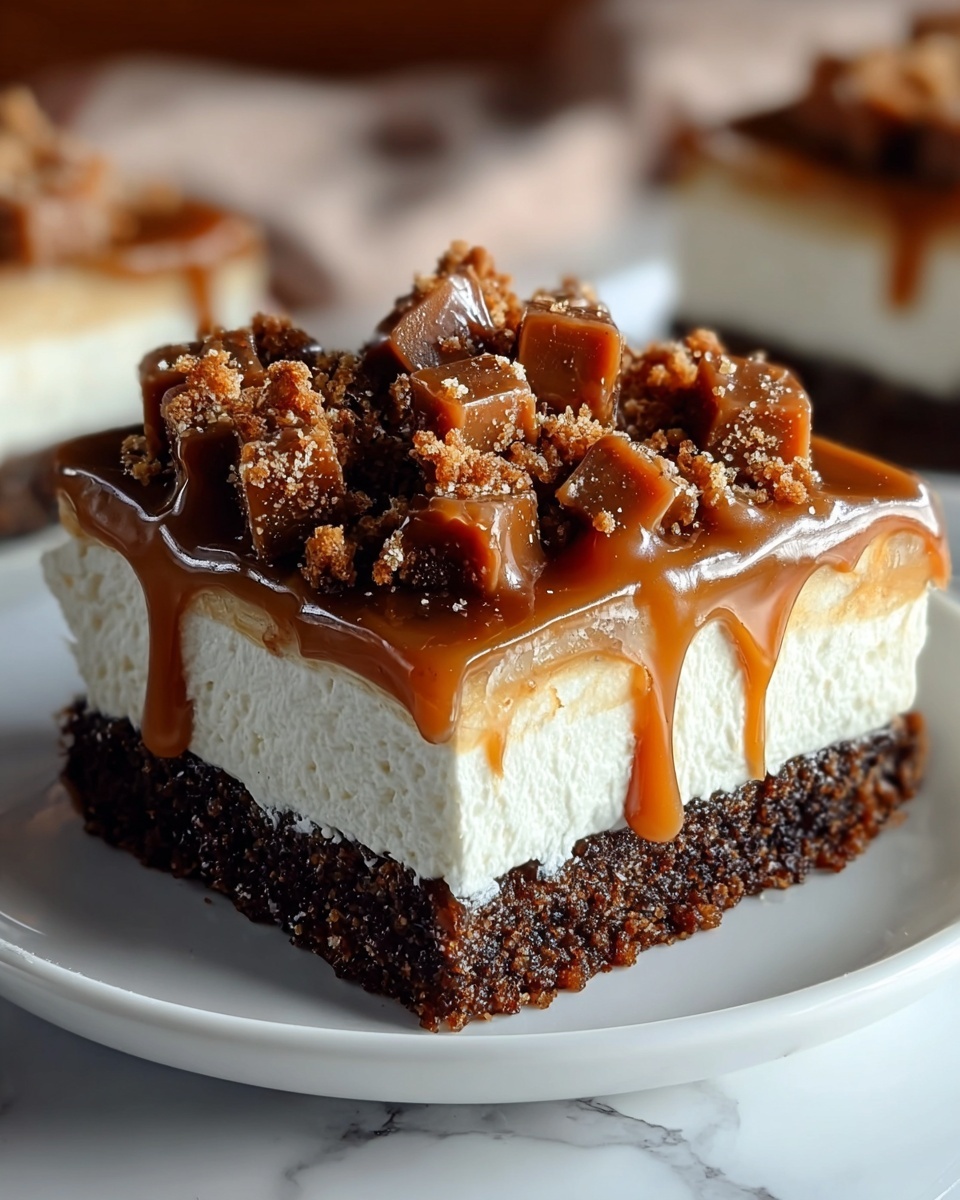
If you are on the hunt for a show-stopping dessert that blends nostalgic candy bar crunch with a moist, rich chocolate base, then this Butterfinger Candy Bar Poke Cake Recipe is exactly what you need. Imagine a deeply chocolate cake soaked with a luscious caramel and sweetened condensed milk mixture, topped with fluffy whipped cream and a generous sprinkle of crunchy Butterfinger bits. It’s a delightful celebration of textures and flavors that will have everyone asking for seconds. Once you try this recipe, it’s bound to become a cherished favorite at your gatherings or a comforting treat to brighten any day.
Ingredients You’ll Need
This Butterfinger Candy Bar Poke Cake Recipe uses straightforward ingredients that almost everyone has access to, yet each plays a vital role in creating the cake’s irresistible taste and texture. The chocolate cake mix provides a moist, tender foundation, while the caramel and sweetened condensed milk bring a rich, gooey sweetness that soaks through every bite. The whipped topping adds softness and lightness, and the Butterfinger pieces are all about that iconic crunchy, nutty finish.
- Chocolate cake mix: The base of this dessert which offers a rich, chocolaty flavor and tender crumb.
- Eggs, oil, and water (as per cake mix instructions): Essential for baking the cake to perfection with just the right moisture.
- Sweetened condensed milk (14 oz can): Adds creamy sweetness that seeps into the cake’s holes, making each bite extra luscious.
- Caramel sauce (12 oz jar): Brings a buttery, smooth caramel flavor that balances the chocolate.
- Whipped topping (8 oz, thawed): Offers a light, fluffy layer to contrast the rich gooeyness below.
- Butterfinger candy bars (4-5 bars, crushed): The star crunchy topping with a perfect peanut butter crispness to finish the cake.
How to Make Butterfinger Candy Bar Poke Cake Recipe
Step 1: Bake the Chocolate Cake
Start by preparing the chocolate cake according to the box instructions. Use a 9×13-inch pan for the best results, baking it until a toothpick comes out clean. Allow the cake to cool just around 10 minutes so it’s still warm but not hot. This warm stage is key for the next step to work perfectly.
Step 2: Poke the Cake
Take the handle of a wooden spoon and gently poke holes all over the surface of the cake. These holes will allow the sweet, sticky filling to soak inside, making every bite incredibly moist and flavorful. Make sure to space them evenly and create generous-size holes so the next step’s sauce penetrates fully.
Step 3: Pour the Filling
In a small bowl, whisk together the sweetened condensed milk and caramel sauce until smooth and well combined. Pour this heavenly mixture slowly and evenly over the cake, watching it seep magnetically into every hole you poked earlier. Then, allow the cake to cool completely so the filling can settle and infuse the cake with lusciousness.
Step 4: Spread the Whipped Topping
Once the cake has cooled to room temperature, spread the thawed whipped topping evenly across the surface. This layer adds a cloud-like softness that perfectly complements the gooey caramel-soaked cake beneath. Smooth it gently with a spatula but don’t overwork it—you want it light and fluffy.
Step 5: Add the Butterfinger Crunch
Crush the Butterfinger candy bars into small chunks or bits and sprinkle them generously on top of the whipped topping. This final touch creates the irresistible crunchy texture and introduces that classic Butterfinger flavor, elevating this poke cake to candy bar greatness.
Step 6: Chill Before Serving
Refrigerate your Butterfinger Candy Bar Poke Cake Recipe for at least one hour before slicing and serving. Chilling allows all the flavors to meld beautifully and the cake to fully set, making each slice neat and packed with flavor.
How to Serve Butterfinger Candy Bar Poke Cake Recipe
Garnishes
For an eye-catching finish, consider adding a few extra crushed Butterfinger pieces just before serving to keep them crunchy. A drizzle of extra caramel sauce or a light dusting of cocoa powder can add festive flair and deepen the chocolate notes.
Side Dishes
This poke cake stands beautifully on its own but pairing it with a scoop of vanilla ice cream or a dollop of fresh whipped cream makes the experience even more indulgent. Fresh berries like raspberries can add a juicy brightness that contrasts with the cake’s rich sweetness.
Creative Ways to Present
Want to impress your guests? Serve the cake in individual clear glass cups layered with extra caramel sauce and whipped topping on the side. Or, transform leftovers into an irresistible trifle by layering cake cubes, whipped cream, and Butterfinger pieces in a large bowl for a crowd-pleasing dessert display.
Make Ahead and Storage
Storing Leftovers
Leftover Butterfinger Candy Bar Poke Cake Recipe is best stored tightly covered in the refrigerator. It will stay moist and flavorful for up to 3 days, making it perfect for prepping ahead or enjoying the next day.
Freezing
You can freeze the cake wrapped well in plastic wrap and aluminum foil for up to 1 month. Thaw overnight in the fridge before serving to maintain that signature soft and gooey texture.
Reheating
This cake is best enjoyed cold or at room temperature, so reheating is not recommended as it can affect the whipped topping and caramel consistency. Just pop it out of the fridge a few minutes ahead of serving for the best taste.
FAQs
Can I use homemade chocolate cake instead of mix?
Absolutely! A homemade chocolate cake works wonderfully in this recipe and can add a personal touch. Just make sure it’s baked in a 9×13-inch pan and cooled slightly before poking and pouring the filling.
Is there a substitute for the whipped topping?
If you prefer, use homemade whipped cream or mascarpone frosting for a richer, more decadent topping. Just keep it light enough to balance the gooey layers beneath.
How many Butterfinger bars should I use?
Using 4-5 bars as directed gives a perfect balance of candy crunch on every slice. Feel free to adjust based on how much crunch you want!
Can I make this cake gluten-free?
To adapt this recipe for gluten sensitivity, use a gluten-free chocolate cake mix. The other ingredients are naturally gluten-free, but always double-check labels to be safe.
How long does this cake last in the fridge?
Stored properly in an airtight container, the cake stays fresh for up to 3 days, but it’s best enjoyed within 24-48 hours to savor the peak flavor and texture.
Final Thoughts
This Butterfinger Candy Bar Poke Cake Recipe is a dreamy combination of simplicity and indulgence that’s perfect for anyone who loves chocolate and candy bars. I truly hope you give it a try and watch it become the star dessert, bringing smiles and buttery sweet satisfaction to your table. It’s fun to make, delicious to eat, and guaranteed to be a crowd-pleaser every time!
Print
Butterfinger Candy Bar Poke Cake Recipe
- Prep Time: 15 minutes
- Cook Time: 30 minutes
- Total Time: 1 hour 45 minutes
- Yield: 12 servings
- Category: Dessert
- Method: Baking
- Cuisine: American
Description
This Butterfinger Candy Bar Poke Cake is a decadent chocolate dessert featuring a moist chocolate cake infused with a rich caramel and sweetened condensed milk mixture. Topped with fluffy whipped topping and crushed Butterfinger candy bars, this cake offers a delightful combination of creamy, crunchy, and chocolaty textures, perfect for any celebration or sweet craving.
Ingredients
Cake Mix
- 1 box chocolate cake mix (plus ingredients listed on the box: eggs, oil, and water)
Filling
- 1 can (14 oz) sweetened condensed milk
- 1 jar (12 oz) caramel sauce
Topping
- 1 container (8 oz) whipped topping (like Cool Whip), thawed
- 4–5 Butterfinger candy bars, crushed
Instructions
- Prepare the Cake: Prepare the chocolate cake according to the package directions in a 9×13-inch baking dish. Once baked, allow the cake to cool for about 10 minutes.
- Poke Holes in Cake: Using the handle of a wooden spoon, poke holes all over the surface of the cake. Make sure the holes are large enough to allow the filling to seep into the cake.
- Mix and Pour Filling: In a small bowl, mix the sweetened condensed milk and caramel sauce together. Pour this mixture evenly over the cake, ensuring it fills the holes. Let the cake cool completely.
- Spread Whipped Topping: Once the cake has cooled, spread the thawed whipped topping evenly over the surface of the cake.
- Add Crushed Butterfinger: Crush the Butterfinger candy bars and sprinkle them generously over the whipped topping.
- Chill Before Serving: Refrigerate the cake for at least 1 hour before serving to allow the flavors to meld and the cake to set.
Notes
- This cake is best served chilled for the ideal texture and flavor.
- Ensure the cake is slightly warm but not hot when poking holes for easier hole formation.
- Use a good-quality caramel sauce for richer flavor.
- Store leftovers covered in the refrigerator for up to 3 days.
- To crush Butterfinger candy bars easily, place them in a sealed bag and gently crush with a rolling pin.


