
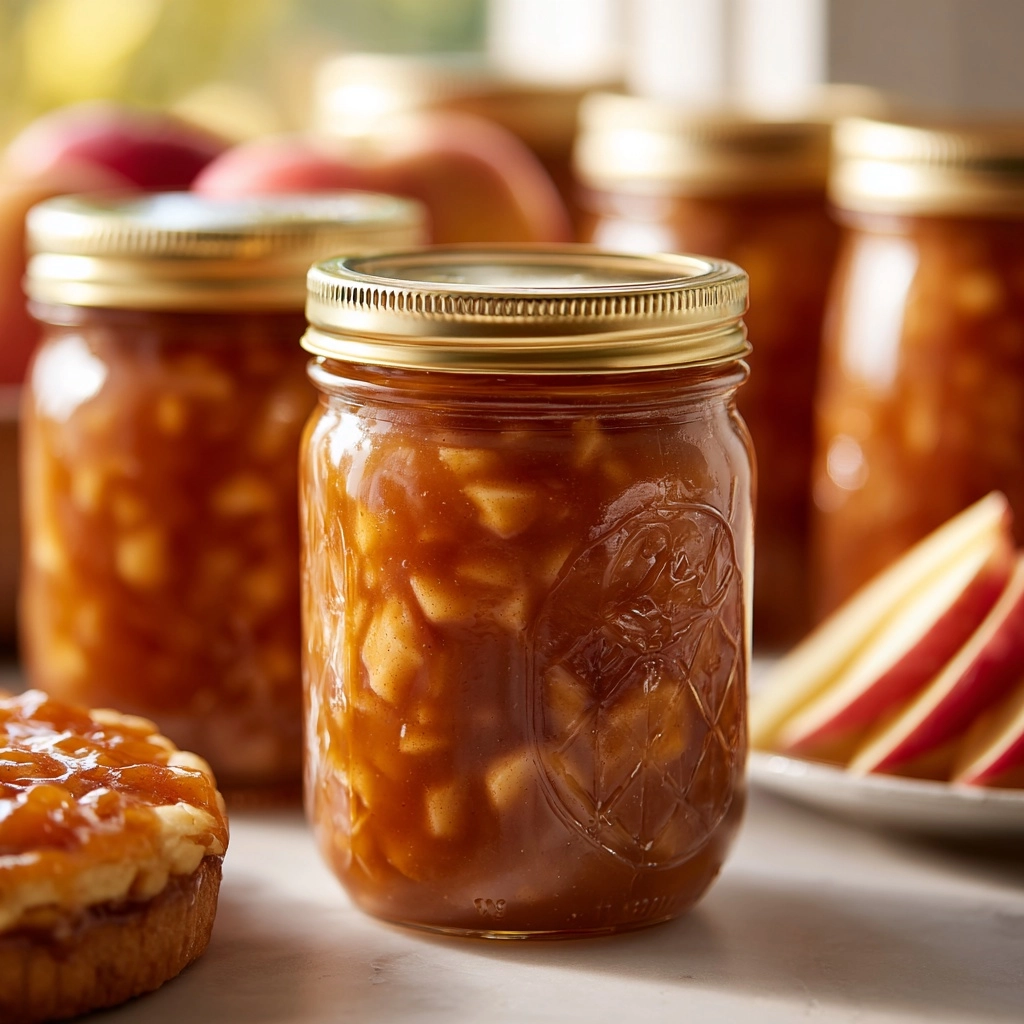
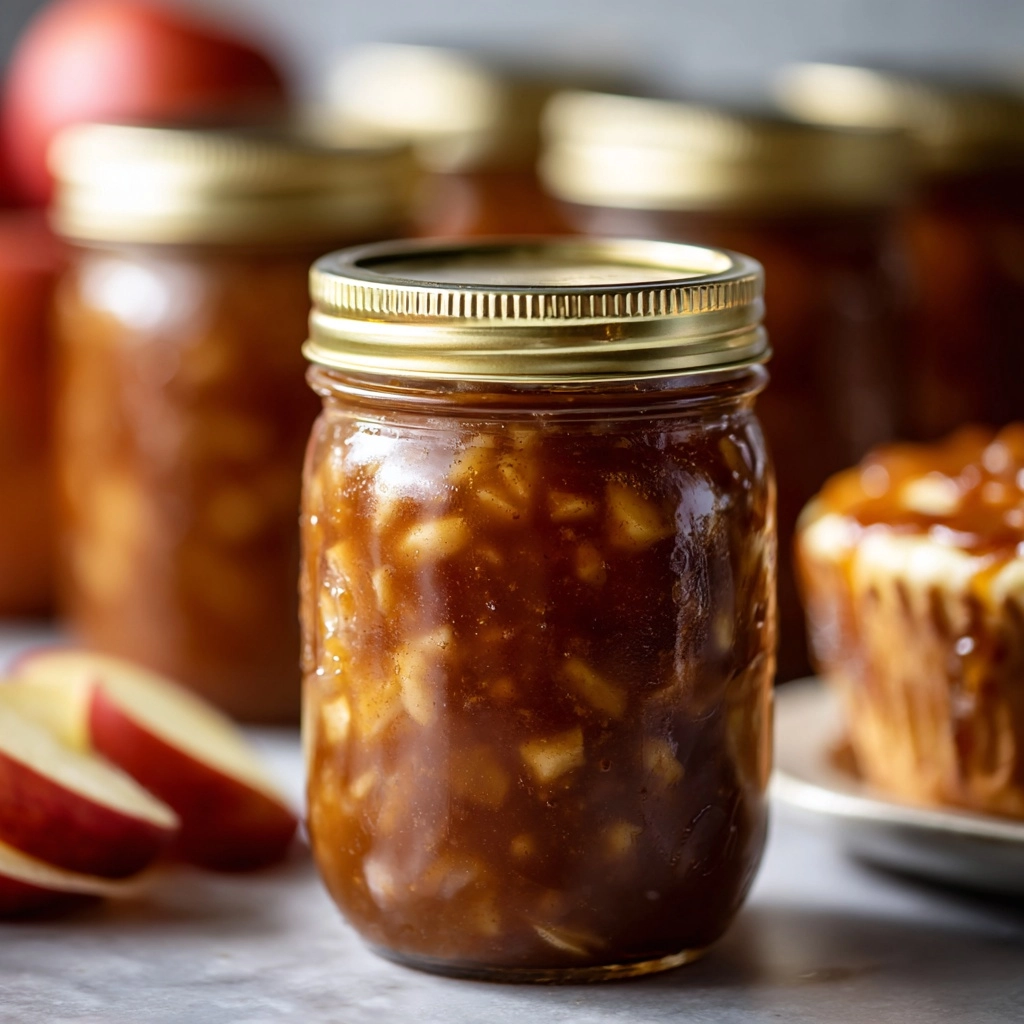
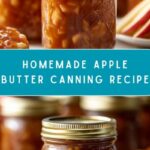
If you love capturing the sweet, spiced flavors of fall in a jar, Canning Apple Butter is a must-try tradition. Lusciously smooth and deeply fragrant, this homemade apple butter brings together the best apples of the season in a slow-cooked symphony of cinnamon, clove, and vanilla. It’s an old-fashioned treat that’s incredibly satisfying to make, perfect for gifting, and so much more versatile than jam. Whether you spread it on warm toast or swirl it into oatmeal, the comforting taste of Canning Apple Butter will instantly brighten your kitchen and your day.
Ingredients You’ll Need
Gathering these simple but flavorful ingredients is the first step to making truly memorable Canning Apple Butter. Each item plays a key role, creating a rich color, silky texture, and the cozy essence everyone craves from this classic spread.
- Apples: A mix of sweet and tart apples like Fuji and Granny Smith will balance out the flavor and ensure your apple butter has depth and complexity.
- Granulated sugar: Adds sweetness and helps the apples cook down beautifully without becoming too sticky or overpoweringly sweet.
- Brown sugar: Brings a hint of caramel in every bite and deepens the color.
- Ground cinnamon: Gives your apple butter that unmistakable autumn aroma everyone loves.
- Ground cloves: Just a touch adds warming spice that lingers pleasantly.
- Ground nutmeg: Enhances the spices and layers in extra warmth to the overall flavor.
- Salt: A pinch balances out the sweetness and brightens every bite.
- Lemon juice: Preserves freshness, adds brightness, and helps the apple butter keep its beautiful color without darkening too much.
- Vanilla extract: Rounds out the flavors with a mellow, comforting finish.
How to Make Canning Apple Butter
Step 1: Prep Your Apples
This is where the magic starts! Wash, core, and chop your apples. If you want silky-smooth apple butter, peel them first; if you love that hint of rustic texture and extra fiber, leave the peels on. Using both tart and sweet varieties infuses the final product with layered, complex flavors that make every spoonful a delight.
Step 2: Layer and Mix in the Slow Cooker
Toss your chopped apples into a large slow cooker. Sprinkle over the granulated sugar, brown sugar, cinnamon, cloves, nutmeg, and salt. Give everything a good stir—this ensures every apple is dusted in those cozy flavors. As the apples cook down, they’ll absorb all the spice and sweetness, creating that signature apple butter taste you know and love.
Step 3: Slow Cook to Perfection
Set the slow cooker on low, pop the lid on, and let the apples work their magic for about 10 hours. Stir every few hours if you can. Your house will smell like a spiced apple wonderland! When the apples are very soft and dark brown, you’ll know it’s time for the next step.
Step 4: Puree Until Smooth
Once the apples are fully cooked and incredibly tender, grab an immersion blender and puree the mixture right in the slow cooker until velvety smooth. Don’t have an immersion blender? No worries—carefully transfer batches to your regular blender. This is what gives Canning Apple Butter that irresistible, spoonable consistency.
Step 5: Add Finishing Touches and Thicken
Stir in the lemon juice and vanilla extract—these brighten and balance the flavors. Continue cooking the apple butter uncovered on low for another 1 to 2 hours, stirring now and then, until it’s thick enough to mound up on a spoon and spreads like a dream.
Step 6: Sterilize Jars and Can Your Apple Butter
While your apple butter is finishing up, sanitize your jars and lids in boiling water for at least 10 minutes. When everything’s piping hot, ladle the apple butter into the jars, leaving 1/4 inch headspace. Wipe the rims, seal the lids, and process the jars in a boiling water bath for 10 minutes (adjust for altitude as needed). Let the jars cool, then check the seals before storing. That’s it—you’ve mastered Canning Apple Butter!
How to Serve Canning Apple Butter
Garnishes
Top off your apple butter with just a sprinkle of cinnamon or a delicate swirl of whipped cream for presentation, especially when serving it at brunch or holiday gatherings. A fresh apple slice or cinnamon stick set on the side of the jar adds an inviting, decorative touch that hints at the flavors inside.
Side Dishes
Canning Apple Butter shines on warm, crusty bread alongside a cheese platter, or as a delightful companion to buttermilk pancakes and waffles. It’s also lovely spooned over Greek yogurt or even stirred into a bowl of steel-cut oats for a quick and memorable breakfast upgrade.
Creative Ways to Present
Think beyond the toast! Swirl apple butter into muffin or cake batter, sandwich it between cookies, or serve it as a sweet dip for pretzels and fresh fruits. Canning Apple Butter also makes a thoughtful homemade gift—simply tie a festive ribbon around a jar and add a handwritten label for a special touch.
Make Ahead and Storage
Storing Leftovers
Once you’ve sealed up your Canning Apple Butter, store unopened jars in a cool, dark place like a pantry for up to a year. If you’ve skipped the canning step, or you have a half-used jar, just refrigerate it and use within two weeks—the flavor is just as dreamy!
Freezing
You can absolutely freeze apple butter for longer storage. Just let it cool completely, then spoon into freezer-safe containers or freezer bags, leaving a bit of space for expansion. Frozen Canning Apple Butter will keep for up to six months and tastes wonderfully fresh after thawing.
Reheating
If you prefer your apple butter warm (amazing on pancakes!), simply spoon the desired amount into a saucepan or microwave-safe bowl and gently heat until just warmed through. Stir occasionally to prevent it from sticking or scorching—its aroma alone will have everyone gathering in the kitchen!
FAQs
Can I use only one type Condiment
While you can use just one apple variety, a mix of sweet and tart apples helps give Canning Apple Butter a richer, more balanced flavor. Try combining apples like Fuji, Honeycrisp, and Granny Smith for the best results.
Do I have to peel the apples before cooking?
Peeling is optional! If you love extra-smooth apple butter, peeling the apples first will help. However, the peels cook down nicely and add extra fiber and color, especially when blended thoroughly.
Can I make Canning Apple Butter without a slow cooker?
Yes! You can simmer the apples and spices in a large heavy pot on the stovetop over low, stirring frequently to prevent sticking. Keep the heat gentle and allow extra time, as stovetop cooking can be a bit faster than the slow cooker method.
How can I tell if my jars are sealed properly after canning?
Once the jars have cooled, press down on the center of each lid. If it doesn’t pop up and feels firm, the jar is sealed. If it pops or flexes, refrigerate and use that jar within a couple of weeks.
Is it possible to reduce the sugar in this recipe?
Absolutely! You can adjust the sugars to taste depending on how sweet your apples are or your personal preference. Just keep in mind, sugar does help with both flavor and preservation, so reducing it may slightly shorten shelf life.
Final Thoughts
I hope you feel inspired to stir up your own batch of Canning Apple Butter! There’s something truly special about filling your kitchen with the scent of apples and spice, and nothing beats the joy of enjoying your homemade creation all year long. So gather your jars, get a big spoon, and dive in—you won’t regret it!
Print
Canning Apple Butter Recipe
- Prep Time: 20 minutes
- Cook Time: 12 hours
- Total Time: 12 hours 20 minutes
- Yield: About 6 half-pint jars
- Category: Condiment
- Method: Slow Cooker, Canning
- Cuisine: American
- Diet: Vegetarian
Description
Learn how to make delicious apple butter at home with this easy canning recipe. Slow cook a blend of sweet and tart apples with warm spices until thick and spreadable, perfect for preserving the flavors of fall.
Ingredients
Apples:
6 pounds of apples (a mix of sweet and tart, such as Fuji and Granny Smith), cored and chopped;
Sugars and Spices:
2 cups granulated sugar; 1 cup packed brown sugar; 1 tablespoon ground cinnamon; ½ teaspoon ground cloves; ½ teaspoon ground nutmeg; ¼ teaspoon salt; 1 tablespoon lemon juice; 1 teaspoon vanilla extract
Instructions
- Prepare the Apples: Place the chopped apples into a large slow cooker.
- Cook the Mixture: Cover and cook on low for 10 hours, stirring occasionally, until the apples are very soft and dark brown.
- Final Steps: Stir in lemon juice and vanilla extract. Continue cooking uncovered on low for 1 to 2 more hours, stirring occasionally, until thick and spreadable.
Add granulated sugar, brown sugar, cinnamon, cloves, nutmeg, and salt. Stir to coat the apples evenly.
Use an immersion blender to puree the mixture until smooth, or transfer in batches to a blender.
To can, sterilize jars and lids. Pour the hot apple butter into hot jars, leaving ¼ inch of headspace. Wipe the rims, apply lids, and process in a boiling water bath for 10 minutes (adjust for altitude if needed). Let cool completely and check seals before storing.
Notes
- For a smoother texture, peel the apples before cooking.
- You can adjust the sweetness depending on the apple variety.
- Apple butter can also be stored in the fridge for up to 2 weeks or frozen for longer storage.
Nutrition
- Serving Size: 1 tablespoon
- Calories: 35
- Sugar: 7g
- Sodium: 5mg
- Fat: 0g
- Saturated Fat: 0g
- Unsaturated Fat: 0g
- Trans Fat: 0g
- Carbohydrates: 9g
- Fiber: 0.5g
- Protein: 0g
- Cholesterol: 0mg
