If you have a sweet tooth and love combining rich chocolate with fruity bursts and crunchy textures, this Cherry Garcia Fudge Recipe is about to become your new obsession. This fudgy delight brings together the luscious creaminess of semi-sweet chocolate, the juicy pop of cherries, and the satisfying crunch of walnuts in one perfect bite. Whether you’re making it for a special occasion or just a cozy night in, this Cherry Garcia Fudge Recipe is simple, quick, and packed with unforgettable flavors that will have everyone asking for seconds.
Ingredients You’ll Need
Nothing fancy or complicated here—just a handful of straightforward, essential ingredients that work in perfect harmony. Each one adds its own special touch, from creamy sweetness to textured contrasts and bursts of freshness.
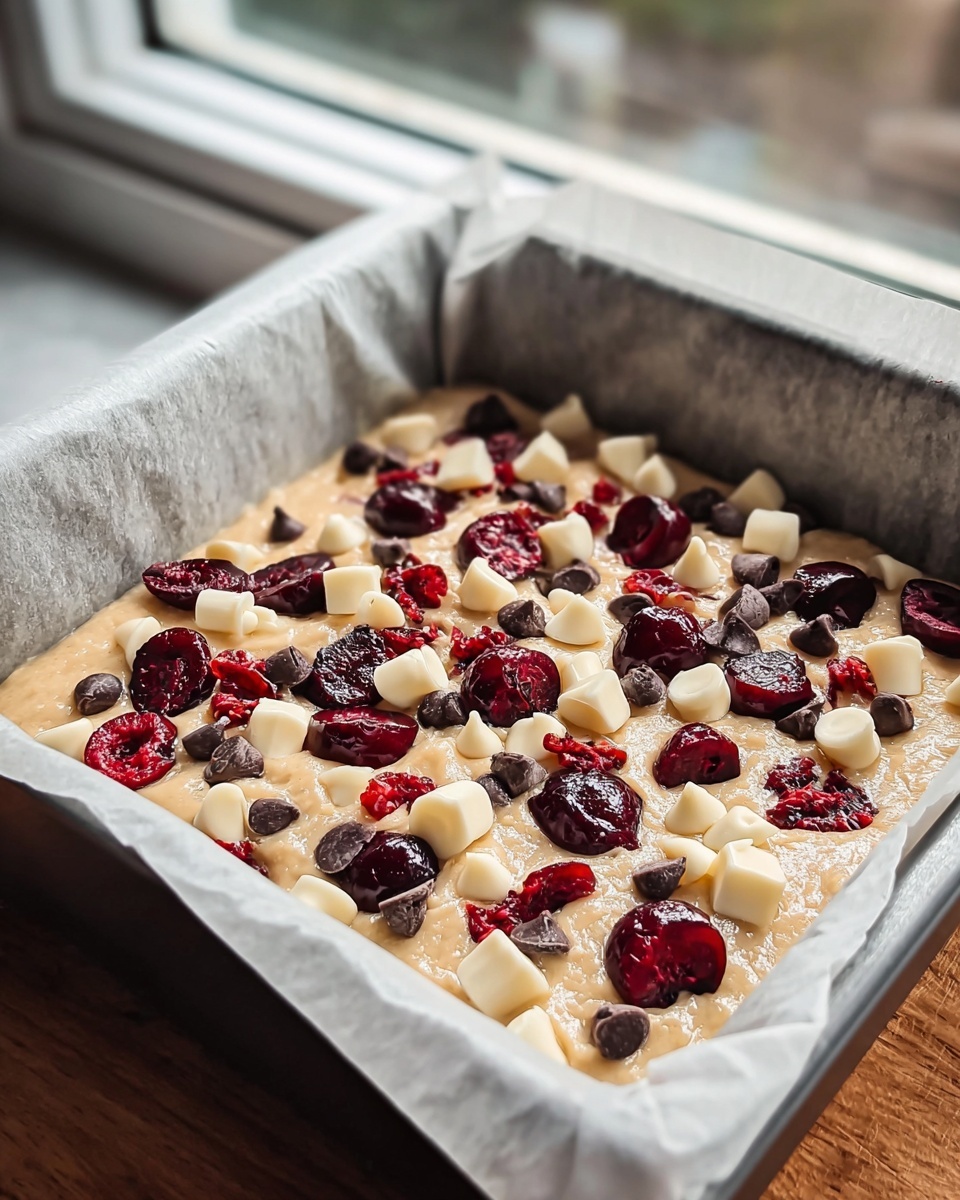
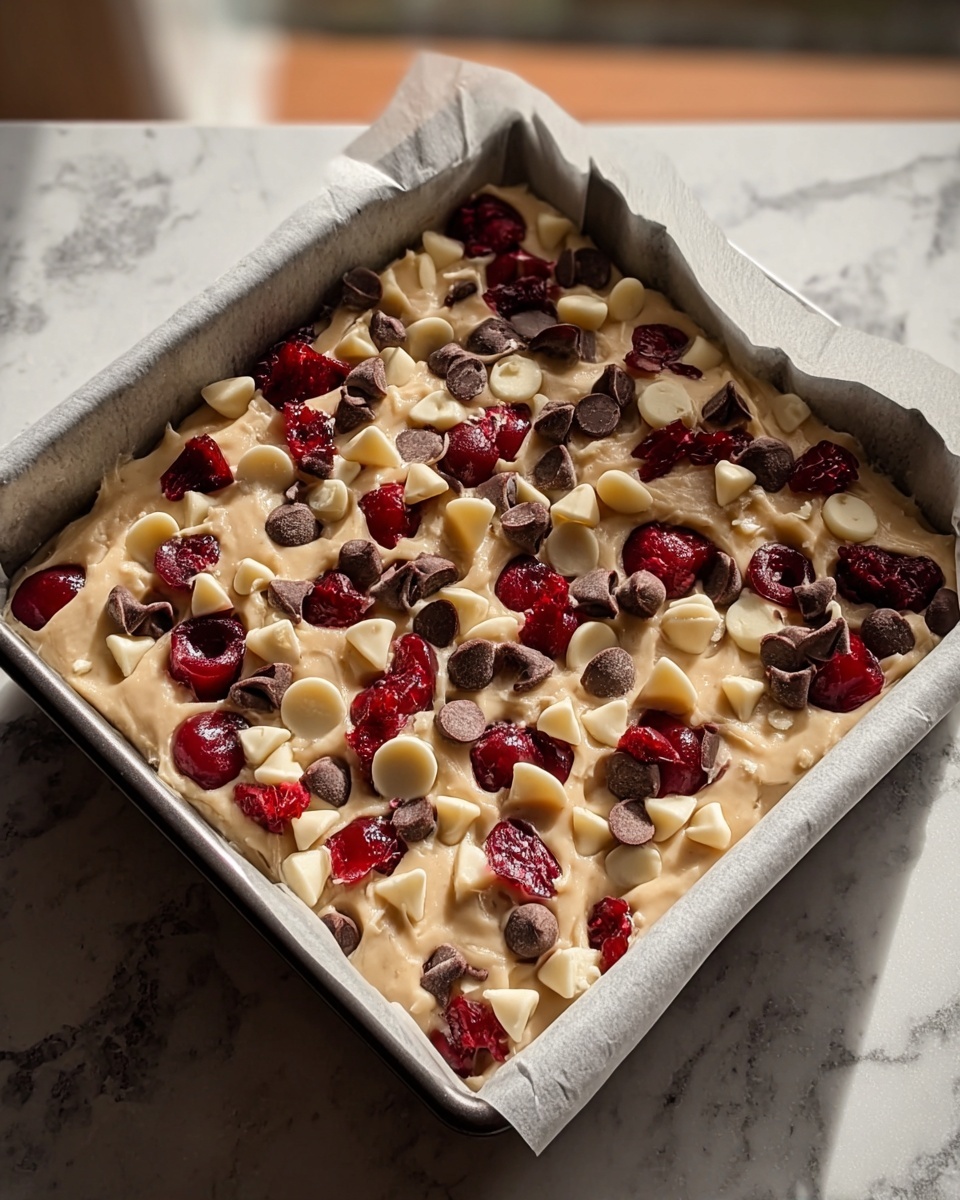
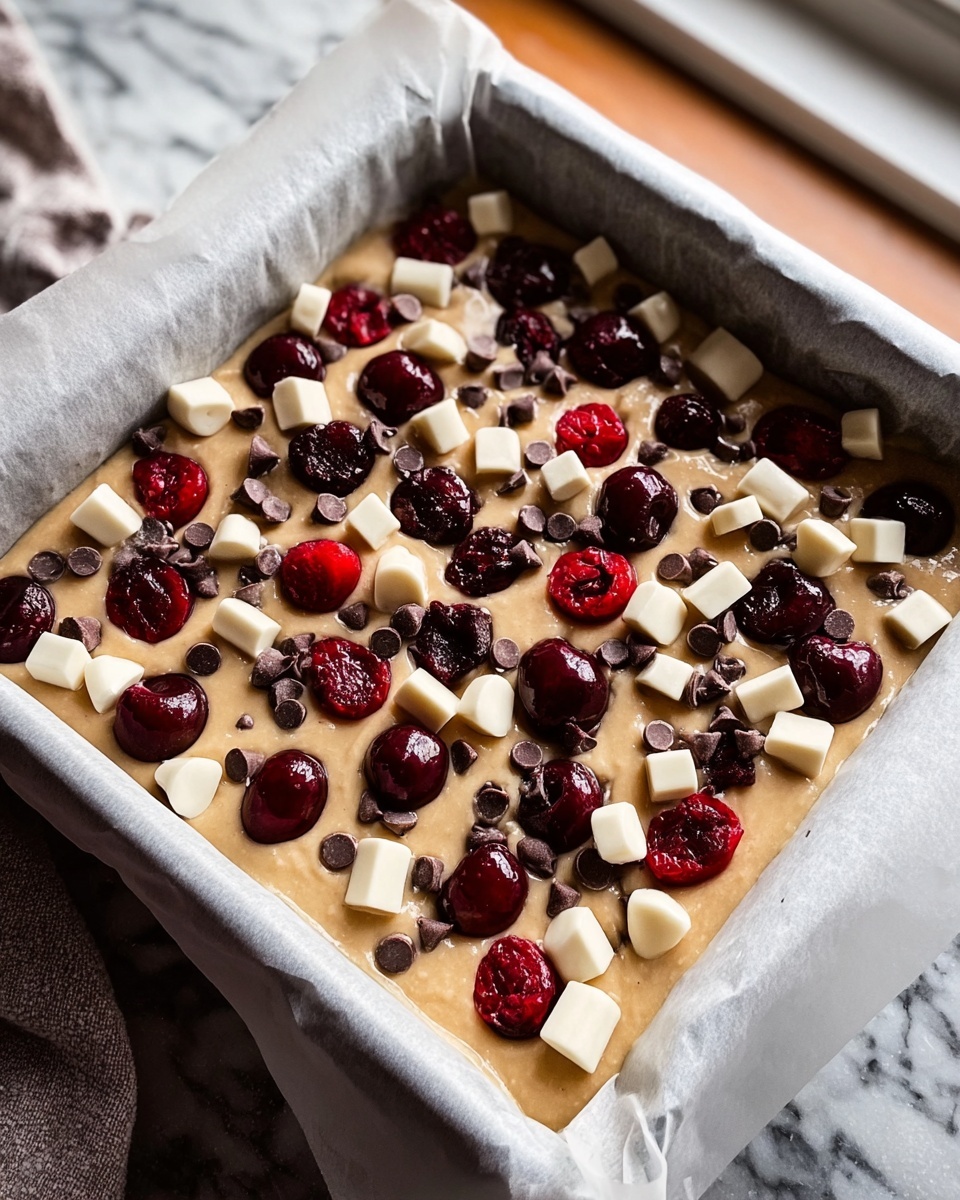
- 2 cups semi-sweet chocolate chips: The core of the fudge, providing that rich, melt-in-your-mouth chocolate flavor.
- 1 can (14 oz) sweetened condensed milk: Adds a silky, creamy sweetness that binds everything together beautifully.
- 1 tsp vanilla extract: Enhances the chocolate’s depth with a warm, aromatic touch.
- 1 cup chopped cherries: Packed with juicy, tart flavor, these bring the signature “Cherry Garcia” zing to the fudge.
- 1/2 cup chopped walnuts: Offers a delightful crunch and nutty contrast to the smooth, chocolatey base.
How to Make Cherry Garcia Fudge Recipe
Step 1: Prepare Your Pan
Start by lining an 8×8 inch pan with parchment paper. This simple step makes sure your fudge won’t stick and allows for easy removal once it’s set. Trust me, it’s a little trick that saves a lot of frustration down the line.
Step 2: Melt the Chocolate and Sweetened Condensed Milk
In a microwave-safe bowl, combine the semi-sweet chocolate chips and the sweetened condensed milk. Heat in 30-second bursts, stirring after each one, until you get a smooth and glossy mixture. This gentle melting method keeps the chocolate silky without burning it, which is key for perfect fudge texture.
Step 3: Stir in Vanilla, Cherries, and Walnuts
Add the vanilla extract, chopped cherries, and walnuts into your melted chocolate mixture. Stir everything together thoroughly so that every bite will have those delicious pops of cherry and crunchy walnut. The cherries bring a fresh tartness that cuts through the chocolate, making this fudge irresistibly balanced.
Step 4: Pour and Spread
Pour your luscious fudge batter into the parchment-lined pan. Spread it out evenly with a spatula, making sure it reaches all corners for even setting. This step is where you get to admire the beautiful marbled cherry pieces peeking through the chocolate.
Step 5: Chill Until Set
Place the pan in the refrigerator and let the fudge firm up for at least 2 hours. This chilling stage is crucial because it allows the flavors to meld and the fudge to get that perfect sliceable consistency you want from a treat like this.
Step 6: Cut and Enjoy!
Once your Cherry Garcia Fudge Recipe has set, lift it out of the pan using the parchment paper and slice it into squares. Now comes the best part—bite into that rich, chewy, cherry-studded fudge goodness and savor every decadent mouthful.
How to Serve Cherry Garcia Fudge Recipe
Garnishes
Sprinkle a few extra chopped walnuts or whole cherries on top before serving for a pretty, inviting look. You could even drizzle a little white chocolate over the fudge squares for an elegant contrast that tastes just as good as it looks.
Side Dishes
This fudge pairs wonderfully with a scoop of vanilla ice cream or a fresh berry compote for a dessert that feels indulgent but balanced. It also works brilliantly alongside a hot cup of coffee or tea, making it a perfect treat any time of day.
Creative Ways to Present
For gifting or parties, wrap individual fudge squares in colorful parchment or place them in cute little boxes. You can also layer them between sheets of wax paper in a decorative jar for a pretty presentation that invites sharing.
Make Ahead and Storage
Storing Leftovers
Wrap your leftover Cherry Garcia Fudge tightly in plastic wrap or store in an airtight container to keep it fresh. It stays delicious at room temperature for up to a week, perfect for snacking whenever the craving strikes.
Freezing
If you want to make this Cherry Garcia Fudge Recipe ahead of time or keep it longer, it freezes beautifully. Just wrap it well in plastic and foil, then pop it in the freezer for up to 3 months. Thaw in the fridge overnight before serving for best texture.
Reheating
Fudge is best enjoyed cold or at room temperature, but if you prefer it a bit softer, you can gently warm it for a few seconds in the microwave. Just be careful not to melt the nuts or cherries inside, so go slow!
FAQs
Can I use fresh cherries instead of chopped cherries?
Fresh cherries can work, but be sure to pit and finely chop them to distribute throughout the fudge. You may also want to dry them lightly to avoid adding extra moisture that could affect the fudge’s setting.
Is it okay to substitute walnuts with other nuts?
Absolutely! Pecans or almonds are great alternatives that offer a similar crunchy texture and complementary flavor. Just chop them roughly before adding for the best results.
Can I make this fudge without a microwave?
Yes, melt the chocolate chips and sweetened condensed milk slowly over a double boiler on the stovetop, stirring constantly to avoid scorching. This method works just as well and gives you good control over melting.
How long will the fudge stay fresh?
When stored in an airtight container at room temperature, this fudge stays fresh and tasty for up to one week. Refrigeration extends the shelf life but can make the fudge firmer.
Can I add other flavors to this Cherry Garcia Fudge Recipe?
Definitely! A pinch of sea salt or a splash of almond extract can deepen the flavor. You might also experiment by folding in mini chocolate chips or white chocolate for added texture and contrast.
Final Thoughts
This Cherry Garcia Fudge Recipe is a total crowd-pleaser and one of my favorite ways to bring together classic chocolate, cherries, and nuts in a simple yet decadent treat. Easy to make, rich in flavor, and perfect for sharing, it’s a recipe you’ll reach for again and again. Give it a try and watch your friends and family fall in love bite after bite!
Print
Cherry Garcia Fudge Recipe
- Prep Time: 10 minutes
- Cook Time: 5 minutes
- Total Time: 2 hours 15 minutes
- Yield: 12 squares
- Category: Dessert
- Method: No-Cook
- Cuisine: American
Description
Cherry Garcia Fudge is a rich, indulgent treat combining smooth semi-sweet chocolate with sweet cherries and crunchy walnuts. This no-bake fudge is easy to prepare and perfect for sharing, delivering a perfect balance of creamy, fruity, and nutty flavors in every bite.
Ingredients
Fudge Base
- 2 cups semi-sweet chocolate chips
- 1 can (14 oz) sweetened condensed milk
- 1 tsp vanilla extract
Add-ins
- 1 cup chopped cherries
- 1/2 cup chopped walnuts
Instructions
- Prepare Pan: Line an 8×8 inch pan with parchment paper to ensure easy removal of the fudge once set.
- Melting Chocolate: In a microwave-safe bowl, combine the semi-sweet chocolate chips and sweetened condensed milk. Microwave in 30-second intervals, stirring between each, until the mixture is completely smooth and fully melted.
- Add Flavorings and Mix-ins: Stir in the vanilla extract alongside the chopped cherries and walnuts, making sure all ingredients are evenly incorporated into the chocolate base.
- Pour Mixture: Transfer the fudge mixture into the prepared parchment-lined pan and spread it evenly using a spatula or the back of a spoon.
- Set Fudge: Refrigerate the pan for at least 2 hours or until the fudge is firm and set to the touch.
- Serve: Remove the fudge from the pan using the parchment paper, then cut into 12 squares and enjoy your delicious Cherry Garcia Fudge!
Notes
- Use fresh or thawed frozen cherries for best flavor and texture.
- For a nuttier taste, toast the walnuts lightly before adding.
- Store fudge in an airtight container in the refrigerator for up to 1 week.
- For easier cutting, let the fudge soften at room temperature for 5-10 minutes before slicing.
- This recipe is a no-bake treat, making it perfect for quick and easy dessert preparation.


