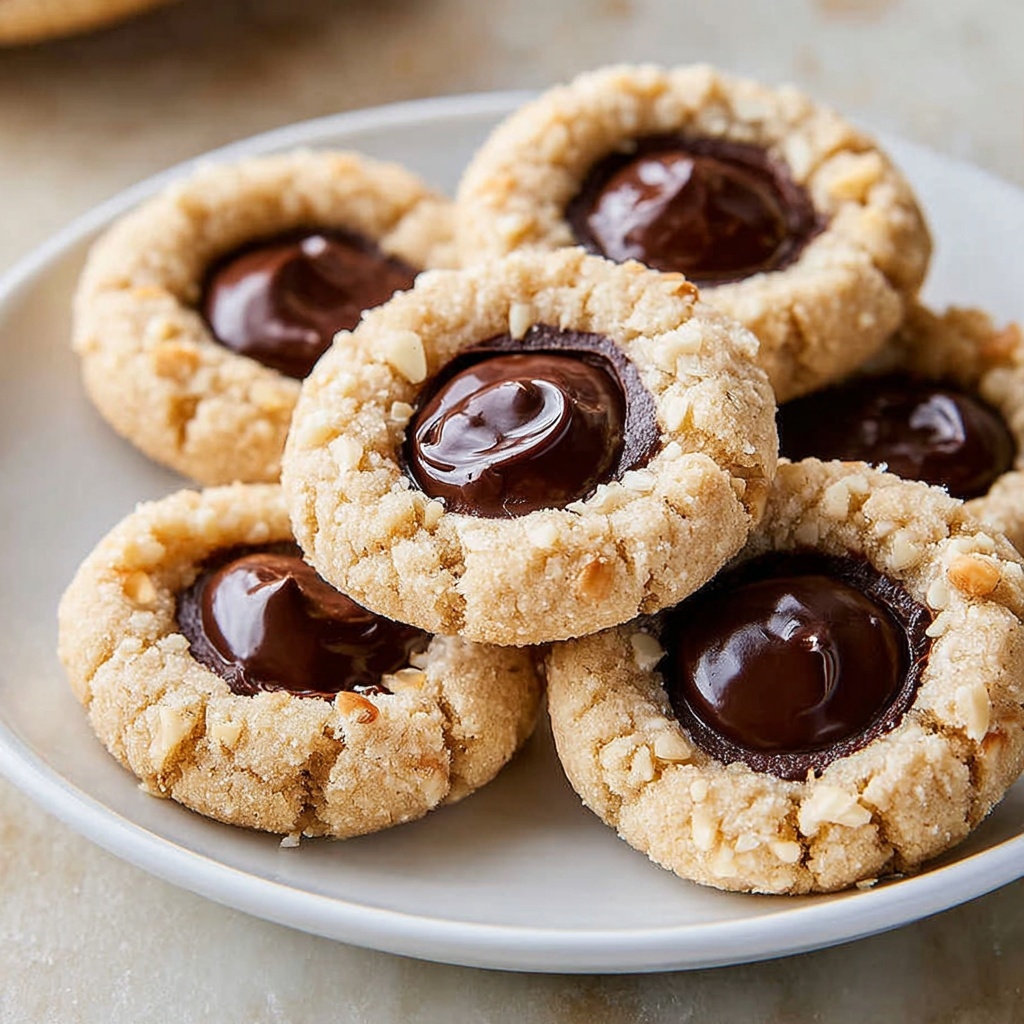
If you’ve been searching for the perfect blend of rich chocolate, nutty flavor, and melt-in-your-mouth texture, look no further than this Chocolate Hazelnut Thumbprint Cookies Recipe. These little delights combine a tender cocoa-infused cookie base with the irresistible creaminess of chocolate hazelnut spread nestled right in the center. Each bite bursts with comforting sweetness and a satisfying crunch thanks to the chopped hazelnut coating, making these cookies an absolute showstopper for any occasion or just a cozy snack to brighten your day.
Ingredients You’ll Need
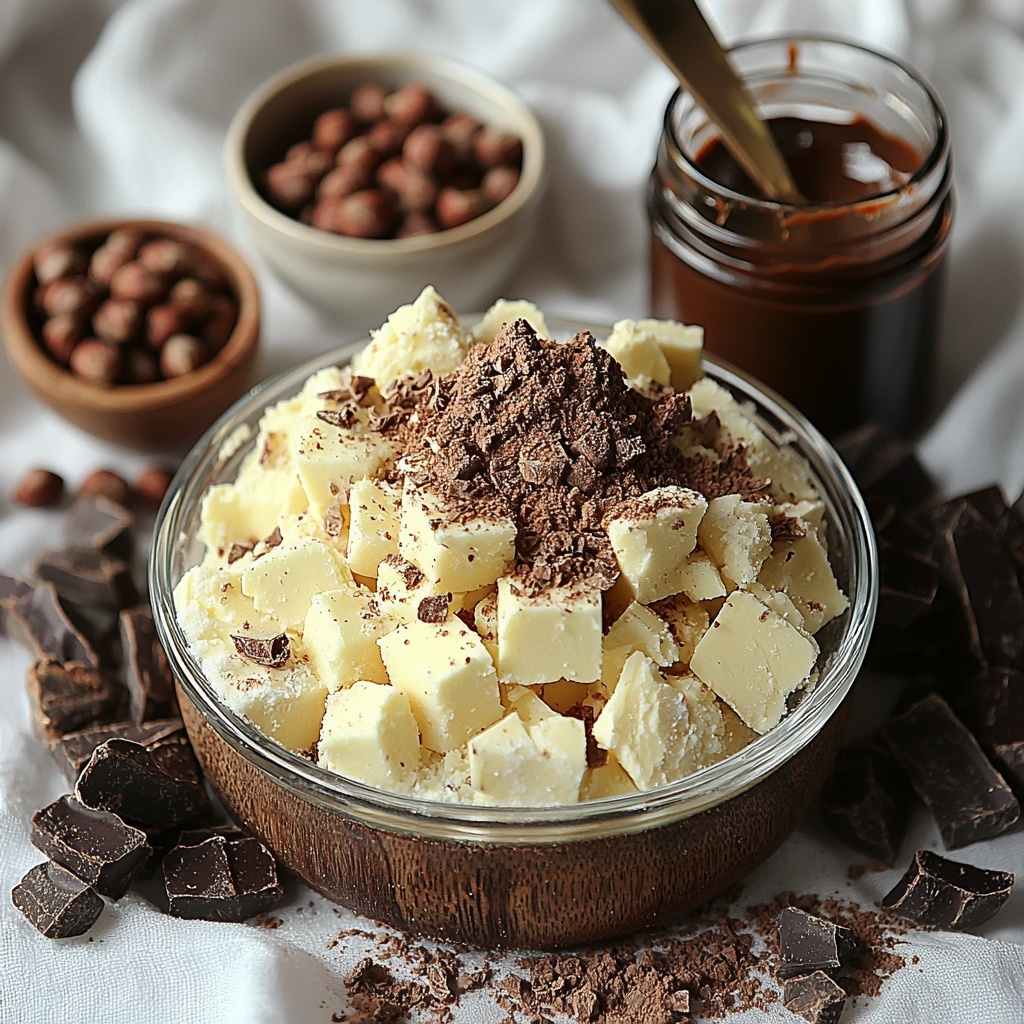
Getting started with this Chocolate Hazelnut Thumbprint Cookies Recipe is a breeze because it calls for simple, wholesome ingredients that each play a starring role. From the creamy butter that adds richness to the cocoa powder bringing a deep chocolate flavor, every item shapes the perfect cookie texture and taste.
- 1 cup unsalted butter (softened): Provides a creamy texture and balanced richness that helps the cookies stay tender and moist.
- 2/3 cup granulated sugar: Sweetens the dough perfectly without overpowering the cocoa notes.
- 2 teaspoons vanilla extract: Adds a warm, fragrant depth that complements the chocolate beautifully.
- 2 cups all-purpose flour: Forms the sturdy yet soft cookie base, ensuring just the right chewiness.
- 1/2 cup cocoa powder: Packs an intense chocolate punch that makes these thumbprint cookies irresistible.
- 1/2 teaspoon salt: Balances the sweetness and enhances all other flavors.
- 1/2 cup finely chopped hazelnuts (for rolling): Adds a crunchy exterior and a nutty aroma that pairs perfectly with the chocolate.
- 1/2 cup chocolate hazelnut spread (like Nutella): The gooey, luscious filling that defines this recipe’s signature taste.
- Extra whole hazelnuts (optional for garnish): For that added touch of elegance and crunch on top.
How to Make Chocolate Hazelnut Thumbprint Cookies Recipe
Step 1: Prep the Oven and Baking Sheets
Start by heating your oven to 350°F (175°C). While waiting, grab two baking sheets and line them with parchment paper. This simple prep ensures your cookies bake evenly and won’t stick, making clean-up a snap and keeping your cookies looking perfect.
Step 2: Cream Butter and Sugar
In a large mixing bowl, beat the softened butter with granulated sugar until light and fluffy. This aeration step is key because it helps create a tender crumb. Then, add the vanilla extract and mix just until combined so those lovely aromatic notes blend seamlessly.
Step 3: Combine Dry Ingredients
Whisk together the all-purpose flour, cocoa powder, and salt in a separate bowl. Mixing these dry ingredients well beforehand makes it easier to incorporate them evenly into the butter mixture, ensuring every cookie boasts an even chocolate flavor and perfect texture.
Step 4: Form the Dough
Gradually mix the dry ingredients into the creamed butter and sugar. Stir gently until everything is just combined—you don’t want to overwork the dough or the cookies may turn out tough. Once it comes together, it will look like a rich, chocolatey dough that’s soft but easy to handle.
Step 5: Shape the Cookies and Coat with Hazelnuts
Roll the dough into approximately 1-inch balls. Next, roll each ball in the finely chopped hazelnuts to coat the outside. This step not only adds a wonderful crunch but also enhances the nutty flavor in every bite. Place the coated balls on your parchment-lined baking sheets, spacing them out so they bake beautifully.
Step 6: Create Thumbprints
Using your thumb or the back of a small spoon, gently press down the center of each cookie ball to create a perfect little well. This charming indentation is exactly where the luscious chocolate hazelnut spread will go after baking, so be careful not to press too hard or break the dough.
Step 7: Bake and Fill
Pop the cookies into the preheated oven and bake for 12 to 14 minutes. They should be set around the edges but still soft in the center. While they’re still warm, fill each indentation with a generous dollop of chocolate hazelnut spread. This warm filling melts just slightly into the cookie, creating an irresistible gooey center.
Step 8: Cool and Enjoy
Let the cookies cool completely on a rack before serving. Cooling firms up the base, so when you bite in, you get that perfect mix of crisp cookie and smooth, creamy filling. These cookies are best enjoyed fresh but also hold up wonderfully if stored properly.
How to Serve Chocolate Hazelnut Thumbprint Cookies Recipe
Garnishes
To elevate your Chocolate Hazelnut Thumbprint Cookies Recipe presentation, sprinkle a few crushed hazelnuts or a light dusting of cocoa powder over the top just before serving. If you want to impress guests, add a single whole hazelnut atop the chocolate filling for that elegant finishing touch.
Side Dishes
These cookies pair wonderfully with a steaming cup of coffee, a creamy glass of milk, or a warm mug of hot chocolate. Their rich chocolate and nutty profile complements these drinks perfectly, making your snack or dessert time feel extra cozy and indulgent.
Creative Ways to Present
For a festive spin, arrange these thumbprint cookies on a beautiful platter nestled among fresh berries or edible flowers. You can also package them in small gift boxes tied with ribbon—making them a delightful homemade gift that friends and family will rave about!
Make Ahead and Storage
Storing Leftovers
Once cooled, store the cookies in an airtight container at room temperature. They will stay fresh and chewy for up to a week, so you can savor their deliciousness over several days without worry.
Freezing
If you want to prepare these cookies in advance, you can freeze them before adding the chocolate hazelnut filling. Arrange the cookie dough balls on a tray and freeze until solid, then transfer to a freezer-safe container. When ready, bake straight from frozen (add a minute or two to baking time) and fill with spread once slightly cooled.
Reheating
To enjoy the cookies warm and melty again, pop them in a microwave for about 10-15 seconds or warm briefly in an oven at low heat. This brings back that delightful gooey chocolate center and freshly baked aroma like you just made them!
FAQs
Can I substitute other nuts for hazelnuts?
Absolutely! While hazelnuts provide a signature flavor here, chopped almonds or pecans can be used as tasty alternatives. Just note the flavor profile will change slightly but still be delicious.
Is it possible to make these cookies gluten-free?
Yes! Swap out the all-purpose flour for a gluten-free flour blend designed for baking. This will keep the texture nice and tender while accommodating gluten sensitivity.
What’s the best chocolate hazelnut spread to use?
Traditional spreads like Nutella work wonderfully in this recipe thanks to their creamy texture and balanced flavor. However, feel free to explore homemade or specialty artisan spreads for a unique twist.
Can I roll the cookie dough balls in something else instead of chopped nuts?
Of course! You might try rolling them in powdered sugar for a snowy look, cocoa powder for extra chocolate intensity, or even crushed cookies for fun texture contrasts.
How long do these cookies stay fresh?
Stored properly in an airtight container at room temperature, the cookies will remain fresh and delicious for up to one week, giving you plenty of time to enjoy them.
Final Thoughts
There’s something truly heartwarming about making and sharing this Chocolate Hazelnut Thumbprint Cookies Recipe. The combination of chocolate, hazelnuts, and that luscious filling creates a cookie experience that’s both comforting and delightfully indulgent. Whether you’re baking for a special event or just treating yourself, these cookies are guaranteed to bring smiles and happy moments. So grab your ingredients, have fun with the process, and savor every bite of these little pockets of joy!
Print
Chocolate Hazelnut Thumbprint Cookies Recipe
- Prep Time: 15 minutes
- Cook Time: 14 minutes
- Total Time: 34 minutes
- Yield: 24 servings
- Category: Dessert
- Method: Baking
- Cuisine: American
Description
These Chocolate Hazelnut Thumbprint Cookies combine rich cocoa-flavored dough rolled in crunchy hazelnuts with a luscious chocolate hazelnut spread center. Soft yet slightly crisp, they make a perfect indulgent treat for any occasion.
Ingredients
Cookie Dough
- 1 cup unsalted butter, softened
- 2/3 cup granulated sugar
- 2 teaspoons vanilla extract
- 2 cups all-purpose flour
- 1/2 cup cocoa powder
- 1/2 teaspoon salt
Coating and Filling
- 1/2 cup finely chopped hazelnuts (for rolling)
- 1/2 cup chocolate hazelnut spread (like Nutella)
- Extra whole hazelnuts (optional for garnish)
Instructions
- Preheat Oven and Prepare Baking Sheets: Preheat your oven to 350°F (175°C) and line two baking sheets with parchment paper to prevent sticking and ensure even baking.
- Cream Butter and Sugar: In a mixing bowl, cream together the softened butter and granulated sugar until the mixture is fluffy, then add the vanilla extract to infuse flavor.
- Combine Dry Ingredients: In another bowl, whisk together the all-purpose flour, cocoa powder, and salt to evenly distribute the cocoa and salt in the dough.
- Mix Dough: Gradually incorporate the dry ingredients into the butter mixture until just combined, forming a soft cookie dough.
- Form and Coat Dough Balls: Roll the dough into 1-inch balls, then roll each ball in finely chopped hazelnuts to coat the outside, adding texture and nuttiness.
- Create Indentations: Place the coated dough balls on the prepared baking sheets and use your thumb to gently press an indentation into the center of each one, preparing for the filling.
- Bake Cookies: Bake the cookies in the preheated oven for 12 to 14 minutes, until set but still soft.
- Fill with Chocolate Hazelnut Spread: Remove the cookies from the oven and while they’re still warm, fill each indentation with a small amount of chocolate hazelnut spread.
- Cool and Serve: Allow the cookies to cool completely on the baking sheets before transferring to a wire rack or serving plate. Optionally garnish with whole hazelnuts.
Notes
- For best results, use room temperature butter for easier creaming.
- The dough can be chilled for 30 minutes to make rolling easier, especially in warm kitchens.
- Make sure not to overbake to keep cookies soft and tender.
- You may substitute chocolate hazelnut spread with any other nut-based chocolate spread or jam.
- Store cookies in an airtight container at room temperature for up to 5 days.


