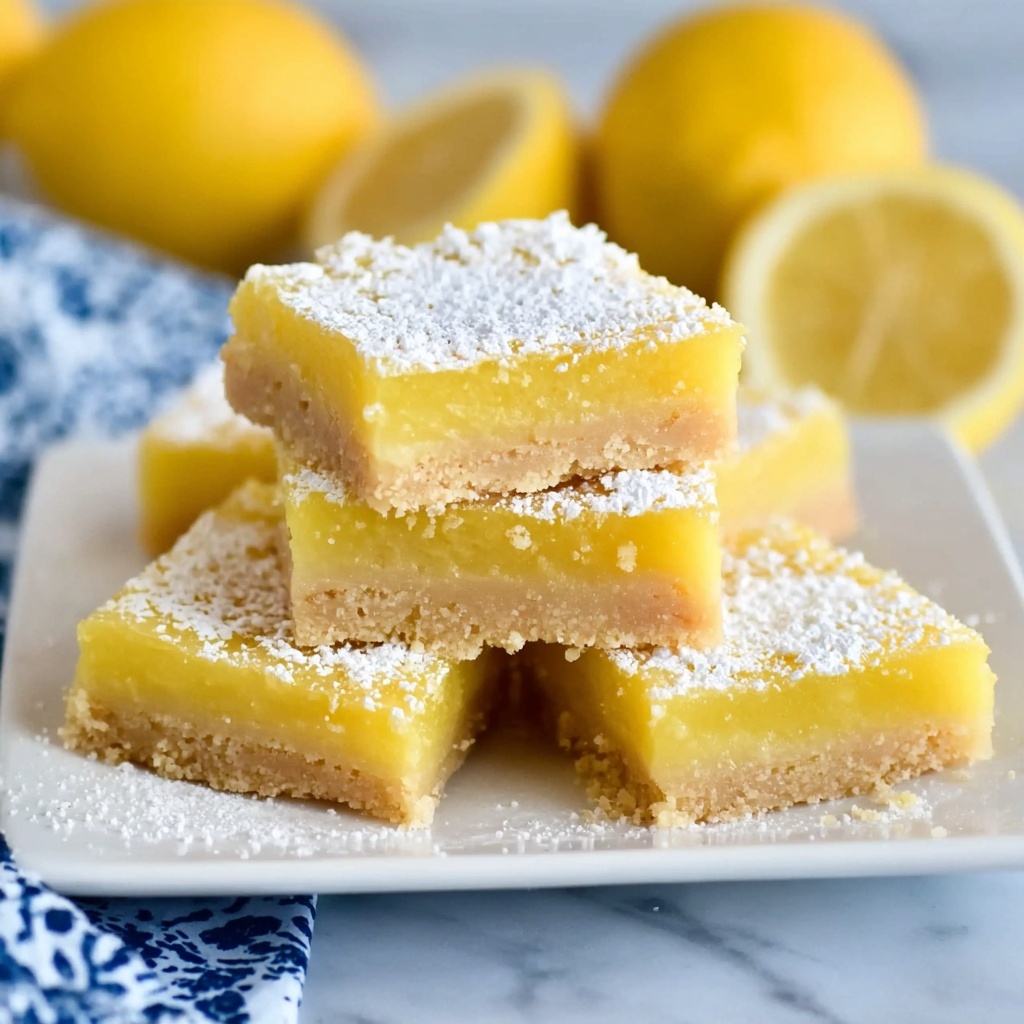
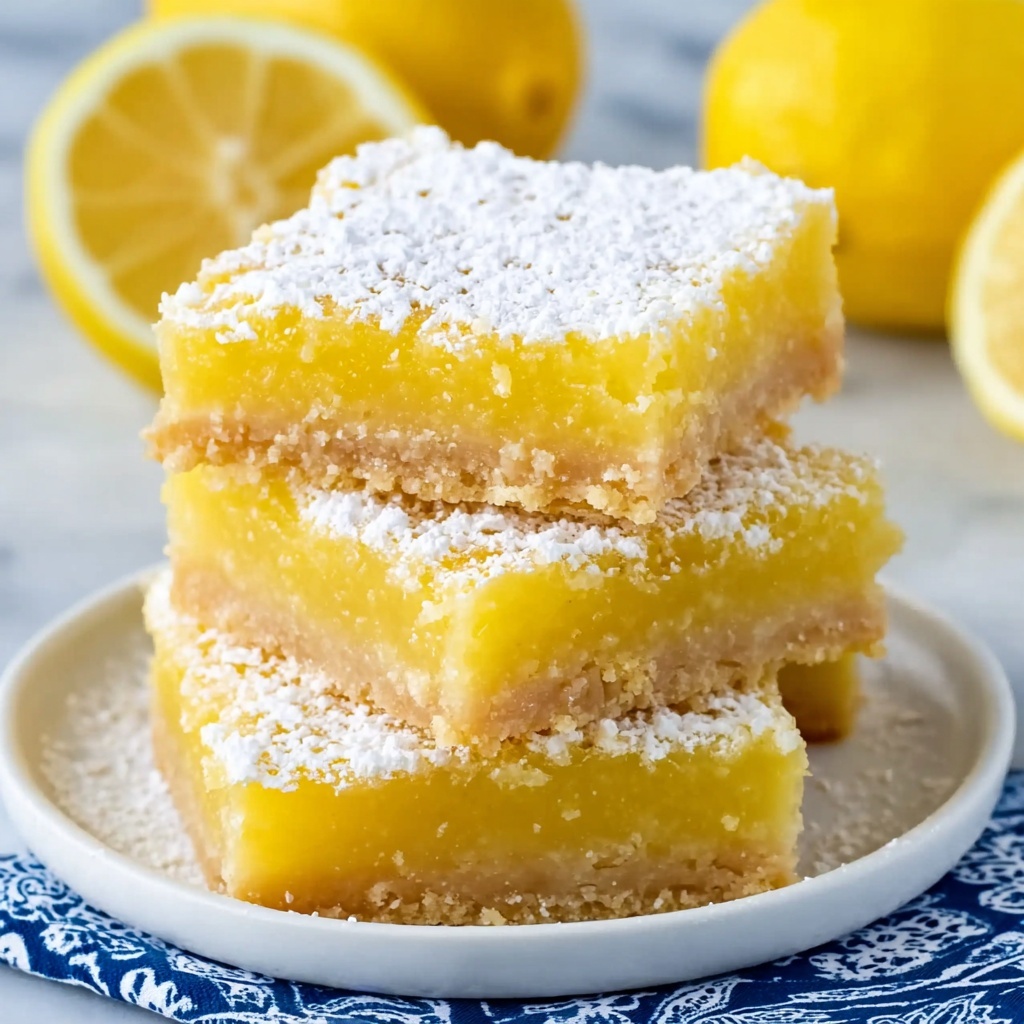
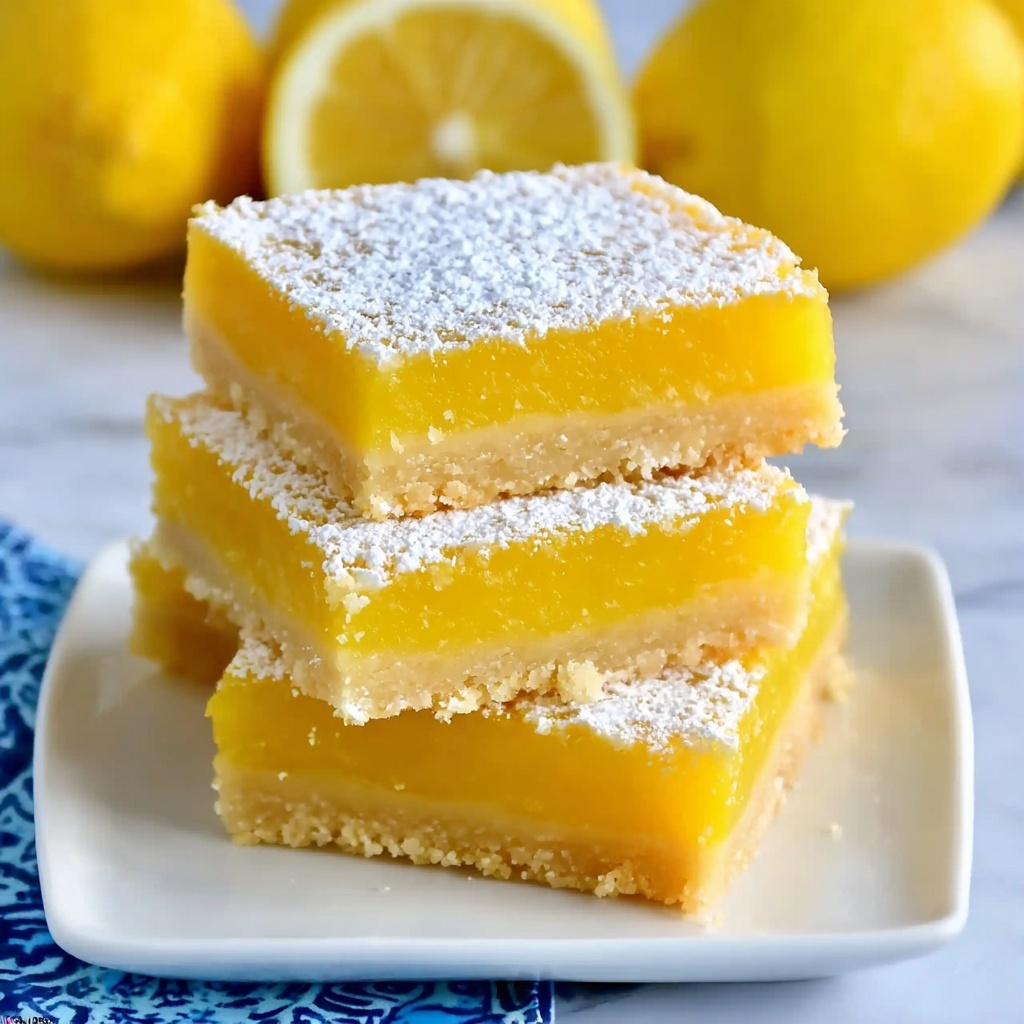
If you have a soft spot for bright, tangy desserts that also happen to be gluten-free, then you are going to adore this Easy Gluten-Free Lemon Bars Recipe. These lemon bars are the perfect balance of buttery crust and luscious, zesty filling, offering a refreshing bite that is as satisfying as it is simple to whip up. Whether you’re baking for a crowd or simply craving a sweet treat, this recipe delivers a delightful lemony punch that everyone can enjoy without worrying about gluten.
Ingredients You’ll Need
Gathering the right ingredients is half the fun and ensures you get the perfect texture and flavor in your lemon bars. Each component plays a crucial role—from lending buttery richness to providing that signature lemony zing and maintaining a tender, gluten-free crumb.
- Unsalted butter (½ cup, 1 stick): Room temperature butter is key for creating a smooth, crumbly crust with a rich flavor.
- Granulated sugar (¼ cup + 1 cup): The first portion adds a gentle sweetness to the crust, while the larger portion balances the tart filling.
- Lemon zest (1 tbsp + 1 tbsp): Freshly grated zest from a Microplane intensifies the bright citrus aroma and flavor in both crust and filling.
- Vanilla extract (1 tsp): A subtle note of vanilla complements and enhances the lemon’s brightness.
- Gluten-free all-purpose flour (1 cup + ½ cup): This ensures the crust and filling maintain the perfect structure without gluten.
- Kosher salt (⅛ tsp + ⅛ tsp): Just a pinch of salt balances the sweetness and brightens the flavors.
- Eggs (3, room temperature): Eggs give the filling its custard-like texture and hold everything together beautifully.
- Lemon juice (½ cup, freshly squeezed): The star of the show, freshly squeezed juice adds vibrant acidity and depth that make these bars truly zing.
How to Make Easy Gluten-Free Lemon Bars Recipe
Step 1: Preheat the Oven and Prep Your Pan
Begin by preheating your oven to 350°F and greasing an 8×8-inch baking dish. Lining it with overlapping rectangles of parchment paper helps with easy removal of the bars later, ensuring clean edges and effortless serving.
Step 2: Prepare the Crust
In a large bowl, cream together the softened butter, ¼ cup granulated sugar, 1 tablespoon of lemon zest, and vanilla extract. This mixture should be light and fragrant. Gradually mix in the gluten-free flour and a pinch of salt until the dough comes together. Press the dough evenly into the bottom of your prepared pan, then use a fork to poke some holes in the crust. This step allows steam to escape, preventing sogginess. Bake the crust for 15-18 minutes until it’s golden and set.
Step 3: Make the Lemony Filling
While the crust bakes, whisk together the eggs, 1 cup sugar, freshly squeezed lemon juice, 1 tablespoon lemon zest, ½ cup gluten-free flour, and ⅛ teaspoon salt until fully combined and smooth. The eggs and lemon juice create that refreshing zing, while flour helps the filling set with a delicate texture.
Step 4: Bake and Cool
Pour the filling over the hot crust as soon as it comes out of the oven. Return the pan to bake for an additional 20-25 minutes, or until the filling is firm around the edges but still slightly jiggly in the center. Let your lemon bars cool completely in the pan on a wire rack — patience here means cleaner slices and a better texture.
How to Serve Easy Gluten-Free Lemon Bars Recipe
Garnishes
A simple dusting of powdered sugar adds a lovely snowy finish that contrasts beautifully with the bright yellow filling. You can also add a few twisted lemon peels or fresh mint leaves for a pop of color and an extra hint of fresh aroma.
Side Dishes
Easy Gluten-Free Lemon Bars pair wonderfully with light, refreshing accompaniments. A cup of hot tea—like chamomile or green tea—or even a scoop of dairy-free vanilla ice cream makes for a perfect duo, balancing the tartness with gentle sweetness or creaminess.
Creative Ways to Present
Consider cutting the bars into smaller squares and serving them on a decorative platter with edible flowers sprinkled around for a fancy touch. You can also stack them with parchment paper in between for gifting or a lovely picnic treat.
Make Ahead and Storage
Storing Leftovers
Once cooled, cover your lemon bars tightly with plastic wrap or place them in an airtight container. They’ll keep well in the refrigerator for up to 5 days, maintaining their delightful texture and flavor.
Freezing
If you want to prepare these in advance, lemon bars freeze beautifully. Wrap individual bars in parchment paper followed by plastic wrap, then place them in a freezer-safe bag. They’ll last up to 2 months, ready for a quick thaw when you’re craving a citrusy dessert.
Reheating
For best results, thaw lemon bars overnight in the refrigerator and bring to room temperature before serving. If desired, you can warm them gently in the oven at 300°F for 5-7 minutes to revive that freshly baked feel without melting away the texture.
FAQs
Can I use regular flour instead of gluten-free?
Absolutely! While this is an Easy Gluten-Free Lemon Bars Recipe, swapping in regular all-purpose flour will give you a similar texture, just not gluten-free. Adjust as needed if you prefer.
What’s the best way to zest lemons?
A Microplane grater is ideal for zesting lemons because it removes only the colorful outer peel without the bitter white pith beneath.
Can I make these lemon bars dairy-free?
Yes! Simply substitute the unsalted butter with a quality plant-based butter or coconut oil. The texture and flavor might shift slightly, but the bars will still be delicious.
How do I know when the filling is fully baked?
The filling should be mostly set with a slight jiggle in the center when you gently shake the pan. It will firm up more as it cools.
Can I double the recipe?
You can! Use a larger baking dish and adjust baking time accordingly. Keep a close eye on the crust and filling to prevent overbaking.
Final Thoughts
There is something so satisfying about baking and sharing this Easy Gluten-Free Lemon Bars Recipe. With its simple ingredients and straightforward steps, it’s a sweet treat that feels like sunshine in every bite. Whether for a special occasion or an everyday indulgence, these lemon bars always bring a smile to my face and I hope they bring one to yours too. Give them a try, and enjoy a little slice of bright, gluten-free happiness!
Print
Easy Gluten-Free Lemon Bars Recipe
- Prep Time: 20 minutes
- Cook Time: 40 minutes
- Total Time: 1 hour
- Yield: 16 servings
- Category: Dessert
- Method: Baking
- Cuisine: American
- Diet: Gluten Free
Description
This Easy Gluten Free Lemon Bars recipe combines a buttery, tender crust with a tangy, smooth lemon filling for a refreshing dessert that’s perfect for any occasion. Made with gluten-free all-purpose flour, these bars are moist, flavorful, and simple to prepare in just over an hour.
Ingredients
Crust
- ½ cup unsalted butter (1 stick), at room temperature
- ¼ cup granulated sugar
- 1 tbsp lemon zest (grated on a Microplane)
- 1 tsp vanilla extract
- 1 cup gluten-free all-purpose flour
- ⅛ tsp kosher salt
Filling
- 3 eggs at room temperature
- 1 cup granulated sugar
- ½ cup lemon juice, freshly squeezed
- 1 tbsp lemon zest (grated on a Microplane)
- ½ cup gluten-free all-purpose flour
- ⅛ tsp kosher salt
Instructions
- Preheat Oven and Prepare Pan: Preheat your oven to 350°F (175°C). Grease an 8×8-inch baking dish and line it with overlapping rectangles of parchment paper to make removal easier later.
- Prepare the Crust: In a large bowl, beat together the unsalted butter, granulated sugar, lemon zest, and vanilla extract until smooth and creamy. Add the gluten-free flour and kosher salt, mixing until the dough is uniform. Press the dough evenly into the bottom of the prepared baking dish. Poke holes in the crust with a fork to prevent bubbling, then bake for about 15-20 minutes until lightly golden.
- Make the Filling: While crust bakes, whisk together the eggs, granulated sugar, freshly squeezed lemon juice, lemon zest, gluten-free flour, and kosher salt until the mixture is smooth and well combined.
- Bake Lemon Bars: Pour the lemon filling evenly over the pre-baked crust. Return the baking dish to the oven and bake for an additional 20-25 minutes or until the filling is set and no longer jiggles in the center.
- Cool and Serve: Allow the lemon bars to cool completely in the baking dish on a wire rack. Once cooled, dust the top with powdered sugar. Use the parchment paper edges to lift the bars out of the pan, slice into 16 squares, and serve.
Notes
- Make sure to use room temperature eggs and butter for the best texture.
- Freshly squeezed lemon juice and zest enhance the brightness of flavor in these bars.
- Use gluten-free all-purpose flour blend suitable for baking for best results.
- Allow bars to cool completely to ensure clean slicing and proper set.
- Store leftovers in an airtight container in the refrigerator for up to 4 days.


