
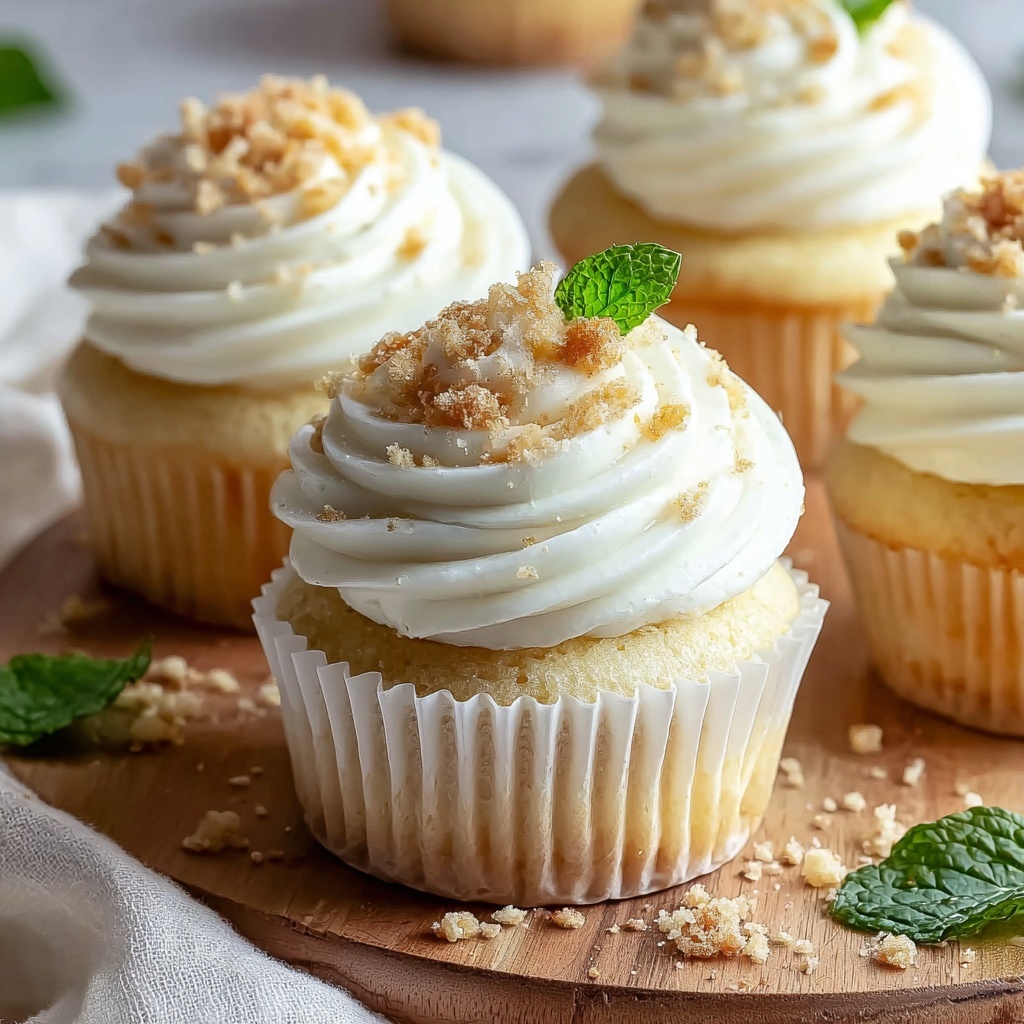
If you have a soft spot for desserts that feel like clouds melting on your tongue, then you are absolutely going to adore this Fluffy Japanese Cotton Cheesecake Cupcakes Recipe. These little delights combine the delicate texture of cotton cheesecake with the individual charm of cupcakes. They are light, airy, and just the right amount of sweet, making them a perfect treat whether you’re celebrating or simply craving something special. Trust me, once you try this recipe, these cupcakes will quickly become a beloved staple in your kitchen repertoire.
Ingredients You’ll Need
Ingredients You’ll Need
The beauty of this Fluffy Japanese Cotton Cheesecake Cupcakes Recipe lies not only in how divine they taste but also in the simplicity and careful selection of ingredients. Each one has a starring role, contributing to the cupcakes’ airy texture, rich flavor, and beautiful color.
- 5 large eggs, room temperature: Perfect for achieving the light, fluffy texture when whipped properly.
- 1/4 tsp cream of tartar: Helps stabilize the egg whites for a lasting fluffy meringue.
- 1/2 cup sugar, divided: Provides subtle sweetness and structure; divided use balances the texture.
- 8 oz cream cheese, room temperature: Adds creamy richness and the classic cheesecake tang.
- 1/2 cup low-fat milk: Lightens the batter and keeps the cupcakes moist.
- 1/4 cup unsalted butter, room temperature: Brings smoothness and depth of flavor.
- 1 Tbsp lemon juice: Brightens the flavor and balances the sweetness.
- 1/4 cup all-purpose flour: Gives the cupcake body without weighing it down.
- 2 Tbsp corn starch: Contributes to the delicate, melt-in-your-mouth texture.
- Fresh fruit (e.g., berries): Wonderful for garnishing and adding a fresh contrast.
- Whipped cream: Optional topping for extra decadence.
- Chocolate sauce: A luscious drizzle to elevate the cupcakes further.
How to Make Fluffy Japanese Cotton Cheesecake Cupcakes Recipe
Step 1: Prepare Ingredients
Start by bringing your cream cheese and butter to room temperature for about 2 hours, and your eggs for roughly 1 hour. This simple step ensures that everything blends smoothly, resulting in a silky batter without lumps. Patience here guarantees the dreamiest cupcakes.
Step 2: Preheat Oven and Set Up
Preheat your oven to 315°F (157°C). Line your cupcake pan with paper liners to make cleanup easier and prevent sticking. If you have a water bath setup, fill a larger pan halfway with water and place it on the oven’s lowest rack. This gentle steaming environment helps set the delicate cupcakes without drying them out.
Step 3: Separate Eggs
Carefully separate the 5 eggs into two bowls—whites in one, yolks in the other. This keeps your whites free from any fat contamination, essential for whipping that perfect fluff that gives these cupcakes their signature airy quality.
Step 4: Whip Egg Whites
Using a mixer, start beating the egg whites on low speed for about 30 seconds just to break them up. Gradually increase to medium-low until they become foamy. Then, add the cream of tartar to stabilize the foam. Continue beating on medium-high speed until soft peaks form, about 3 minutes, while slowly adding 1/4 cup sugar. This process is key for creating volume and lightness.
Step 5: Mix Cream Cheese Batter
In a separate large bowl, combine the cream cheese and low-fat milk. Mix on low speed until smooth and creamy, typically 2-3 minutes. Add the softened butter, remaining 1/4 cup sugar, and lemon juice, then beat another minute. This blend provides tanginess and richness that makes every bite irresistible.
Step 6: Add Dry Ingredients and Yolks
Sift together the all-purpose flour and corn starch to avoid lumps and keep the airy texture. Slowly add the dry mix to the cream cheese mixture, stirring gently for about a minute. Then, add the yolks and mix an additional minute to combine all the flavors evenly.
Step 7: Strain the Batter
For that extra silky smooth texture, strain your batter through a fine sieve into a clean bowl. This step removes any stubborn lumps and ensures each cupcake bakes up with a perfectly uniform crumb.
Step 8: Fold in Egg Whites
Now, gently fold in a third of the whipped egg whites into the batter to lighten it. Repeat this folding process two more times with the remaining whites to fully integrate them but be careful not to deflate the volume. This gentle technique is what makes these cupcakes truly soft and fluffy.
Step 9: Fill Cupcake Liners
Pour the batter into each cupcake liner, about two-thirds full. To release any trapped air bubbles that could cause cracks, gently drop the pan onto your countertop a few times. This helps the cupcakes rise evenly and look beautifully smooth on top.
Step 10: Bake Carefully
Place the cupcake pan in the water bath if you are using one. Bake for about 25–30 minutes or until the tops turn golden and a toothpick inserted comes out clean. The water bath ensures gentle, even baking, which prevents cracking and drying out.
Step 11: Cool Gradually
Once the cupcakes are baked, turn off the oven and open the door slightly. Leave the cupcakes inside for 10 to 15 minutes to cool gradually. This smart step prevents the delicate structure from shrinking and losing its fluffiness.
Step 12: Chill Completely
Remove the cupcakes from the pan and cool completely on a wire rack at room temperature. Once cooled, chilling them in the fridge enhances their texture and flavor, readying them for serving or storing.
How to Serve Fluffy Japanese Cotton Cheesecake Cupcakes Recipe
Garnishes
Fresh berries like strawberries, blueberries, or raspberries add a burst of natural sweetness and color, perfectly complementing the creamy cupcakes. A dollop of whipped cream or a gentle drizzle of chocolate sauce turns these cupcakes into a true showstopper that’s both elegant and inviting.
Side Dishes
Light accompaniments such as a simple fruit salad or a cup of green tea create a balanced, refreshing experience that lets the delicate flavor of the cupcakes shine. These sides keep your dessert moment feeling light and joyous.
Creative Ways to Present
Serve these cupcakes in beautiful glass jars or decorate with edible flowers for a touch of whimsy. You could also stack them on a tiered cupcake stand at a party or drizzle with flavored syrups like matcha or caramel to customize flavors that wow your guests.
Make Ahead and Storage
Storing Leftovers
Keep any leftover cupcakes in an airtight container in the refrigerator. They stay fresh and fluffy for up to 3 days, though honestly, they rarely last that long with their delightful texture and flavor tempting every sweet tooth around.
Freezing
If you want to save them longer, wrap each cupcake tightly in plastic wrap and place them in a freezer-safe container. They freeze well for up to 1 month. Just thaw in the refrigerator overnight before enjoying their melt-in-the-mouth softness once more.
Reheating
To bring back that fresh-baked feel, warm the cupcakes gently in the microwave for about 10-15 seconds or at low heat in the oven. Avoid overheating, as it can alter the delicate texture, but just a slight warmth makes these cupcakes taste like they were made moments ago.
FAQs
Can I use full-fat milk instead of low-fat milk?
Absolutely! Full-fat milk will add a bit more richness to the cupcakes but won’t drastically change the fluffiness. Just be sure to keep your other ingredients balanced for the best texture.
Why is it important to bring ingredients to room temperature?
Room temperature ingredients blend more smoothly, creating a batter free of lumps and ensuring that eggs whip properly for volume. This is crucial in achieving the signature airy texture of the cupcakes.
Can I make these cupcakes dairy-free?
With some substitutions like dairy-free cream cheese, plant-based milk, and vegan butter, you could adapt the recipe. However, the texture may be slightly different since dairy contributes to the moistness and flavor profile of the cotton cheesecake.
What is the purpose of the water bath when baking?
The water bath helps maintain a gentle, moist heat around the cupcakes, preventing the delicate batter from drying out or cracking and promoting an even rise and tender crumb.
How do I know when the cupcakes are perfectly baked?
The cupcakes should be golden on top and spring slightly to the touch. Insert a toothpick into the center—if it comes out clean or with just a few moist crumbs, they are done. Avoid overbaking as that can dry them out.
Final Thoughts
There is something truly magical about the way these Fluffy Japanese Cotton Cheesecake Cupcakes Recipe delivers the perfect balance of softness, subtle sweetness, and creamy tang. They are a delight to bake and an absolute pleasure to enjoy, whether with family, friends, or as a little treat for yourself. Don’t hesitate to try making these cupcakes soon; they will bring a beautiful moment of joy to your day, one melt-in-the-mouth bite at a time.
Print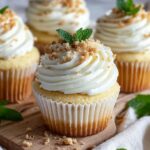
Fluffy Japanese Cotton Cheesecake Cupcakes Recipe
- Prep Time: 2 hours
- Cook Time: 30 minutes
- Total Time: 2 hours 30 minutes
- Yield: 12 cupcakes
- Category: Dessert
- Method: Baking
- Cuisine: Japanese
- Diet: Low Fat
Description
These Fluffy Japanese Cotton Cheesecake Cupcakes are irresistibly light and airy, melting in your mouth with a delicate, creamy texture. Perfectly balanced with a hint of lemon and a subtle sweetness, these cupcakes are baked in a water bath to achieve their iconic soft and moist crumb. Served with fresh fruit, whipped cream, and a drizzle of chocolate sauce, they are an elegant treat perfect for any special occasion or dessert craving.
Ingredients
Main Ingredients
- 5 large eggs, room temperature
- 1/4 tsp cream of tartar
- 1/2 cup sugar, divided
- 8 oz cream cheese, room temperature
- 1/2 cup low-fat milk
- 1/4 cup unsalted butter, room temperature
- 1 Tbsp lemon juice
- 1/4 cup all-purpose flour
- 2 Tbsp corn starch
For Serving
- Fresh fruit (e.g., berries)
- Whipped cream
- Chocolate sauce
Instructions
- Prepare Ingredients: Start by bringing your cream cheese and butter to room temperature for about 2 hours, and your eggs for about 1 hour. Room temperature ingredients are essential for a smooth batter!
- Preheat Oven: Preheat your oven to 315°F (157°C) and prepare a cupcake pan with liners. If you have a water bath setup, fill a larger pan halfway with water and place it on the lowest rack of the oven.
- Separate Eggs: Carefully separate the 5 large eggs, placing the whites in a mixing bowl and the yolks in another bowl. This allows you to whip the egg whites to a perfect fluff.
- Whip Egg Whites: Using a mixer, beat the egg whites on low speed for about 30 seconds. Gradually increase to medium-low until foamy, then add cream of tartar to stabilize. Finally, beat on medium-high speed until soft peaks form (about 3 minutes), gradually adding 1/4 cup of sugar while beating.
- Mix Batter: In a separate bowl, combine the cream cheese and low-fat milk, mixing on low speed until smooth (about 2-3 minutes). Then, add the softened butter, remaining 1/4 cup sugar, and lemon juice; beat for another minute.
- Combine Dry Ingredients: Sift together all-purpose flour and corn starch, then add to the cream cheese mixture. Mix for about a minute until just combined, and then add the yolks. Mix for an additional minute.
- Strain Batter: To ensure a silky consistency, strain the batter through a fine sieve into a large bowl, discarding any lumps.
- Fold in Egg Whites: Gently fold 1/3 of the whipped egg whites into the batter to lighten it. Add another 1/3 and repeat the folding process. Finally, carefully fold in the remaining egg whites until fully incorporated, being mindful not to deflate the mixture.
- Fill Cupcake Liners: Pour the batter into the prepared cupcake liners, filling them about 2/3 full. Gently drop the pan onto the counter a few times to release air bubbles.
- Bake: Place the cupcake pan in the water bath (if using) and bake for about 25-30 minutes. You may want to check for doneness toward the end. Cupcakes are done when they are golden and a toothpick inserted comes out clean.
- Cool Down: Once baked, turn off the oven and leave the door slightly ajar for about 10-15 minutes. This helps prevent the cupcakes from shrinking.
- Chill and Serve: Remove the cupcakes from the pan and let them cool completely at room temperature before serving with fresh fruit, whipped cream, and a drizzle of chocolate sauce.
Notes
- Room temperature ingredients are key to preventing lumps and ensuring a smooth batter.
- Using a water bath creates a gentle heat that prevents cracking and drying.
- Be gentle when folding the egg whites to keep the batter airy and light.
- Check for doneness with a toothpick; if it comes out clean, the cupcakes are ready.
- Chilling before serving enhances texture and flavor.


