
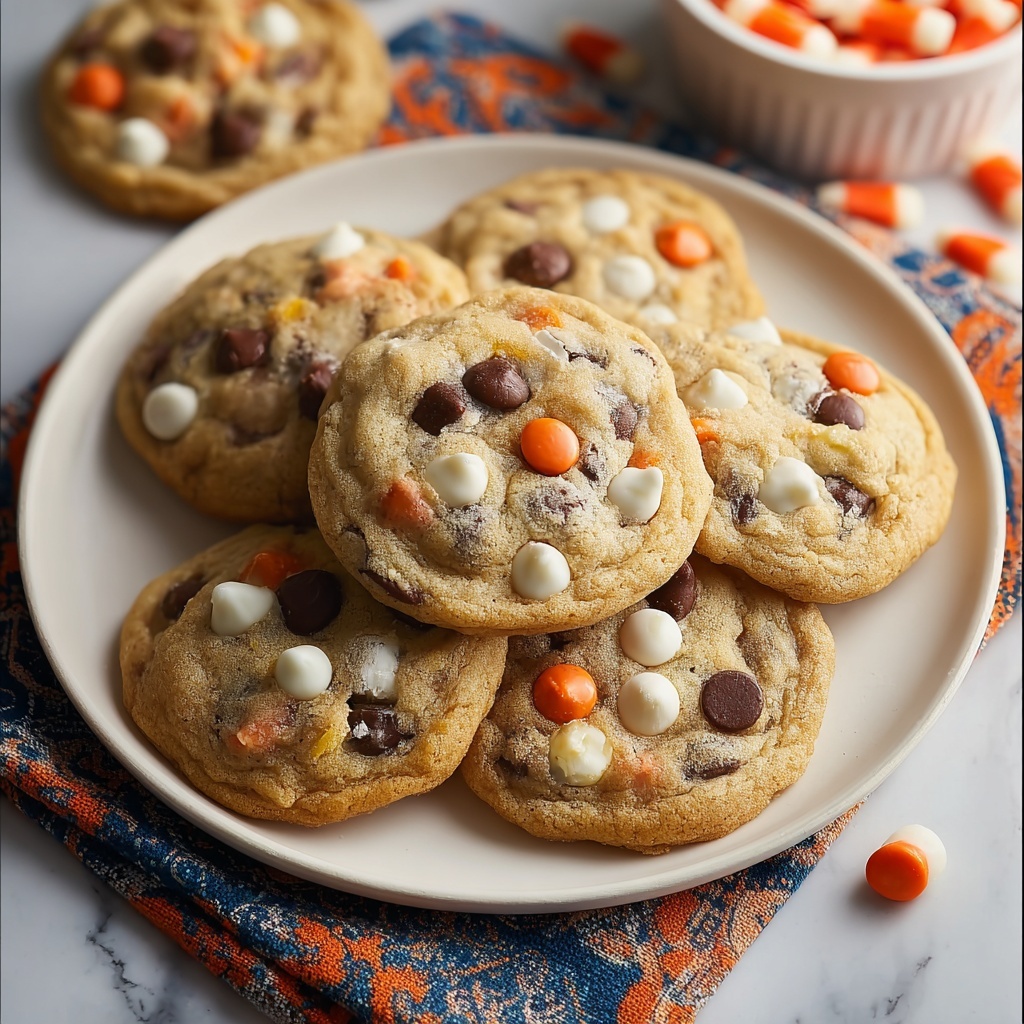
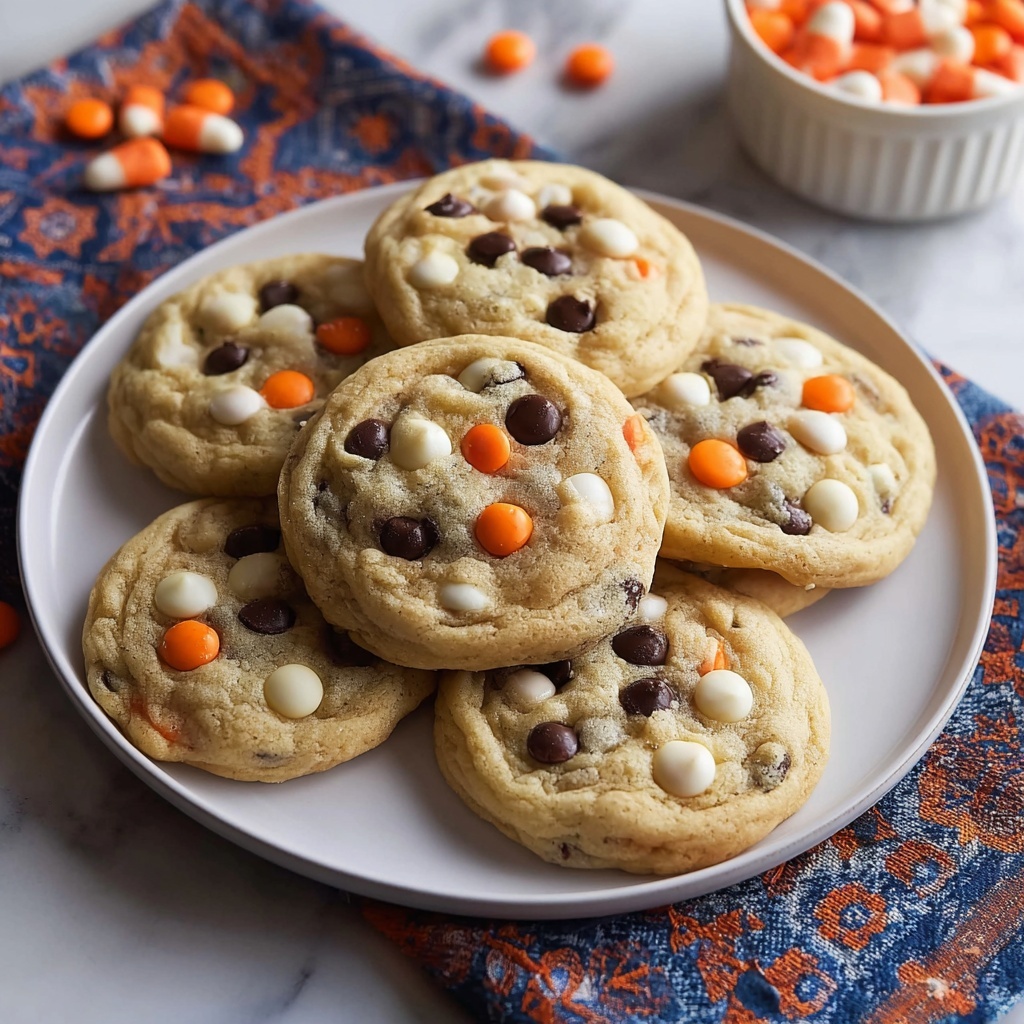
If you’re on the hunt for a treat that perfectly blends festive fun with irresistible flavor, the Hauntingly Delicious Chocolate Chip Spooky Cookies Recipe is going to be your new best friend. These cookies bring together the classic comforts of soft, chewy chocolate chip cookies with a playful holiday twist, thanks to spooky decorations that turn every bite into a mini celebration. Whether you’re baking for a Halloween party or just want to add a bit of magic to your snack time, this recipe delivers plenty of charm and plenty of chocolatey goodness in every batch.
Ingredients You’ll Need
These ingredients may be simple, but they work in harmony to create the perfect texture and taste for your spooky cookies. Each one plays a key role—from providing that tender chew to ensuring the rich chocolate flavor shines through.
- 2 1/4 cups all-purpose flour: The sturdy base that gives your cookies structure while keeping them soft.
- 1/2 teaspoon baking soda: Helps the cookies rise just right and develop a light texture.
- 1 cup unsalted butter, room temperature: For luscious richness and the perfect melt-in-your-mouth feel.
- 1/2 cup granulated sugar: Adds sweetness and helps with that slightly crisp edge.
- 1 cup packed light-brown sugar: Brings moisture and a subtle caramel undertone.
- 1 teaspoon salt: Balances sweetness and enhances all the flavors.
- 2 teaspoons pure vanilla extract: Infuses the dough with a warm, inviting aroma.
- 2 large eggs: Bind everything together and create that chewy texture we adore.
- 2 cups semisweet and/or white chocolate chips: The star of the show that provides bursts of melty chocolate in every bite.
- Assorted spooky decorations: Think black and orange sprinkles, candy eyeballs, or Halloween-themed candies to give your cookies their festive flair.
How to Make Hauntingly Delicious Chocolate Chip Spooky Cookies Recipe
Step 1: Prepare Your Oven and Baking Sheets
Preheat your oven to 350°F (175°C). Line two baking sheets with parchment paper or silicone mats to ensure the cookies bake evenly and release easily once done. Trust me, this little prep step saves you a lot of clean-up hassle later.
Step 2: Mix the Dry Ingredients
In a medium bowl, whisk together the all-purpose flour and baking soda. This simple combo is the foundation for your cookie’s perfect texture, helping them rise just the right amount while staying tender inside.
Step 3: Cream Butter and Sugars
Grab a large bowl and beat the unsalted butter with both the granulated and light-brown sugars using an electric mixer. Go for about two minutes on medium speed until the mixture is light, fluffy, and perfectly creamy. This step is key—those airy little pockets will make your cookies tender and full of flavor.
Step 4: Add Flavor and Eggs
Beat in the salt, vanilla extract, and eggs, making sure everything is well combined. Scrape down the bowl sides occasionally to keep the mixture smooth. This mix of ingredients ensures your cookies have that rich, buttery taste with just the right sweetness.
Step 5: Combine Wet and Dry Ingredients
Gradually add your flour mixture into the butter mixture while mixing on low speed. You want everything just combined here—overmixing will make your cookies tough instead of soft and chewy.
Step 6: Stir in the Chocolate Chips
Using a wooden spoon or rubber spatula, fold the chocolate chips into the dough. This hands-on step helps spread the chips evenly without breaking them, so each cookie will boast melty pockets of chocolate.
Step 7: Scoop and Arrange Dough
Drop dough onto your prepared baking sheets using a cookie scoop or tablespoon, spacing them about two inches apart. This spacing prevents the cookies from merging into one giant delight during baking.
Step 8: Decorate with Spooky Flair
Now comes the fun part! Gently press your spooky decorations—whether sprinkles, candy eyeballs, or Halloween-themed treats—into each cookie. They’ll stick during baking and make your cookies look as good as they taste.
Step 9: Bake to Perfection
Bake the cookies in your preheated oven for 10 to 12 minutes. You’ll know they’re ready when the edges turn golden brown but the centers are still soft—you want them to hold a slight softness for that perfect chewy texture.
Step 10: Cool Before Enjoying
Once out of the oven, let the cookies cool on the baking sheets for about five minutes before transferring them to wire racks. This helps them set properly without falling apart and keeps the spooky decorations intact.
How to Serve Hauntingly Delicious Chocolate Chip Spooky Cookies Recipe
Garnishes
Enhance your spooky cookies with an extra touch by serving alongside a dusting of edible glitter or a light drizzle of white chocolate. These little details add a festive shimmer and make your treats even more irresistible at the Halloween table.
Side Dishes
Pair your cookies with a classic glass of cold milk, or for a grown-up twist, a spiced pumpkin latte or hot chocolate topped with whipped cream. The creamy beverages complement the rich cookie flavors beautifully, turning your snack time into a cozy event.
Creative Ways to Present
Set the mood by arranging your cookies on a themed platter with mini pumpkins and autumn leaves around, or use a tiered dessert stand decorated with cobwebs and fake spiders for a real Halloween wow factor. Presentation is part of the fun and will wow guests of all ages.
Make Ahead and Storage
Storing Leftovers
Keep your spooky cookies fresh by storing them in an airtight container at room temperature for up to five days. Layer them between sheets of parchment paper to prevent sticking and preserve those charming decorations.
Freezing
If you want to prepare these cookies in advance, you can freeze the baked cookies in a sealed container or freezer bag for up to two months. Thaw them at room temperature when you’re ready to indulge—perfect for last-minute celebrations.
Reheating
To bring back that just-baked warmth, pop a cookie or two in the microwave for about 10 seconds or warm them in a low oven for a few minutes. This step revives their soft texture and melty chocolate, making them taste fresh out of the oven again.
FAQs
Can I use a different type of chocolate chip?
Absolutely! Feel free to mix semisweet, dark, white, or even peanut butter chips to customize the flavor. Just make sure you keep the total amount around two cups to maintain the right cookie consistency.
What can I substitute for unsalted butter?
You can use salted butter, but reduce or eliminate the added salt in the recipe to avoid oversalting. Unsalted butter is preferred for controlling the exact salt level, but salted works fine in a pinch.
How do I make these cookies gluten-free?
Swap the all-purpose flour with a gluten-free blend that is designed for baking. Just be sure it contains xanthan gum or another binder for the best texture, and check that your decorations are gluten-free too.
Can I make the dough ahead of time?
Yes! Chill the dough in the refrigerator for up to 48 hours before baking. This can enhance the flavor and texture. Just scoop and bake straight from the fridge, adding a couple of extra minutes to the baking time if needed.
What decorations work best for the spooky theme?
Black and orange sprinkles, candy eyeballs, edible glitter, or tiny gummy spiders all bring that perfect Halloween vibe. Pick decorations that can handle baking without melting too much or losing shape.
Final Thoughts
I can’t recommend enough for you to dive into making the Hauntingly Delicious Chocolate Chip Spooky Cookies Recipe this Halloween season. These cookies are more than just tasty—they’re an experience filled with fun, flavor, and a little playful spookiness that everyone will love. So grab your mixing bowl, get those spooky decorations ready, and let the baking magic begin!
Print
Hauntingly Delicious Chocolate Chip Spooky Cookies Recipe
- Prep Time: 0h 20m
- Cook Time: 0h 12m
- Total Time: 0h 32m
- Yield: About 36 cookies
- Category: Dessert
- Method: Baking
- Cuisine: American
- Diet: Vegetarian
Description
These Hauntingly Delicious Chocolate Chip Spooky Cookies are perfect for Halloween or any fun occasion. Soft and chewy with a delightful mix of semisweet and white chocolate chips, they’re decorated with festive spooky sprinkles and candy eyeballs for a fun and spooky twist on a classic favorite.
Ingredients
Dry Ingredients
- 2 1/4 cups all-purpose flour
- 1/2 teaspoon baking soda
Wet Ingredients
- 1 cup unsalted butter, room temperature
- 1/2 cup granulated sugar
- 1 cup packed light-brown sugar
- 1 teaspoon salt
- 2 teaspoons pure vanilla extract
- 2 large eggs
Add-ins and Decorations
- 2 cups semisweet and/or white chocolate chips
- Assorted spooky decorations (black and orange sprinkles, candy eyeballs, or Halloween-themed candies)
Instructions
- Preheat Oven: Preheat your oven to 350°F (175°C). Line two baking sheets with parchment paper or silicone baking mats and set aside.
- Mix Dry Ingredients: In a medium bowl, whisk together the flour and baking soda; set aside.
- Cream Butter and Sugars: In a large bowl, using an electric mixer, beat the butter and sugars on medium speed until light and fluffy, about 2 minutes.
- Add Flavorings and Eggs: Add the salt, vanilla, and eggs to the butter mixture. Mix until well combined, scraping down the sides of the bowl as needed.
- Combine Dry and Wet Mixtures: Gradually add the flour mixture to the butter mixture, beating at low speed until just combined.
- Fold in Chocolate Chips: Stir in the chocolate chips by hand using a wooden spoon or rubber spatula.
- Portion Dough: Using a cookie scoop or tablespoon, drop dough onto the prepared baking sheets about 2 inches apart.
- Decorate: Decorate each cookie with your spooky decorations, gently pressing them into the dough so they stick while baking.
- Bake: Bake cookies in the preheated oven for 10 to 12 minutes or until edges are golden brown but centers are still soft.
- Cool: Remove the cookies from the oven and let them cool on the baking sheets for about 5 minutes before transferring to wire racks to cool completely.
Notes
- If you prefer, you can use all semisweet or all white chocolate chips depending on taste preference.
- To keep cookies soft, do not overbake; remove as soon as edges turn golden.
- For extra festive flair, add a variety of Halloween-themed candies and sprinkles.
- Butter should be at room temperature for optimal creaming with sugars.
- Store cookies in an airtight container at room temperature for up to 5 days.


