
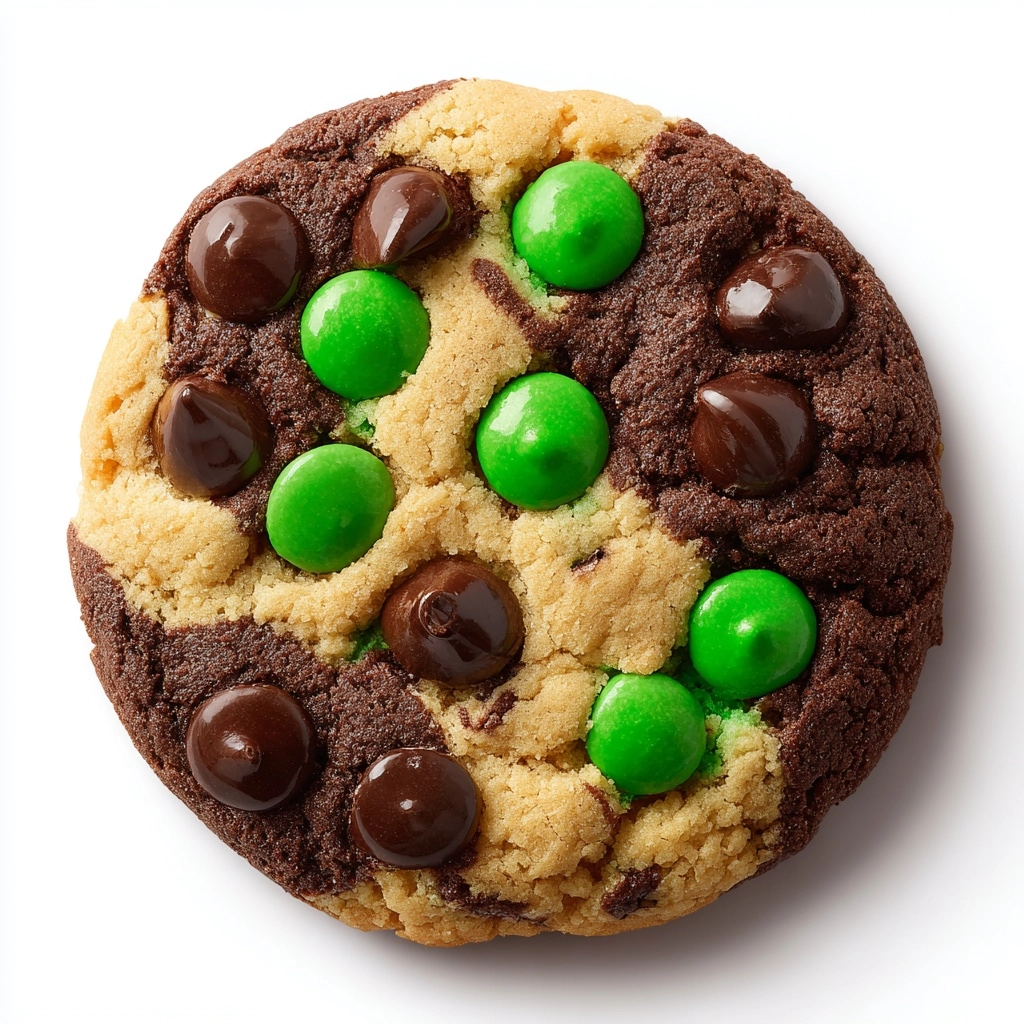
If you’re looking for the perfect magical treat to conjure up this Halloween season, Hocus Pocus Cookies are about to cast a delicious spell on your dessert table! Packed with eye-popping sprinkles, a trio of chocolates, gooey marshmallows, and crunchy Oreo bits, these cookies are not only festive but irresistibly chewy and soft. Every bite delivers fun, nostalgia, and a whole lot of Halloween charm. Whether you’re baking for a party, a family movie night, or just want to surprise the neighborhood trick-or-treaters, Hocus Pocus Cookies promise to bring a little enchantment to every occasion.
Ingredients You’ll Need
Making these Hocus Pocus Cookies is all about assembling the most playful, whimsical, and decadent ingredients into one seriously spooky-sweet package. Each element adds something special, whether it’s a punch of color, a boost of flavor, or that delightful chewy-crispy texture everyone craves in a cookie.
- Unsalted butter: Softened butter creates that plush, chewy base and helps blend all the magical mix-ins together smoothly.
- Granulated sugar: Brings light sweetness and assists with cookie spread and golden edges.
- Packed light brown sugar: Infuses caramel notes and contributes to a moist, soft bite.
- Large eggs: These bind the dough and provide essential structure for perfect cookies every time.
- Vanilla extract: A generous splash enhances all the rich flavors and lends a little dreamy aroma.
- All-purpose flour: The flour holds everything together and gives these cookies their tender, bakery-style crumb.
- Baking soda: Ensures your cookies rise just the right amount for that classic softness.
- Baking powder: Adds extra lift for a slightly puffy, cake-like finish to each bite.
- Salt: A small amount balances out the sweetness and intensifies flavor complexity.
- Halloween-themed sprinkles: Bold, festive colors instantly make each cookie Halloween-ready and delightfully playful.
- White chocolate chips: These melt into little pockets of creamy sweetness in every cookie.
- Semi-sweet chocolate chips: For deep chocolate flavor that isn’t too sweet – perfectly balanced in every bite.
- Crushed Oreos (Halloween edition if available): Oreos add a fun crunch and spooky color; the festive edition heightens the Halloween spirit.
- Mini marshmallows: Little clouds of gooey magic that create melty, stretchy bites within the cookie.
How to Make Hocus Pocus Cookies
Step 1: Prep Your Baking Gear
Start by preheating your oven to 350°F. Line two baking sheets with parchment paper—this keeps your cookies from sticking and makes cleanup a breeze. Trust me, this small step makes a huge difference in getting those perfect golden edges!
Step 2: Cream the Butter and Sugars
In a large mixing bowl, beat the softened butter, granulated sugar, and brown sugar together until light and fluffy. This process adds air, setting the stage for soft, chewy Hocus Pocus Cookies and ensuring every bite is buttery and rich.
Step 3: Add Eggs and Vanilla
Crack in the eggs, then pour in your vanilla extract. Mix until everything is just combined and smooth—this locks in moisture and brings out those irresistible cookie flavors you crave.
Step 4: Combine the Dry Ingredients
In a separate bowl, whisk together your flour, baking soda, baking powder, and salt. This ensures even distribution (and prevents biting into a salty or bitter lump). Gradually add the dry mix to your wet ingredients, blending just until the dough forms and no streaks of flour remain.
Step 5: Add the Mix-ins
Now it’s time to bring on the magic! Gently fold in the Halloween sprinkles, both kinds of chocolate chips, crushed Oreos, and mini marshmallows. This step is where your Hocus Pocus Cookies come to life—it’s colorful, messy, and oh-so-fun!
Step 6: Scoop and Shape
With a cookie scoop or spoon, portion out dough balls onto your prepared baking sheets, spacing them about 2 inches apart. This gives the cookies room to spread without merging into a big, spooky blob (unless that’s your vibe!).
Step 7: Bake to Perfection
Pop those trays in the oven and bake for 10 to 12 minutes, just until the edges are set and lightly golden. The centers will still look soft—that’s how you get that coveted chewy middle! For a little extra flair, press a few more marshmallows, chips, or sprinkles on top right after they come out.
Step 8: Cool and Enjoy
Let your cookies rest on the baking sheet for about 5 minutes (they’re extra fragile fresh from the oven). Then, transfer them to a wire rack to cool completely—or sneak one while they’re still warm and melty!
How to Serve Hocus Pocus Cookies

Garnishes
For the ultimate festive flair, sprinkle on extra Halloween-themed sprinkles, a couple of marshmallow bits, or even a crushed Oreo or two on top while the cookies are still warm. This simple touch makes your Hocus Pocus Cookies shine and amps up the “wow” factor for every guest.
Side Dishes
Pair your cookies with small glasses of cold milk (classic!) or serve alongside a mug of hot chocolate for a dreamy, cozy treat. They also make a charming addition to a spooky dessert platter with caramel apples, popcorn balls, or fruity punch.
Creative Ways to Present
Arrange your Hocus Pocus Cookies in a cauldron-shaped bowl for a magical effect or line a platter with parchment and scatter plastic spiders for playful, spooky vibes. For party favors, tuck a few cookies into clear treat bags, tie with orange and black ribbon, and hand them out as enchanting Halloween gifts!
Make Ahead and Storage
Storing Leftovers
Store leftover Hocus Pocus Cookies in an airtight container at room temperature for up to 4 days. The marshmallows and chocolates keep the cookies moist and chewy, so every cookie tastes freshly baked even days later.
Freezing
To freeze, let the cookies cool completely, then layer them in a freezer-safe container with parchment between the layers to prevent sticking. They’ll keep beautifully for up to 2 months—just let them thaw at room temperature before serving for best texture.
Reheating
If you crave that fresh-baked warmth, pop a cookie in the microwave for 8–10 seconds. This brings the marshmallow back to gooey, melts the chocolate, and makes your Hocus Pocus Cookies taste like they just came out of the oven!
FAQs
Can I use different colored sprinkles for other holidays?
Absolutely! Swap in any themed sprinkles—think Christmas, Valentine’s Day, or birthday parties—to make these cookies match any festive occasion all year round.
How do I keep my Hocus Pocus Cookies from spreading too much?
If your dough is extra soft, try chilling it for 30 minutes before baking. This helps prevent excess spreading and keeps the cookies thick, chewy, and picture-perfect.
Can I make the dough ahead of time?
Yes! You can mix the dough, scoop the portions, and freeze them on a tray. When you’re ready to bake, just pop them straight from the freezer onto the tray and add an extra minute or two to the bake time.
Can I substitute the marshmallows with something else?
If you’re not a fan of marshmallows, mini caramel candies or butterscotch chips make a delicious swap, adding their own gooey or melty charm to the cookies.
What’s the best way to crush the Oreos?
Place them in a resealable plastic bag and use a rolling pin to gently crush. Aim for small chunks, not fine crumbs, so you get that signature cookies-and-cream crunch in your Hocus Pocus Cookies!
Final Thoughts
If you’re on the hunt for a joyful, whimsical bake that’ll put everyone under a happy spell, give these Hocus Pocus Cookies a try. There’s something about their colorful, chunky, chocolatey magic that just makes people smile. Make a batch, share them with friends, and watch these cookies disappear faster than you can say “abracadabra!”
Print
Hocus Pocus Cookies Recipe
- Prep Time: 15 minutes
- Cook Time: 12 minutes
- Total Time: 27 minutes
- Yield: 24 cookies
- Category: Dessert
- Method: Baking
- Cuisine: American
- Diet: Vegetarian
Description
These Hocus Pocus Cookies are a delightful treat for Halloween or any festive occasion. Packed with white and dark chocolate, sprinkles, and crushed Oreos, these cookies are perfect for spreading some spooky cheer.
Ingredients
Cookies:
- 1 cup unsalted butter, softened
- 1 cup granulated sugar
- 1 cup packed light brown sugar
- 2 large eggs
- 1 tablespoon vanilla extract
- 3 cups all-purpose flour
- 1 teaspoon baking soda
- 1/2 teaspoon baking powder
- 1/2 teaspoon salt
Add-Ins:
- 1 cup Halloween-themed sprinkles
- 1 cup white chocolate chips
- 1 cup semi-sweet chocolate chips
- 1 cup crushed Oreos (Halloween edition if available)
- 1/2 cup mini marshmallows
Instructions
- Preheat the oven: Preheat the oven to 350°F and line two baking sheets with parchment paper.
- Cream butter and sugars: In a large mixing bowl, cream the butter, granulated sugar, and brown sugar until light and fluffy.
- Add eggs and vanilla: Add the eggs and vanilla extract, mixing until fully combined.
- Combine dry ingredients: In a separate bowl, whisk together the flour, baking soda, baking powder, and salt. Gradually add the dry ingredients to the wet mixture, mixing just until incorporated.
- Stir in add-ins: Fold in the sprinkles, white chocolate chips, semi-sweet chocolate chips, crushed Oreos, and mini marshmallows.
- Bake: Use a cookie scoop to portion dough balls onto the prepared baking sheets. Bake for 10–12 minutes, or until the edges are set and lightly golden.
- Cool and enjoy: Let the cookies cool on the baking sheet for 5 minutes before transferring to a wire rack to cool completely.
Notes
- For extra Halloween flair, press a few extra chips, sprinkles, or marshmallows on top of the cookies right after baking.
- These cookies freeze well and are great for spooky-themed parties or gifting.
Nutrition
- Serving Size: 1 cookie
- Calories: 210
- Sugar: 18g
- Sodium: 120mg
- Fat: 10g
- Saturated Fat: 6g
- Unsaturated Fat: 3g
- Trans Fat: 0g
- Carbohydrates: 28g
- Fiber: 1g
- Protein: 2g
- Cholesterol: 25mg


