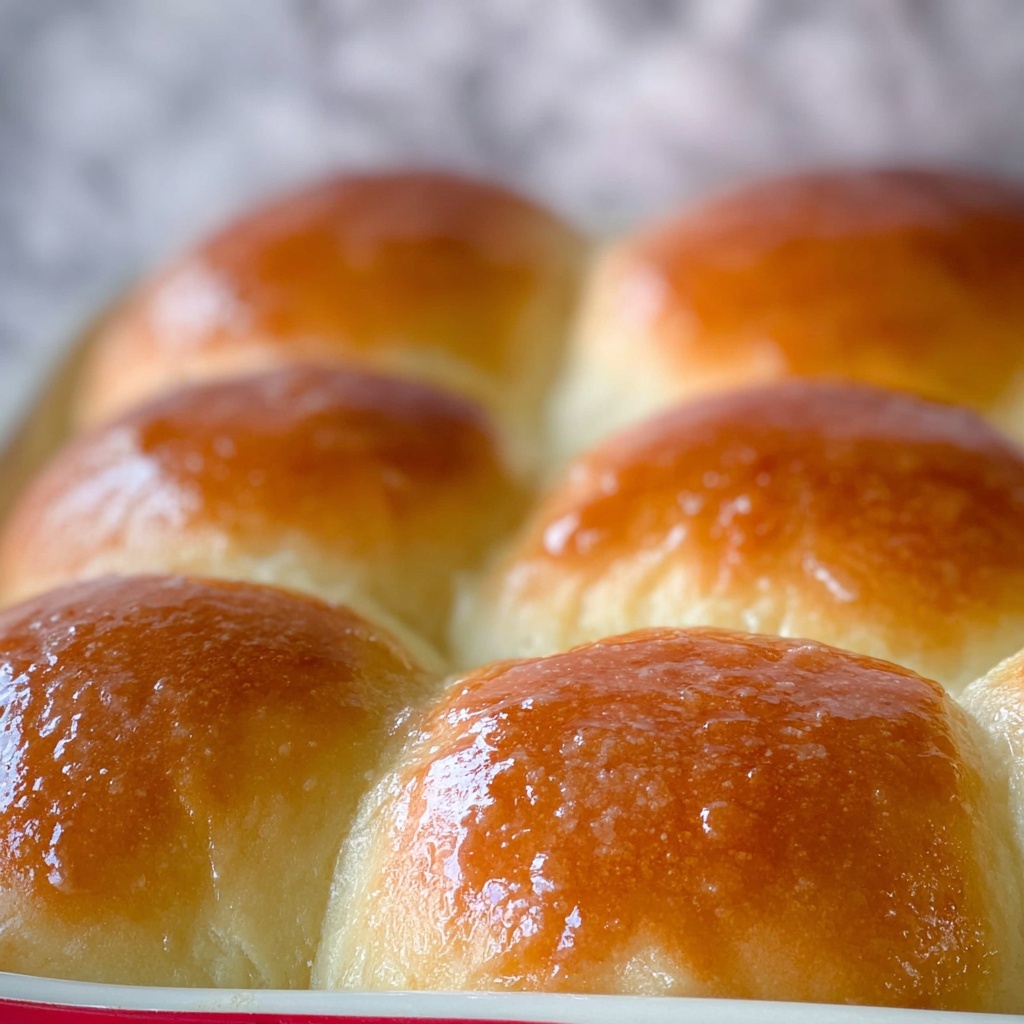
There is nothing quite like the warmth and comfort of freshly baked bread, and this Homemade Dinner Rolls Recipe delivers that with every soft, buttery bite. These rolls are a classic crowd-pleaser, perfect for family dinners, holiday feasts, or any time you want to elevate your meal. The recipe strikes the ideal balance between tender crumb and a golden crust, making each roll irresistibly fluffy and buttery. Whether you’re a seasoned baker or just starting out, these rolls will quickly become your go-to for effortless homemade bread that impresses.
Ingredients You’ll Need
The magic of this Homemade Dinner Rolls Recipe lies in its simple yet carefully chosen ingredients. Each one plays a vital role in building the flavor, texture, and color that make these rolls so special.
- 1/2 cup water: Lukewarm water activates the yeast to help the dough rise beautifully.
- 2 tablespoons active dry yeast: The powerhouse that creates the fluffy, airy texture.
- 2 teaspoons white sugar: Feeds the yeast, speeding up the rising process.
- 2 cups milk: Warm milk adds richness and tenderness to the dough.
- 1/3 cup white sugar: Adds just the right touch of sweetness to balance flavors.
- 2 1/2 teaspoons kosher salt: Enhances flavor and strengthens gluten formation.
- 1/4 cup butter-flavored shortening (or real butter): Provides moisture and a delicious buttery note.
- 1 egg: Binds ingredients together and enriches the dough.
- 5-6 cups all-purpose flour: Forms the dough structure; adding gradually ensures perfect consistency.
- 4 tablespoons melted butter (for brushing): Brushed on after baking for that golden, shiny finish and extra flavor.
How to Make Homemade Dinner Rolls Recipe
Step 1: Activate Your Yeast
Start by warming 1/2 cup of water until it’s just lukewarm—not too hot to kill the yeast. Mix in the active dry yeast with 2 teaspoons of sugar and let it sit for about 5 minutes. Watch carefully for bubbling; this signals the yeast is alive and ready to do its job.
Step 2: Warm the Milk
Warm 2 cups of milk gently in the microwave until it’s comfortably warm but not hot. Warm milk enriches the dough giving the rolls their tender crumb and a hint of sweetness that makes them so addictive.
Step 3: Mix Dry Ingredients and Shortening
In a large bowl or your stand mixer, combine 1/3 cup sugar, kosher salt, butter-flavored shortening, and 2 cups of the flour. Stir these together to start building the dough base with a perfect balance of saltiness and slight sweetness.
Step 4: Combine Wet and Dry Ingredients
Add the warm milk, yeast mixture, and the egg to the dry ingredients. Mix everything well and let it rest for 5 minutes to allow the flour to absorb the liquid—this makes kneading easier and the dough softer.
Step 5: Add Flour Gradually
Start adding more flour one cup at a time, mixing in between. Use between 4 to 6 cups — stop when the dough is soft, slightly sticky, yet pulls away from the sides of the bowl. Remember, less flour means more tender rolls.
Step 6: Knead the Dough
Knead the dough either with your hands or a dough hook for about 5 to 6 minutes. This develops gluten, giving the rolls structure while keeping them light and fluffy.
Step 7: First Rise
Grease a large bowl and place the dough inside, turning it over so the top is also greased. Cover loosely with a towel or plastic wrap and let it rise in a warm spot until doubled in size, about 1 hour. Patience here means fluffier rolls later!
Step 8: Shape the Rolls
After punching down the dough to release air, divide it into 24 equal pieces. Shape each into a smooth ball by pinching the ends underneath. The shaping ensures even baking and that beautiful rounded top.
Step 9: Second Rise
Place your rolls in two well-greased pans—a 9×13 inch pan and a 2-quart casserole dish work perfectly. Cover with tea towels and let them rise again in a warm place for 30-45 minutes, until doubled. Meanwhile, preheat your oven to 375°F.
Step 10: Bake and Butter
Bake the rolls at 375°F for 12-15 minutes until they are golden brown on top. Remove from the oven and immediately brush generously with melted butter for that signature shiny crust and burst of buttery flavor.
Step 11: Enjoy While Warm
The best part! Serve these rolls hot and watch them disappear quickly. Their soft texture and buttery taste are unforgettable fresh out of the oven.
How to Serve Homemade Dinner Rolls Recipe
Garnishes
A quick brush of melted butter is a classic garnish that adds flavor and shine. For a twist, sprinkle garlic powder, fresh chopped herbs, or a pinch of coarse salt on top right after baking for extra character.
Side Dishes
These dinner rolls pair wonderfully with soups, stews, and hearty salads. Try them alongside a comforting bowl of chili or roasted chicken dinner to soak up every last bit of sauce.
Creative Ways to Present
Shape your rolls into knots or braids before baking for a fun visual treat. You could also serve them alongside flavored butters—think honey cinnamon or herb and garlic—to impress guests with both taste and style.
Make Ahead and Storage
Storing Leftovers
If you have leftovers, store the rolls in an airtight container at room temperature for up to 2 days. Keeping them covered maintains their softness and prevents drying out.
Freezing
These rolls freeze beautifully. Wrap cooled rolls individually or in small batches in plastic wrap and place them in a freezer-safe bag. They keep well for up to 3 months, making them perfect for prepping in advance.
Reheating
To bring frozen or stored rolls back to life, warm them in a low oven (about 300°F) wrapped in foil for 10-15 minutes, or microwave wrapped in a damp paper towel for 20-30 seconds. Finish with a quick brush of melted butter for that fresh-baked touch.
FAQs
Can I use real butter instead of shortening?
Absolutely! Real butter adds rich flavor and a lovely aroma. Just keep the amount the same, and your rolls will taste even more buttery and indulgent.
Why do some rolls turn out tough?
This usually happens if too much flour is added or if the dough is over-kneaded. Aim for a soft, slightly sticky dough and knead just enough to develop gluten without making the dough stiff.
Can I make smaller or larger rolls?
Yes, feel free to adjust the size of the rolls. Just remember to adjust baking time accordingly—smaller rolls will bake faster, larger ones will need a few extra minutes.
What’s the best way to proof the dough?
A warm, draft-free spot is ideal. You can put the bowl in an oven with just the light on or near a radiator to maintain consistent warmth for rising.
Can I add herbs or cheese to the dough?
Definitely! Fresh herbs or shredded cheese can be gently folded into the dough before the first rise to create flavored rolls that add a scrumptious twist.
Final Thoughts
Once you try this Homemade Dinner Rolls Recipe, you’ll wonder why you ever bought rolls from the store. Their pillowy softness, buttery finish, and comforting aroma make them unforgettable. Baking them yourself is easier than you think, and the reward is more than worth the time. So grab your apron and get ready to fill your kitchen—and your heart—with the joy of homemade bread!
Print
Homemade Dinner Rolls Recipe
- Prep Time: 30 minutes
- Cook Time: 12 minutes
- Total Time: 1 hour 45 minutes
- Yield: 24 rolls
- Category: Bread, Side Dish
- Method: Baking
- Cuisine: American
Description
These homemade dinner rolls are soft, fluffy, and buttery, perfect for family meals or special occasions. With a tender crumb and golden brown crust, they are easy to make from scratch using simple ingredients and a straightforward baking process that yields 24 delicious rolls.
Ingredients
Yeast Mixture
- 1/2 cup water
- 2 tablespoons active dry yeast
- 2 teaspoons white sugar
Dough
- 2 cups milk
- 1/3 cup white sugar
- 2 1/2 teaspoons kosher salt
- 1/4 cup butter-flavored shortening (or real butter)
- 1 egg
- 5–6 cups all-purpose flour (spooned and leveled)
For Finishing
- 4 tablespoons melted butter (for brushing)
Instructions
- Prepare Yeast Mixture: Microwave 1/2 cup water for 20-30 seconds until lukewarm but not hot. Stir in 2 tablespoons active dry yeast and 2 teaspoons white sugar. Let sit for 5 minutes, ensuring it doesn’t overflow as the yeast activates.
- Warm the Milk: Microwave 2 cups of milk for 1-2 minutes until warm but not hot to help activate the yeast and ease mixing.
- Mix Dry Ingredients: In a large bowl or stand mixer, combine 1/3 cup sugar, 2 1/2 teaspoons kosher salt, 1/4 cup butter-flavored shortening, and 2 cups of flour. Stir these ingredients together thoroughly.
- Add Wet Ingredients: Pour in the warm milk, the activated yeast mixture, and 1 egg into the dry ingredient mixture. Mix well and allow the mixture to rest for 5 minutes. Switch to a dough hook if using a mixer for better kneading.
- Incorporate Flour: Add 4 cups of flour gradually, one cup at a time, mixing between additions. Add more flour as needed, up to 5 or 6 cups total, until the dough is smooth, soft, slightly sticky, and pulling away from the sides of the bowl. Avoid over-flouring for tender rolls.
- Knead the Dough: Knead the dough for 5-6 minutes by hand or with a dough hook until elastic and smooth.
- First Rise: Grease a large bowl with oil or butter. Place the dough inside, shape into a ball, turning it over so the top is greased. Cover loosely with a tea towel or plastic wrap and let rise in a warm place until doubled in size, about 1 hour.
- Shape Rolls: Punch down the risen dough and divide it into 24 equal pieces. Shape each piece into a smooth ball by pinching the ends together.
- Second Rise: Arrange the rolls in two well-greased pans (one 9×13-inch pan and one 2-quart casserole dish recommended). Cover with tea towels and let rise in a warm spot for 30-45 minutes until doubled in size. Preheat oven to 375°F when near the end of this rise.
- Bake: Bake the rolls at 375°F for 12-15 minutes until golden brown across the tops.
- Brush with Butter: Remove the rolls from the oven immediately and brush generously with 4 tablespoons melted butter for a shiny, flavorful finish.
- Serve: Enjoy the dinner rolls warm for the best texture and flavor.
Notes
- Do not let the water or milk get too hot; lukewarm temperature is best to activate yeast without killing it.
- Use the minimum amount of flour needed to keep dough sticky but workable for soft, tender rolls.
- Cover the dough gently to prevent drying out during rising.
- Butter-flavored shortening can be substituted with real butter for a richer flavor.
- Letting the dough rise fully both times is key to achieving fluffy rolls.
- Brush with melted butter immediately after baking for a soft crust and additional moisture.


