If you have ever wanted to impress your friends with a restaurant-quality dish at home, learning How to Roll Sushi Recipe is an absolute must. Sushi might seem intimidating with its delicate appearance and artistic presentation, but once you get the hang of the basics, it’s an incredibly rewarding and fun culinary adventure. This recipe simplifies the process and shows you exactly how to create perfect rolls, how to handle sushi rice, and the best way to arrange your fillings so each bite bursts with harmonious flavor. Get ready to bring a touch of sushi magic to your kitchen!
Ingredients You’ll Need
The ingredients for this sushi recipe are elegantly simple, yet each plays a unique role in building the authentic flavors and textures you expect from a well-crafted roll.
- 1 cup sushi rice: The foundation of any sushi, it should be short-grain and sticky to bind the roll together perfectly.
- 1 piece nori (roasted): This seaweed sheet wraps the rice and fillings, adding umami and a slight crisp texture.
- Toasted black sesame seeds: These provide a nutty crunch and a striking contrast against the white rice.
- Filling ingredients: Choose your favorites like fresh fish, cucumber, avocado, or crab sticks—each will add flavor, color, and variety.
How to Make How to Roll Sushi Recipe
Step 1: Prepare Your Workspace and Ingredients
Before you start rolling, make sure you have your bamboo sushi mat ready and clean fingertips dipped in water to handle sticky rice easily. Prepare all fillings sliced into thin strips and have a bowl of water nearby to keep your hands moist—this prevents the rice from sticking to your fingers during the rolling process.
Step 2: Spread Rice on Nori (Maki Method)
Lay one sheet of nori on the bamboo mat, lines running parallel to the mat’s sticks and with the rough side up. Scoop in 1 cup of prepared sushi rice and spread it evenly across the nori with a rice paddle or back of a spoon, stopping about ½ inch from the edge closest to you. Keeping this edge clear helps seal the roll later on.
Step 3: Add Your Filling Ingredients
Place your chosen fillings in a neat row along the edge closest to you, slightly off-center to give the roll balance when you fold. A light sprinkle of salt can enhance the flavor of your fillings without overpowering them.
Step 4: Roll the Sushi
Starting at the edge closest to you, pick up the bamboo mat and carefully roll it over the fillings, gently pressing the ingredients inward as you go. Use the bamboo mat to apply even pressure, tightening the roll without squashing it. Stop once you reach the uncovered edge of nori.
Step 5: Seal Your Roll
Wet your fingers and moisten the bare edge of nori left at the end of the roll. Press firmly to stick that edge onto the roll and keep everything neatly enclosed. This sealing step keeps your sushi from unraveling and locks in all those incredible flavors.
Step 6: Inside-Out Roll Variation (Uramaki Method)
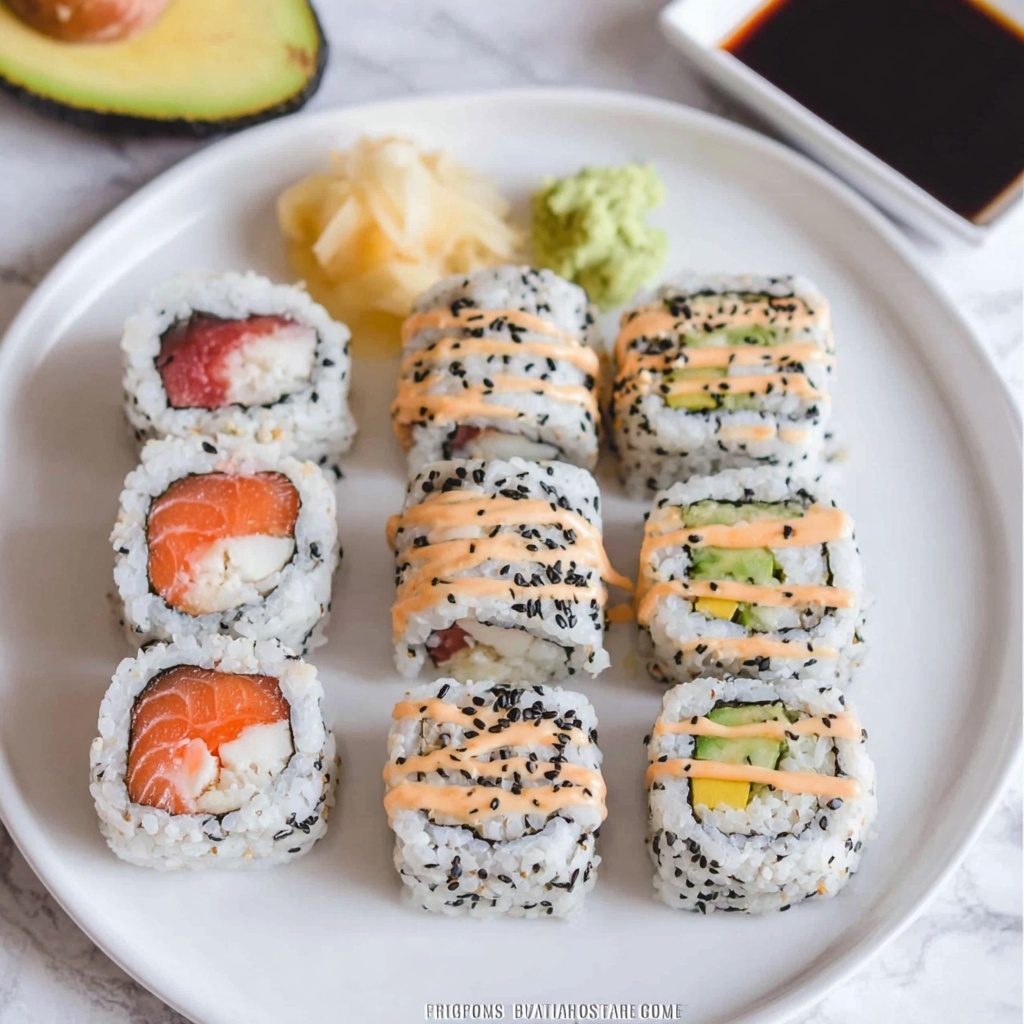
For an inside-out roll, spread the rice fully over the nori, edge to edge, and sprinkle on toasted black sesame seeds. Cover with plastic wrap, flip the nori over so the rice faces down on the bamboo mat, then add fillings on the nori side. Roll gently while ensuring the plastic wrap doesn’t get caught in the sushi. This technique creates a beautiful outer layer of rice studded with sesame.
Step 7: Cutting Your Sushi Roll
Use a sharp chef’s knife run under cold water to cut clean, even slices. You can slice with or without plastic wrap, but the wrap helps maintain shape until the knife completes the cut. Aim for about 8 to 10 pieces per roll—perfect bite-sized portions for sharing and savoring.
How to Serve How to Roll Sushi Recipe
Garnishes
Serve your sushi with classic accompaniments like pickled ginger, wasabi, and soy sauce for dipping. These garnishes not only complement the flavors but also add visual appeal and traditional flair.
Side Dishes
Consider pairing your sushi with a light miso soup or a bright seaweed salad. These sides highlight the freshness of your sushi and add a satisfying balance of textures and tastes to your meal.
Creative Ways to Present
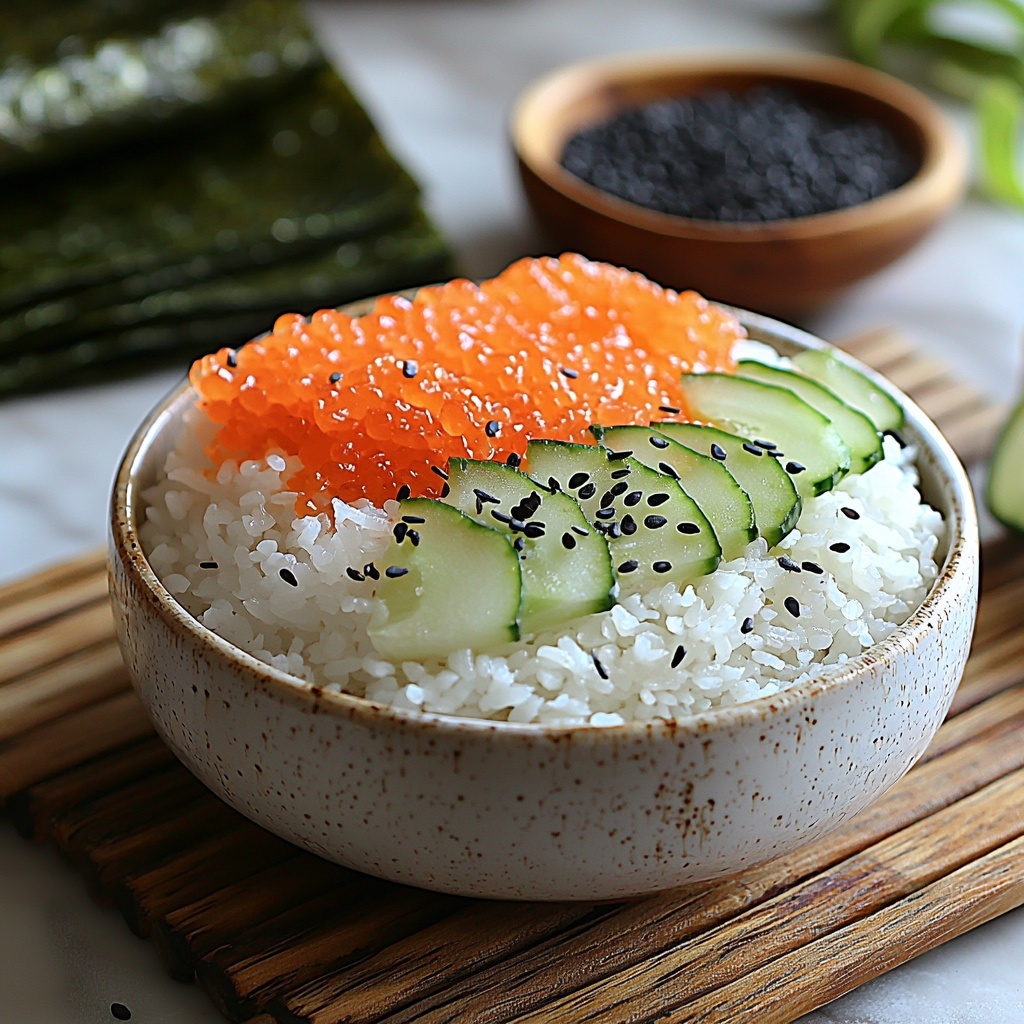
Try adding playful touches like thin slices of radish, edible flowers, or drizzles of spicy mayo on top of your rolls. Arrange your sushi on a wooden board with fresh herbs or bamboo leaves for an inviting and authentic presentation that will wow your dinner guests.
Make Ahead and Storage
Storing Leftovers
Sushi is best enjoyed fresh, but if you have leftovers, wrap them tightly in plastic wrap and store in the refrigerator. They should be eaten within 24 hours for best texture and taste, as the rice tends to harden over time.
Freezing
Freezing sushi is not recommended as it greatly affects the texture of both rice and fillings, especially fresh fish. It’s better to prepare only what you can enjoy in one sitting to maintain the highest quality.
Reheating
Reheating sushi is generally not advisable. The rice will lose its is ideal texture and the fillings may become overcooked or soggy. Instead, enjoy your cold sushi straight from the fridge or refresh the experience by making a new batch with your favorite fillings.
FAQs
Do I need a special type of rice to roll sushi?
Yes, short-grain sushi rice is essential because it becomes sticky and pliable enough to hold the roll together without falling apart.
Can I make sushi without a bamboo mat?
While a bamboo mat makes rolling easier and more compact, you can use parchment paper or even your hands carefully to shape the sushi roll in a pinch.
How do I prevent the rice from sticking to my hands?
Keep a bowl of water nearby and frequently wet your fingertips when handling sushi rice. This simple trick keeps the rice from sticking and makes spreading and rolling much easier.
What types of fillings work best in sushi?
Traditional fillings include fresh fish like tuna or salmon, cucumber, avocado, crab sticks, or even cooked items like tempura shrimp. The key is to balance flavors and textures for the best bite.
Can I make vegetarian sushi using this recipe?
Absolutely! Just swap out fish for fresh veggies like cucumber, carrot, avocado, or pickled radish for a delicious vegetarian sushi roll.
Final Thoughts
Mastering How to Roll Sushi Recipe might seem daunting at first, but with a little practice, it becomes an enjoyable and rewarding cooking experience. Not only will you delight your taste buds, but you’ll also impress friends and family with this fun, interactive dish. So, roll up your sleeves and dive in—your homemade sushi adventure awaits!
Print
How to Roll Sushi Recipe
- Prep Time: 10 minutes
- Cook Time: Not included (assumes cooked sushi rice prepared beforehand)
- Total Time: 10 minutes
- Yield: 1 sushi roll (8-10 pieces)
- Category: Sushi
- Method: No-Cook
- Cuisine: Japanese
Description
Learn how to roll sushi using traditional Maki and Inside-Out Uramaki methods with simple instructions for spreading rice, adding fillings, rolling, and cutting the sushi rolls. This guide includes tips for perfect seals and optional use of toasted sesame seeds for added texture and flavor.
Ingredients
Main Ingredients
- 1 cup sushi rice
- 1 piece nori (roasted seaweed sheet)
- Toasted black sesame seeds (optional, for Uramaki)
Filling Ingredients
- Varied fillings (vegetables, seafood, or other preferred sushi fillings)
- Salt (optional, for seasoning fillings)
Instructions
- Maki (Traditional) Method – Spread Rice: Place a sheet of nori onto a bamboo mat with the rough side facing up and lined with the bamboo. Add 1 cup of sushi rice and spread it evenly using a rice paddle. Wet your fingertips and lightly spread rice to all edges except about ½-inch from the edge farthest from you to allow sealing.
- Add Fillings: Arrange your chosen filling ingredients in a row slightly off-center and close to you on the rice. Sprinkle a little salt if desired.
- Roll Sushi: Starting from your end, lift the bamboo mat over the fillings and roll forward, pressing gently to tighten the sushi roll while pushing the filling back inside.
- Seal Roll: Wet your fingers and moisten the uncovered ½-inch edge of nori, then press the roll to seal it closed.
- Uramaki (Inside-Out) Method – Spread Rice: Place the nori sheet on the bamboo mat rough side up and spread 1 cup of sushi rice evenly across it. Wet fingertips to spread rice to all edges and optionally sprinkle toasted black sesame seeds on top. Cover with plastic wrap, then flip the nori over so rice side is down on the mat.
- Add Fillings: Place the fillings in a row close to you and slightly off-center on the nori.
- Roll Sushi: Using the bamboo mat, start rolling from your end while lifting the mat, keeping the plastic wrap from getting wrapped into the roll, pushing filling back inside and tightening the roll.
- Cut the Sushi Roll: Either cut the roll with plastic wrap on or remove it first. Using a sharp chef’s knife dipped in cold water, cut 2-3 slices at a time until you have 8-10 pieces.
- Remove Plastic: Remove any plastic wrap still on the roll before serving.
Notes
- Wet your fingers before handling sushi rice to prevent sticking.
- Use a sharp, wet knife for clean sushi cuts.
- Adjust filling ingredients to taste and dietary preferences.
- Plastic wrap helps keep the roll together during the Uramaki method.
- Sushi rice requires proper seasoning and cooling before assembling rolls for best texture.


