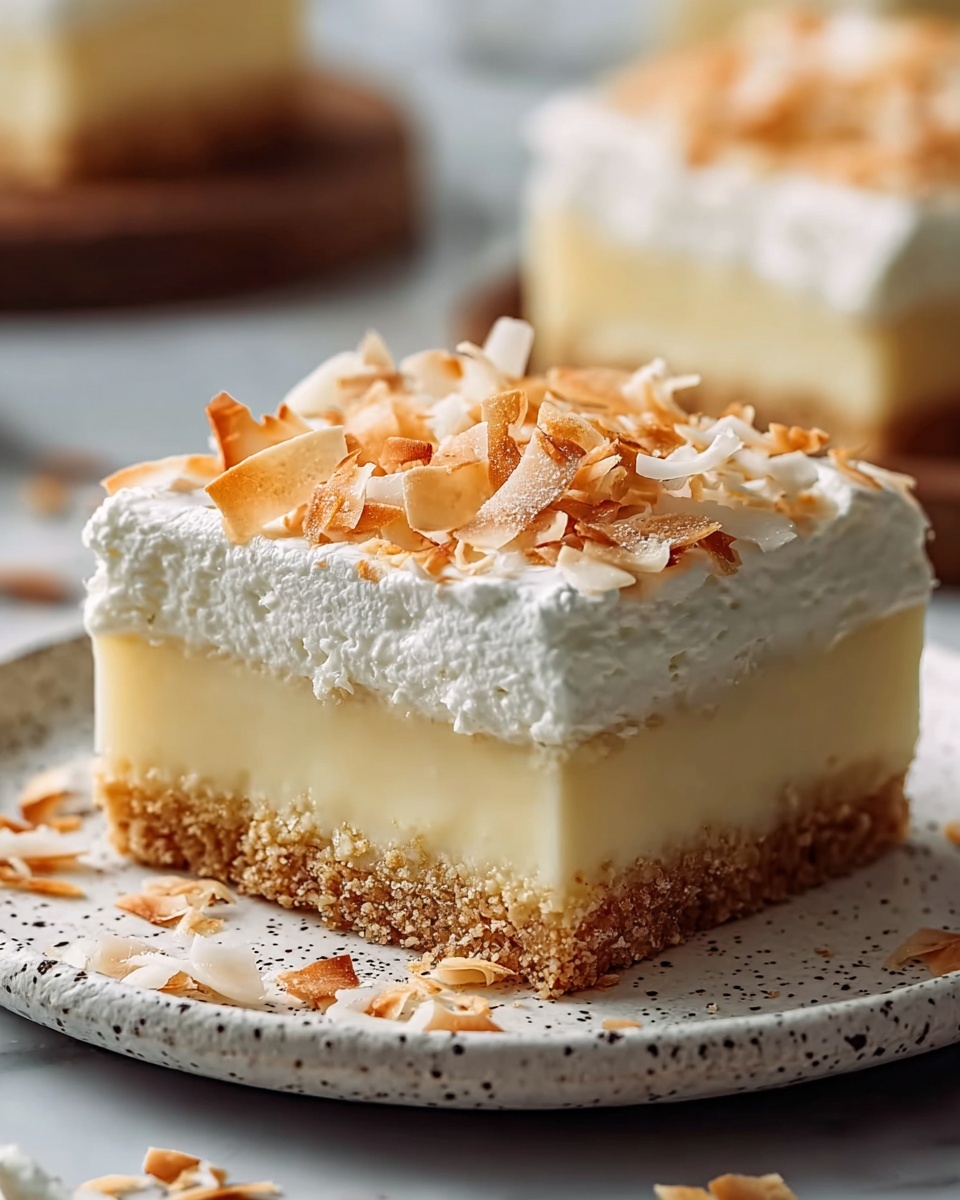
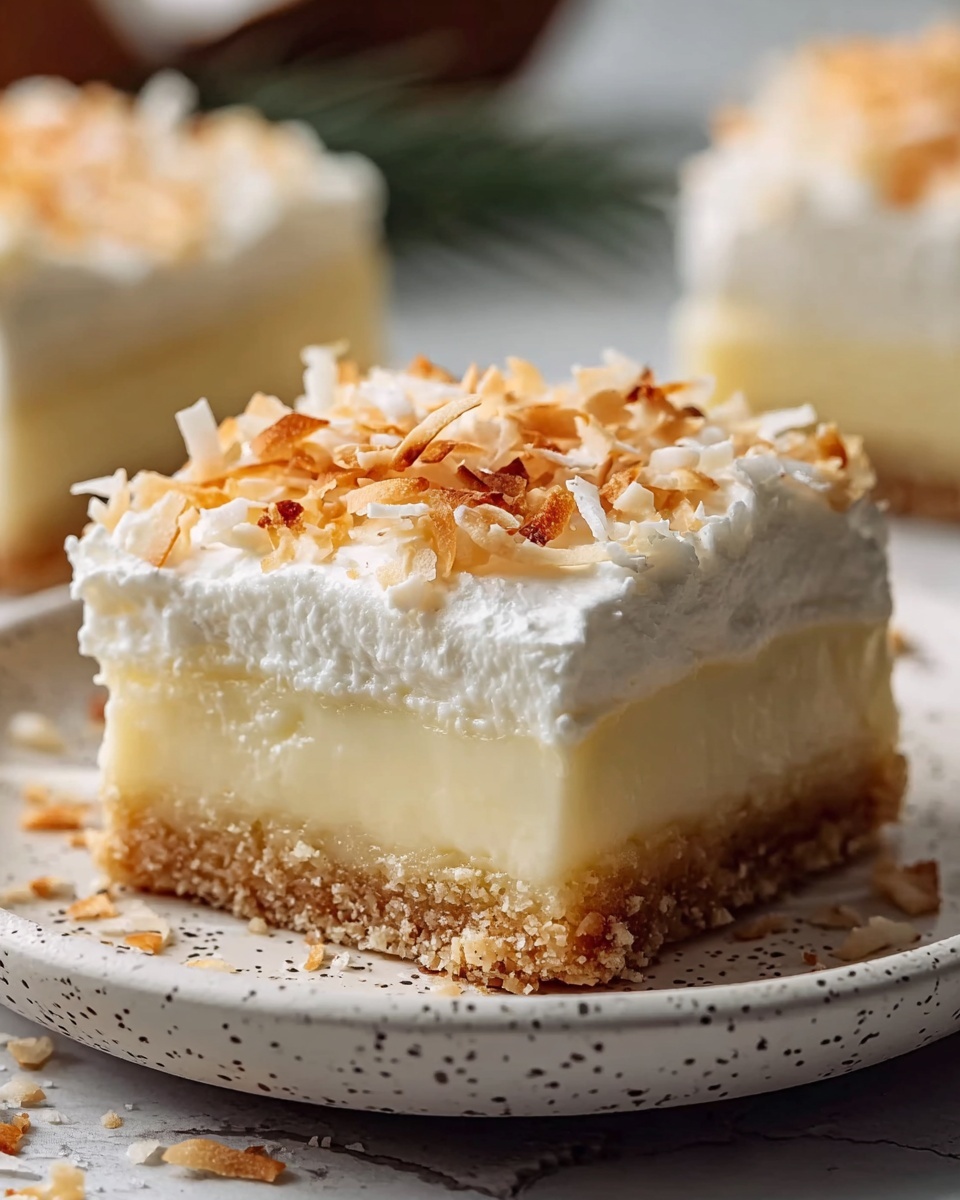
If you have a soft spot for tropical flavors and creamy desserts, then you are absolutely going to fall head over heels for this Island Dream Coconut Cream Bars Recipe. It effortlessly combines a buttery crust with a luscious coconut cream filling that’s rich yet light, topped with fluffy whipped cream and the perfect crunch of toasted coconut. This treat captures the essence of island bliss in every bite, making it an irresistible option for gatherings, special occasions, or simply a delightful way to brighten your day with some sunshine on a plate.
Ingredients You’ll Need
These ingredients are straightforward but incredibly important because each one brings a unique dimension to the Island Dream Coconut Cream Bars Recipe — from the buttery base to the smooth, tropical coconut cream filling and the delightful finish on top.
- All-purpose flour: The foundation for a sturdy yet tender crust that holds everything together perfectly.
- Unsalted butter: Adds richness and helps create a golden, flaky crust that’s simply irresistible.
- Granulated sugar: Sweetens both the crust and filling, balancing the natural coconut flavors beautifully.
- Sweetened shredded coconut: Brings that unmistakable chewy texture and coconut flavor that characterizes the filling.
- Coconut milk: Infuses a creamy, tropical essence through the filling, amplifying the coconut dreaminess.
- Large eggs: Provide structure and richness, ensuring the filling sets just right.
- Cornstarch: A key thickening agent that transforms the coconut milk mixture into a luscious cream.
- Vanilla extract: Adds warmth and depth, perfectly complementing the coconut notes.
- Whipped topping: Creates a light, airy layer on top, balancing the denser filling.
- Toasted coconut: Offers a nutty crunch and gorgeous visual contrast to finish the bars beautifully.
How to Make Island Dream Coconut Cream Bars Recipe
Step 1: Preheat and Prepare Your Pan
Begin by setting your oven to a warm 350°F (175°C). Grease a 9×9-inch baking pan and line it with parchment paper for easy removal later — this small step makes slicing and serving so much simpler.
Step 2: Whip Up the Perfect Crust
In a medium bowl, combine the flour, sugar, and softened butter. Use your fingers or a pastry cutter to blend everything until it forms a dough. Press this evenly into the bottom of your prepared pan. This crust is the buttery base that supports that luscious coconut filling and offers a delightful texture contrast.
Step 3: Bake the Crust to Golden Perfection
Pop the crust into your preheated oven and bake for about 10-12 minutes. You’ll know it’s ready when the edges turn a beautiful golden brown and a warm aroma fills your kitchen. Let it cool slightly before moving on — this ensures the filling sets up without mixing into a soggy base.
Step 4: Craft the Coconut Cream Filling
In a saucepan over medium heat, mix the coconut milk, shredded coconut, sugar, and cornstarch. Whisk constantly as it cooks to prevent lumps and to encourage thickening. After about 5-7 minutes, when the mixture has thickened beautifully, remove from heat and stir in the eggs and vanilla extract. This rich filling is the heart of the Island Dream Coconut Cream Bars Recipe, delivering creamy sweetness with every bite.
Step 5: Assemble and Bake the Whole Bar
Pour the creamy coconut filling evenly over your pre-baked crust and spread it smooth. Return the pan to the oven for another 15-20 minutes, until the filling is fully set and slightly firm to touch. This bakes the flavors together and creates that perfect creamy texture.
Step 6: Chill for Firmness
Allow the bars to cool to room temperature, then pop them into the fridge for at least two hours. Chilling helps the coconut cream set up nicely so your bars hold their shape when sliced and served.
Step 7: Add the Finishing Touches
Once chilled, generously spread whipped topping across the surface of the bars. Finally, sprinkle toasted coconut over the top to add a delightful crunch and a beautiful finish. This topping adds a fresh layer of texture and keeps the bars feeling light and dreamy.
Step 8: Slice, Serve, and Savor
Cut the bars into 12 to 16 squares depending on your preferred size, and get ready to be transported to a coconut paradise with each bite of these stunning Island Dream Coconut Cream Bars Recipe treats.
How to Serve Island Dream Coconut Cream Bars Recipe

Garnishes
A simple sprinkle of toasted coconut on top adds the perfect nutty crunch and visual appeal. For an extra tropical vibe, consider adding fresh pineapple chunks or a drizzle of passion fruit sauce for a zingy counterpoint.
Side Dishes
These bars shine on their own, but pairing them with a scoop of vanilla bean ice cream or a fresh berry salad brings delicious balance to the dessert plate. Light and refreshing side dishes complement the creamy richness beautifully.
Creative Ways to Present
For a festive touch, try stacking smaller bars on a pretty serving dish, layered with edible flowers for a tropical look. Alternatively, serve on individual plates with a dollop of whipped cream and a mini umbrella to bring that island dream vibe to your gathering.
Make Ahead and Storage
Storing Leftovers
Keep your Island Dream Coconut Cream Bars Recipe leftovers in an airtight container in the refrigerator. They stay fresh and creamy for up to 4 days, making them a perfect make-ahead dessert for busy weeknights or parties.
Freezing
If you want to enjoy these luscious bars later, freeze them uncovered on a tray until firm, then wrap tightly in plastic wrap and foil. They can be frozen for up to a month. Thaw overnight in the fridge before serving to maintain their creamy texture.
Reheating
These bars are best enjoyed chilled, but if you prefer a softer texture, let them sit at room temperature for 15-20 minutes before digging in. Avoid microwave reheating to keep the whipped topping intact and texture perfect.
FAQs
Can I make the crust gluten-free for the Island Dream Coconut Cream Bars Recipe?
Absolutely! Substitute the all-purpose flour with a gluten-free flour blend that’s suitable for baking. The texture might be slightly different, but the flavor will still be delightful.
Is there a dairy-free option for the butter and whipped topping?
Yes, you can use plant-based butter alternatives and coconut whipped cream to keep the bars dairy-free while maintaining a rich and creamy taste consistent with the island vibe.
Can I use freshly shredded coconut instead of sweetened shredded coconut?
Fresh shredded coconut works wonderfully for more intense coconut flavor and texture, but you might want to adjust the sugar amount slightly since fresh coconut isn’t sweetened.
How long do the bars need to chill before serving?
Chilling for at least two hours is essential to let the filling set fully. For best results, overnight refrigeration is even better and helps the flavors meld beautifully.
Can I prepare these bars a day ahead for a party?
Definitely! These bars actually taste better the next day after the flavors settle. Just keep them refrigerated and add the whipped topping and toasted coconut just before serving for the freshest presentation.
Final Thoughts
I genuinely hope you give this Island Dream Coconut Cream Bars Recipe a try because it’s not just a dessert — it’s a mini tropical vacation for your taste buds. The combination of buttery crust, creamy coconut filling, and that light whipped topping creates a harmony of textures and flavors that’s impossible to resist. When you make these bars, you’re sharing a little slice of island joy that’s perfect for any occasion or just a treat to brighten your day.
Print
Island Dream Coconut Cream Bars Recipe
- Prep Time: 15 minutes
- Cook Time: 30 minutes
- Total Time: 50 minutes plus 2 hours chilling
- Yield: 12 servings
- Category: Dessert
- Method: Baking
- Cuisine: American
Description
Island Dream Coconut Cream Bars are a luscious tropical treat featuring a buttery crust topped with a creamy, sweet coconut filling. Finished with a layer of fluffy whipped topping and toasted coconut garnish, these bars are perfect for dessert lovers craving a taste of the islands.
Ingredients
For the Crust:
- 1 ½ cups all-purpose flour
- ½ cup unsalted butter, softened
- ¼ cup granulated sugar
For the Coconut Cream Filling:
- 1 cup sweetened shredded coconut
- 1 cup coconut milk
- 2 large eggs
- ½ cup granulated sugar
- 2 tablespoons cornstarch
- 1 teaspoon vanilla extract
For the Topping:
- 1 cup whipped topping (store-bought or homemade)
- ½ cup toasted coconut (for garnish)
Instructions
- Preheat the Oven: Preheat your oven to 350°F (175°C). Grease and line a 9×9-inch baking pan with parchment paper or spray with non-stick cooking spray.
- Prepare the Crust: In a medium bowl, mix the flour, sugar, and softened butter until the mixture forms a dough. Press the dough evenly into the prepared pan, covering the bottom completely.
- Bake the Crust: Bake the crust in the preheated oven for 10-12 minutes, or until golden brown. Remove from the oven and set aside to cool slightly.
- Make the Coconut Cream Filling: In a medium saucepan, combine coconut milk, sweetened shredded coconut, sugar, and cornstarch. Cook over medium heat, whisking constantly, until the mixture thickens, about 5-7 minutes. Remove from heat and stir in the eggs and vanilla extract thoroughly.
- Assemble the Bars: Pour the coconut filling over the baked crust and spread evenly. Bake for an additional 15-20 minutes, or until the filling is set. Remove from the oven and let cool to room temperature.
- Chill: Once cooled, refrigerate the bars for at least 2 hours to allow the coconut cream to firm up properly.
- Top with Whipped Topping and Toasted Coconut: After chilling, spread the whipped topping evenly over the coconut filling. Sprinkle toasted coconut on top as a garnish.
- Serve and Enjoy: Cut the bars into 12-16 squares and serve chilled for a tropical dessert experience.
Notes
- Ensure the crust is fully cooled before pouring in the coconut filling to prevent it from mixing.
- Whisk the filling constantly while cooking to avoid lumps and ensure even thickening.
- Use full-fat coconut milk for the creamiest texture.
- The bars taste best when chilled overnight but can be enjoyed after a minimum of 2 hours.
- For a homemade whipped topping, whip heavy cream with a bit of sugar and vanilla until soft peaks form.


